Note: Before you embark on your blind project, take a look at the latest rules and regulations on blind safety. Visit makeitsafe.org.uk for up-to-date information
You will need
- Two different fabrics
- Two wooden battens (width of your finished blind)
- Screw eyes
- Hooks
- Cord
- Cleat
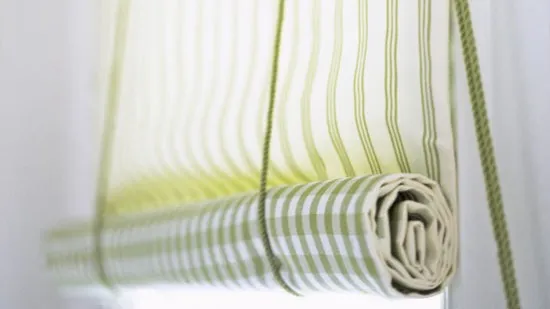
Pictured: Sail Narrow Stripe fabric (J128F-02), £32 per m; Sail Check fabric (J184F-06), £36 per m; both Jane Churchill. Green cord, £1.45 per m, John Lewis.
What to do:

1. Measure your window. Cut a piece of each fabric to the right size, adding 3cm to the width and 10cm to the length.
Article continues below2. Place the right sides of the fabrics together and machine-stitch down
the sides 1.5cm in from the edge. Turn the right way round and press.
3. Decide which fabric will be the front of the blind, then stitch hems of 1.5cm and then 3cm onto the back of the blind at the top and bottom to form casings for the battens. Insert battens.
Insert the screw eyes

1. Insert two screw eyes into the top edge of the top batten, (through the fabric) plus two directly below on the front of the blind.
2. Insert another screw eye into the base of the top batten, 5cm from the edge of the blind.
Attach the cord

1. Cut two lengths of cord. One should be three times, and the other three-and-a-half times, the length of the blind.
2. Tie one end of each piece of cord to a screw eye at the top of the blind - the longer piece should be tied to the screw eye furthest from the extra eyelet.
Thread the cord
1. Lay the cords down the back of the blind then up the front, threading them through the screw eyes at the base of the top batten, then across into the extra screw eye.
Hang the blind
1. Knot the lengths of cord together at the ends and pull while rolling up the blind.
2. Use hooks to hang the blind from the window frame and screw the cleat to the wall to hold the cord when the blind is raised.
For more decorating inspiration, craft ideas and cleaning hacks don't miss our dedicated DIY guide.