Homeowner gives dull bathroom a stunning monochrome transformation for under £250
Never underestimate the power of paint!
Taking her bathroom from bleak to sleek was a breeze for one homeowner, who carried out the transformation for under £250. Painting the walls, bath and tiles, laying new flooring and adding decorative touches has turned what was a dingy room into a fresh and stylish wash space, with a smart monochrome look.
After carrying out work on the rest of her home, Sacha from Stamford, Lincolnshire, was determined to put some budget small bathroom ideas into place. 'In terms of affordable DIY projects, the bathroom has to be my favourite,' she admits. 'This is the room I put most of my own time into, and something I completed totally by myself on a super minimal budget. The transformation in this room was pretty huge.'
£250 monochrome bathroom makeover
Sacha documented the makeover on her Instagram account, @reno.at.81. The transformation is pretty extensive, let's take a look and see what the bathroom was like pre-makeover…
Before
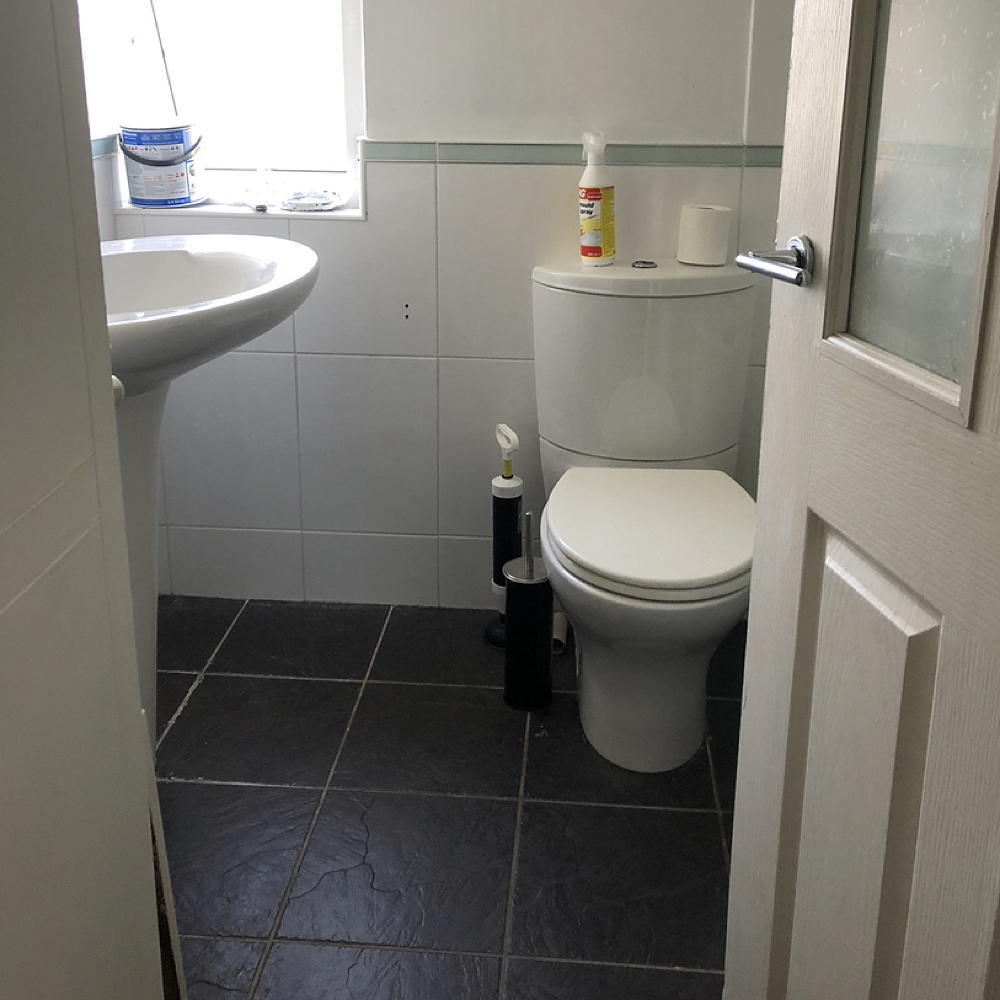
Large black tiles on the floor and a similar white design on the wall may sound good in theory, but there was nothing particularly stylish about the bathroom ideas already in place. 'It was a really dull space that felt small and always looked grubby, no matter how much I cleaned it,' says Sacha. 'I wanted to create a brighter, cleaner and more inviting room.'
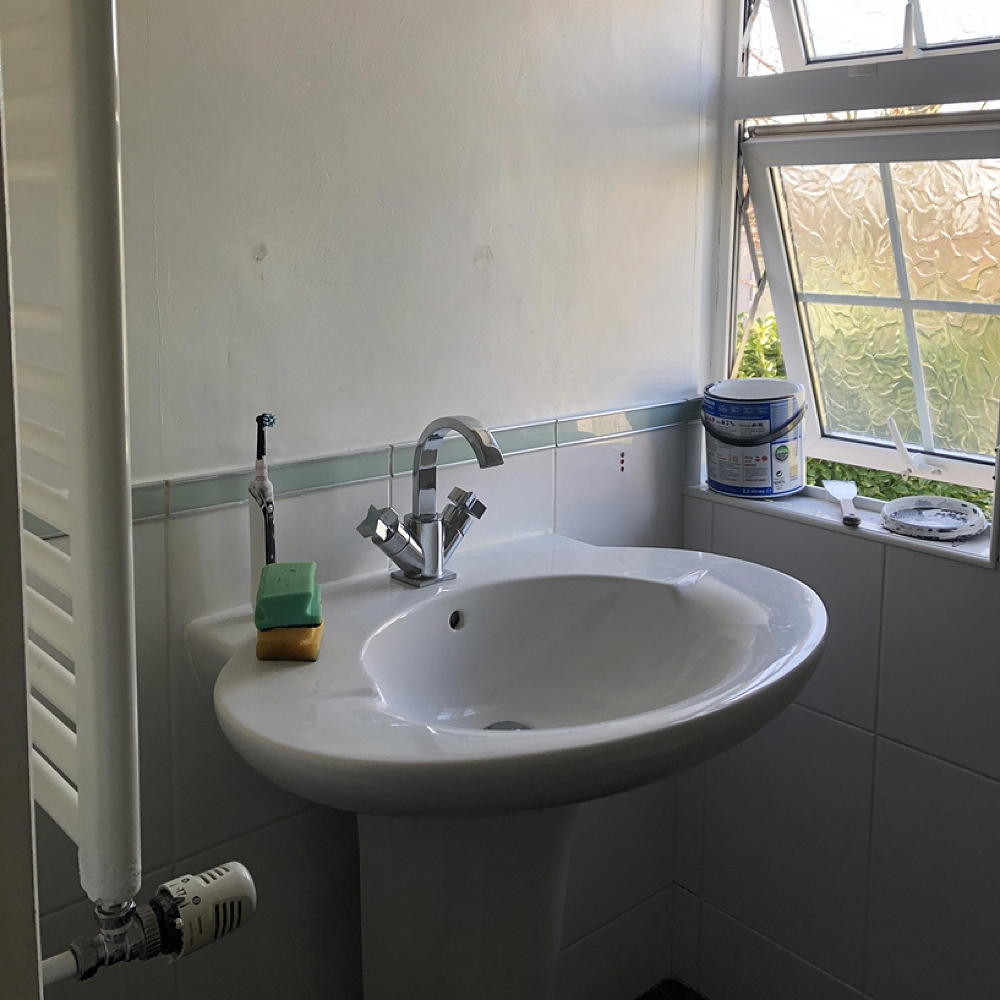
The basin area was no different, looking plain and unattractive – it was definitely time for an overhaul. 'A lot of the house was done on a budget – other than our kitchen – as most of our money had gone into the house deposit and solicitor's fees, etc,' Sacha told online flooring retailer Leader Floors.
'I also feel like if there is a way of doing something cheaper yourself, then it makes no sense to pay someone else and spend more than you need to get it done – unless it's something that really requires a professional, of course.'
After
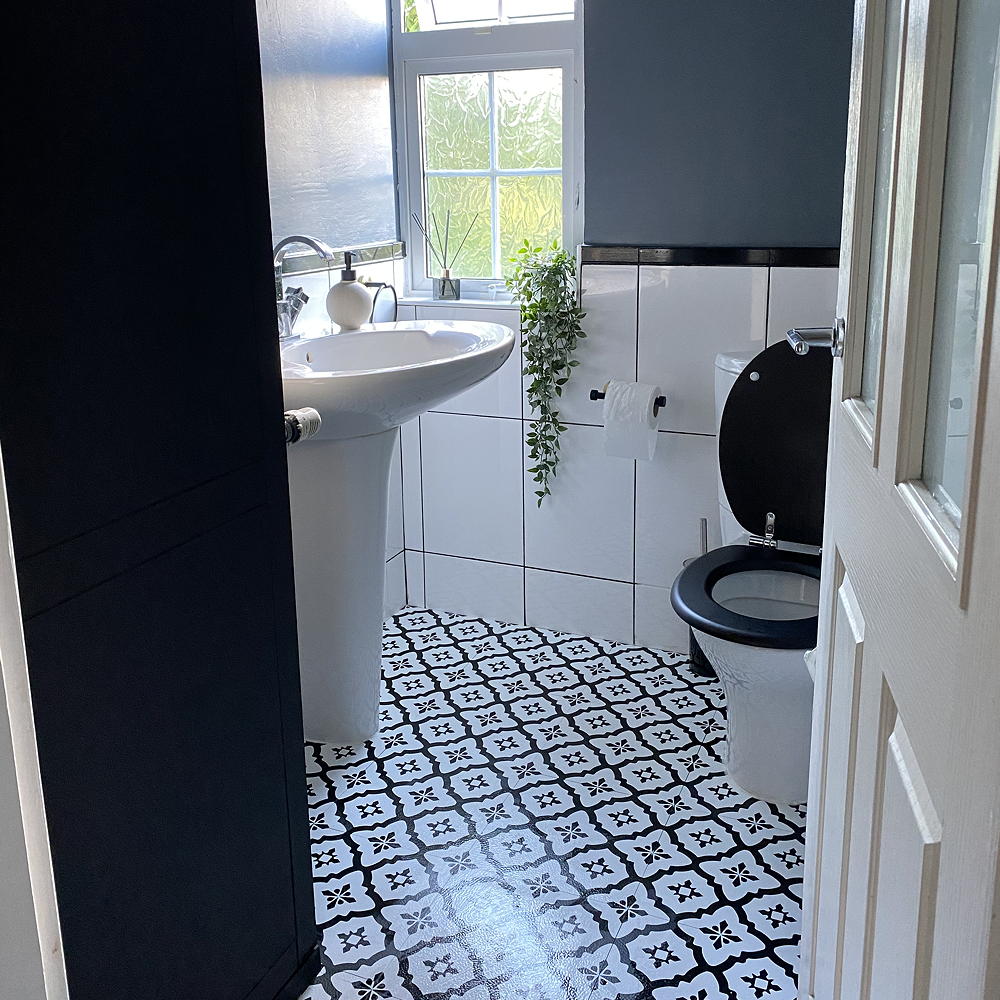
The new-look bathroom is smarter and fresher looking, with a new black toilet seat, painted walls and patterned tiles on the floor. 'I started by painting the ceiling, walls and storage cupboards before going on to lay the flooring,' Sacha recalls. 'That way, any paint spillages wouldn't really matter too much, as the floor would be covered.'
Get the Ideal Home Newsletter
Sign up to our newsletter for style and decor inspiration, house makeovers, project advice and more.
'I then moved on to washing all of the tiles and grout with sugar soap,' she continues. 'Before I started painting the wall tiles, I lightly sanded them to give the paint something to stick to and then taped around the edges to avoid getting paint anywhere I didn’t want it to go. Once they were painted, I went over all of the grout with a black grout pen.'
Next, it was time to move onto the bath. 'I removed the bath panel, which over the years had gone a nasty yellow colour, took it out to the garden and gave it a couple of coats of white spray paint,' says Sacha. 'It brought it back to its former colour.'
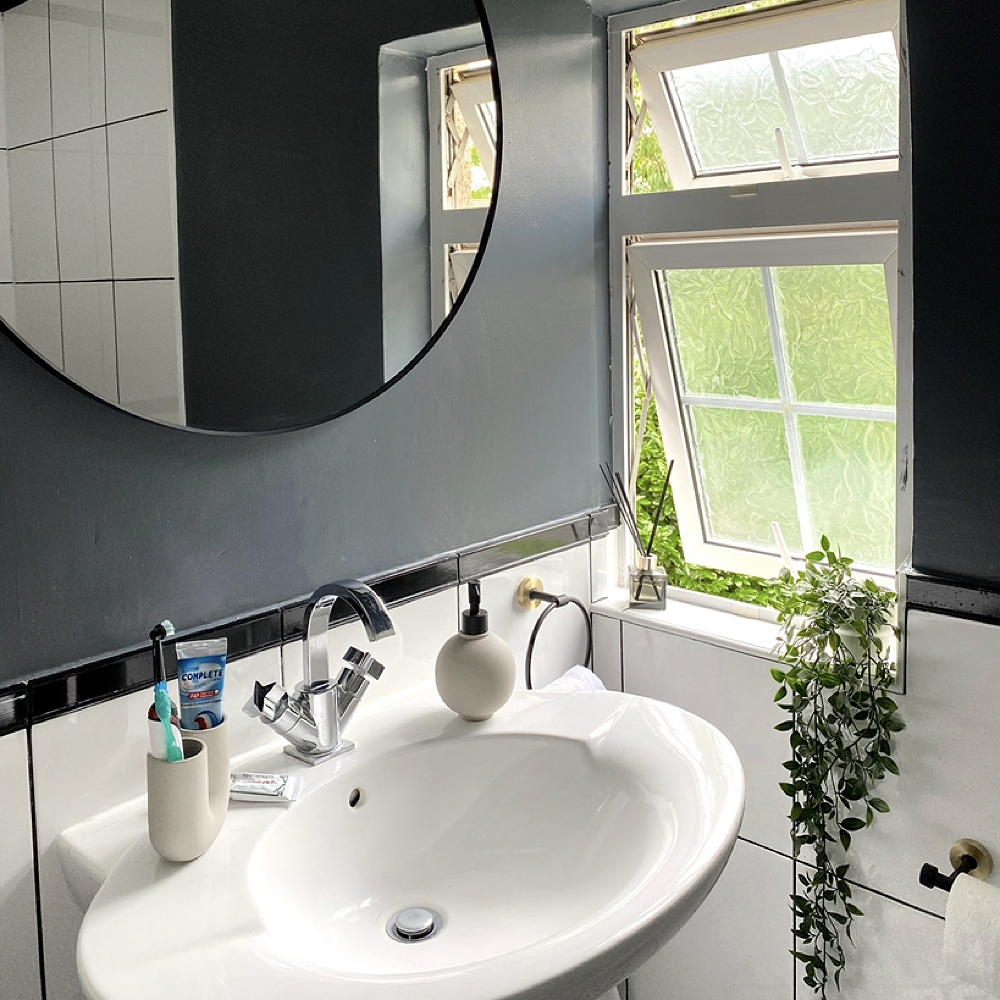
A dark paint colour on the upper half of the walls makes a striking contrast against the clean white below while trailing plants and other accessories help soften the look.
'I wouldn’t say I have one particular interior style,' says Sacha, 'it's more of a mash-up of a few different ones. My home is a mixture of Scandi, minimalistic, modern and eclectic looks and I tend to just go with what I like as opposed to trying to follow one particular style or trend.'
When moving onto the floor, Sacha decided to use peel-and-stick vinyl tiles, which cost just £56 in total. 'Before I could begin I cleaned the floor really well to make sure there was no dirt on it, as this would affect how well the peel-and-stick tiles adhered to it,' she explains.
'I then laid the tiles out on the floor without sticking them down, to get an idea of where I wanted each one to go. The ideas was to do as little amount of cuts as possible, so laying them out helped me work out a formation.'
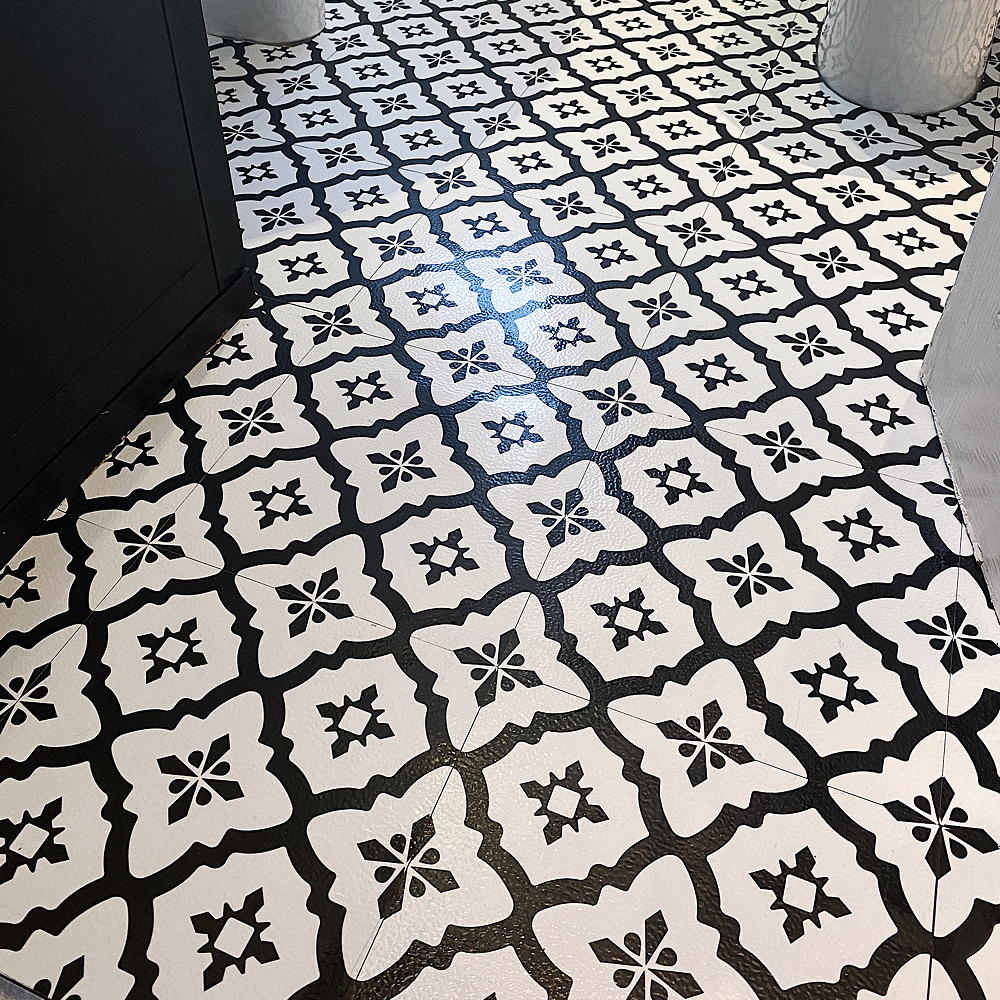
Starting with the tricky cuts first, such as the ones around the toilet and sink bases, Sacha found laying them pretty easy, despite the whole process taking five hours. 'When everything was stuck down, I sealed around the base of the toilet and sink, then it was just a case of adding decorative bits, such as new doorknobs, and hanging the mirror, which helped open up the space,' she says.
Asked what her biggest tip would be for decorating on a budget and Sacha recommends getting samples for anything you're planning on using. 'Whether it's paint colours, fabric choices or tiles, getting samples is important as things can look different on a computer screen, as well in different areas of your home depending on the light,' she advises.

Laurie Davidson is a professional stylist, writer and content creator, who lives and breathes interiors. Having worked for some of the UK’s leading interior magazines, styled homes up and down the country and produced sets for TV shows, adverts and top brands, it’s safe to say Laurie has had a pretty exciting career. Find her on Instagram at @lifeofaninteriorstylist or over at lauriedavidson.co.uk
-
 Will a conservatory add value to your home and how can you maximise it?
This is what the pros say
By Amy Reeves
-
 I’ve been looking for a new signature scent for my home and The White Company's new fragrance is the exact summer holiday smell I needed
Santorini smells fresh, summery and sophisticated
By Kezia Reynolds
-
 How to remove algae from garden walls in five steps – and the cleaning product experts rave about for tackling it fast
Experts share their top tips for getting garden walls algae-free
By Katie Sims