Make your own scandi-inspired felt Christmas trees – in four easy steps
Follow our easy step-by-step guide to craft your own adorable trees
These adorable mini felt Christmas trees are the perfect size to decorate mantelpieces, sideboards and dining tables – to add a hint of festive cheer without overwhelming.
More craft ideas: How to make a Christmas wreath – six steps to a festive floral masterpiece
Create a felt forest as a stylish Scandi-inspired table centrepiece, to seT the scene for festive feasting in style. Or align a few of these homemade creations, in assorted sizes, along the fireplace to add an artisanal decorative touch.
Make your own felt Christmas trees
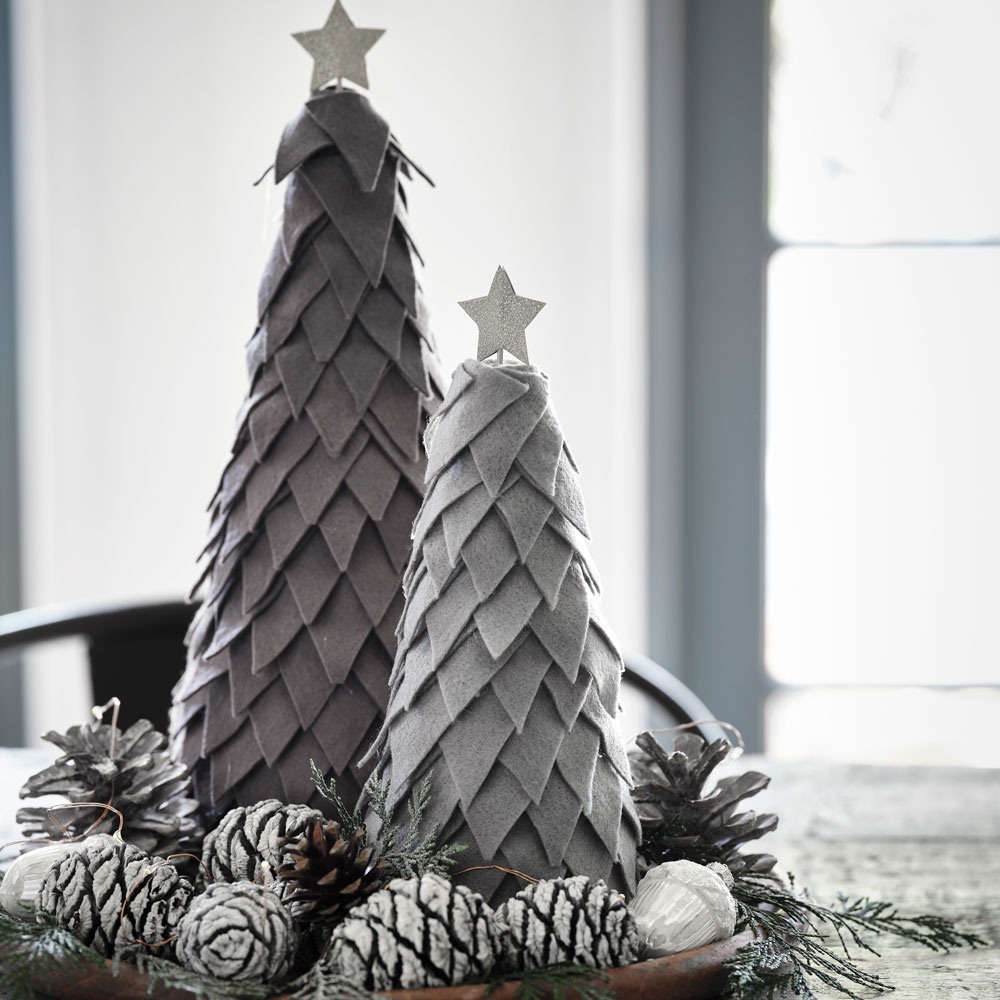
Ideal Home have chosen on-trend grey to make the mini felt trees, but the possibilities are endless – with all the colours of the rainbow available in crafting felt. Choose felt squares in a colour that ties in with your chosen Christmas decorating scheme. Or add an accent colour, so the handmade trees stand out from the rest. You could even use three shades of the same colour and swap a third and two thirds up for an ombre effect. Let your imagination run wild.
What you will need to make mini felt trees
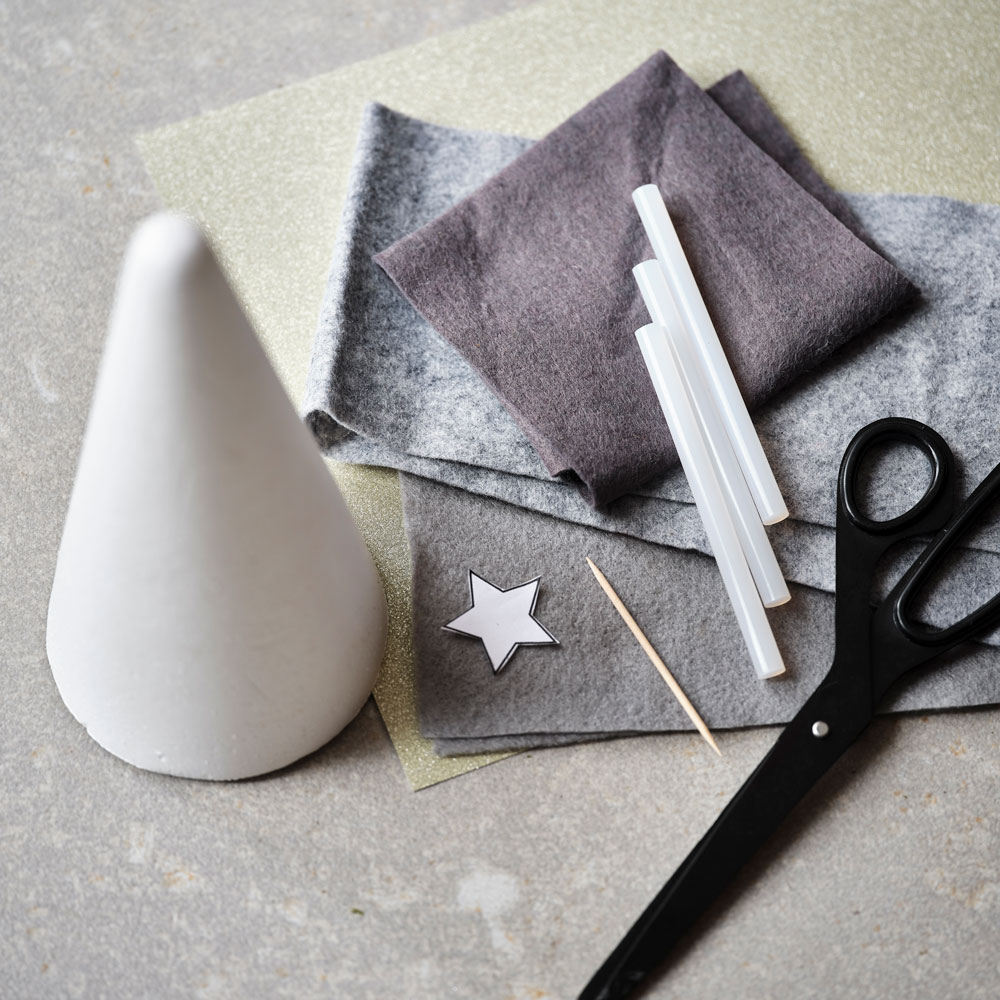
- Wool felt sheets – width dependant on the size of tree
- Polystyrene cone
- glue gun
- Scissors
- Gold card
- Toothpick
Step 1: Wrap and secure the first layer onto the base
Using a polystyrene cone as the base, wrap a 2cm strip of felt around the base of each cone. Secure using a hot-glue gun.

Step 2: Cut and layer felt triangles
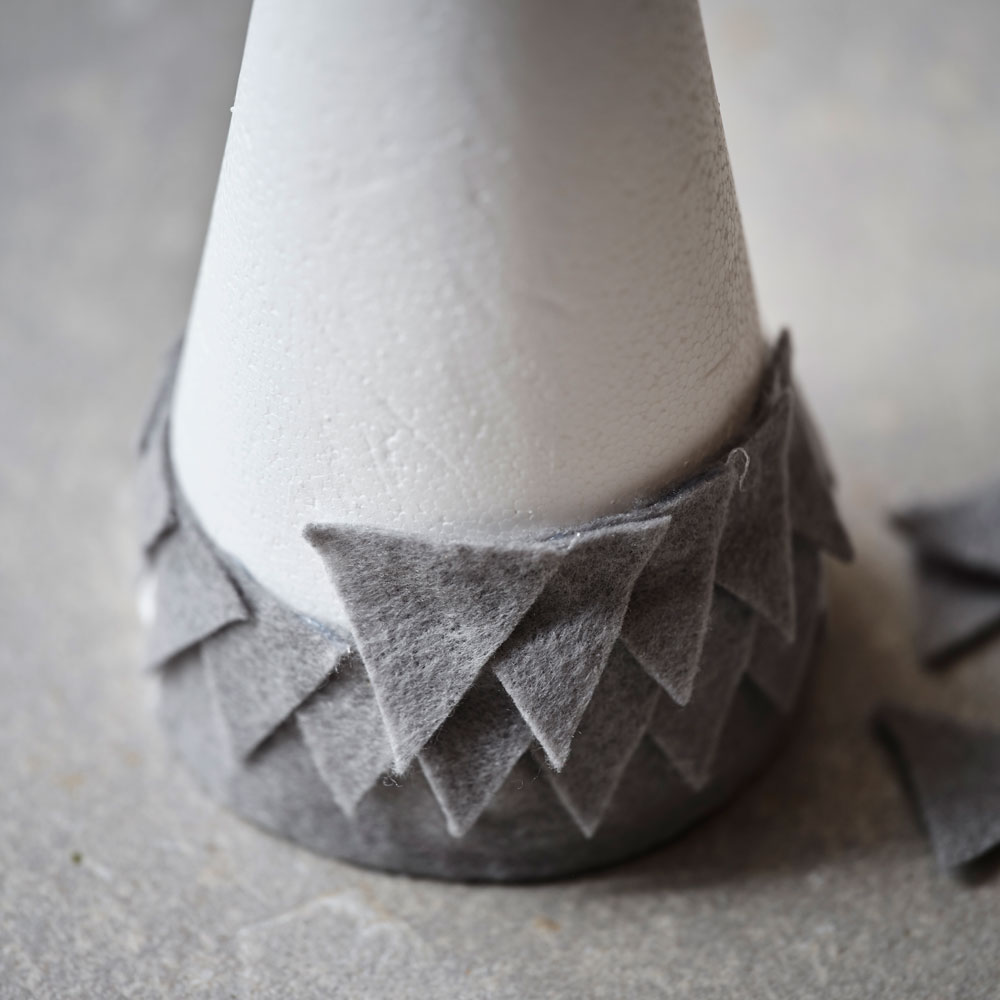
Cut and glue felt triangles, point down facing down, around the circumference of the cone – starting from the bottom. Overlapping them so that the right-hand corner sits halfway across the centre of the next triangle. Continue in rows around the cone, working all the way up to the top.
Step 3: Cover the top with a neat circle

To finish the top of the tree, cut a circle of felt around 3cm in diameter. Cut a slit to the centre then wrap around the top of the cone securing in place with a hot-glue gun. Finish with a final row of triangles.
Step 4: Pop a gold star on top
Dress with the finesse as you would a real tree, by adding a gold star. Cut a star shape out of the gold card and glue to a toothpick, to poke inside the top of the tree.
Related: The budget DIY wreath trending for Christmas 2020 – here's how to make your own
And in those four simple steps you have a mini felt Christmas tree, to decorate any room ready for the festivities.
Get the Ideal Home Newsletter
Sign up to our newsletter for style and decor inspiration, house makeovers, project advice and more.
Tamara was Ideal Home's Digital Editor before joining the Woman & Home team in 2022. She has spent the last 15 years working with the style teams at Country Homes & Interiors and Ideal Home, both now at Future PLC. It’s with these award wining interiors teams that she's honed her skills and passion for shopping, styling and writing. Tamara is always ahead of the curve when it comes to interiors trends – and is great at seeking out designer dupes on the high street.
-
 Wood drenching is the calming new twist on the colour drenching trend – here’s how to make the look work in your home
It’s easier than ever to embrace natural materials
By Maddie Balcombe
-
 Aldi is launching a £200 day bed with four different features - its sleek design is suited to the whole family
You don't want to miss out on this Specialbuy
By Kezia Reynolds
-
 How to set up a drip watering system that saves water and a lot of effort
Keep your plants hydrated (and your water bill down) with this clever garden watering solution
By Natalie Osborn