How to make fabric bathroom storage boxes – for toiletries, make-up and hair accessories
Follow these simple instructions to make colourful stitched containers

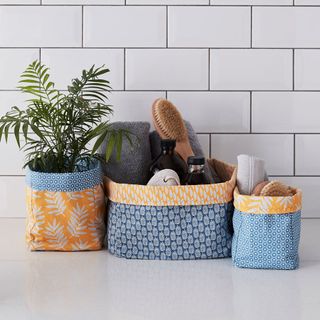
Fabric storage boxes are a quick and easy make for stashing all kinds of household items, from bathroom essentials to make-up and hair accessories. They also make pretty nifty planters – just ensure your plant pot is watertight at the bottom!
Discover more amazing makes in our DIY & Decorating channel
These fun fabric boxes are also a thrifty project for using up odd fat quarters and look best when using contrasting fabrics for the inner and outer sections. Follow this easy step-by-step tutorial to make yours in three sizes.
How to make fabric bathroom storage boxes
What you'll need
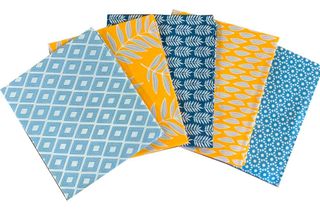
- Sewing machine
- Fabric scissors
- Pins
- Tape measure
- Fabric fat quarters
- Sewing thread
- Iron-on interfacing
- Mustard Teal Fern Geo cotton fat quarters 5 pack, £7, Hobbycraft
1. Cut out your fabrics
Using the below measurements, cut out your chosen fabrics to size.
Large:
- 4 x Outer 27cm (width) x 21cm (height) rectangles
- 1 x Outer 27cm x 27cm square
- 4 x Inner 27cm (width) x 21cm (height) rectangles
- 1 x Inner 27cm x 27cm square
Medium:
- 4 x Outer 16cm (width) x 22cm (height) rectangles
- 1 x Outer 16cm x 16cm square
- 4 x Inner 16cm (width) x 22cm (height) rectangles
- 1 x Inner 16cm x 16cm square
Small:
- 4 x Outer 13.5cm (width) x 19cm (height) rectangles
- 1 x Outer 13.5cm x 13.5cm square
- 4 x Inner 13.5cm (width) x 19cm (height) rectangles
- 1 x Inner 13.5cm x 13.5cm square
Once you’ve cut out your pieces, press them flat using a warm iron.
2. Add the interfacing
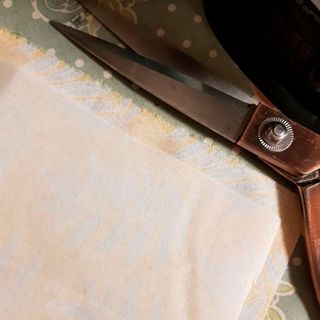
Cut interfacing 1cm smaller than each fabric piece all round (this keeps the seam allowances free). Following the packet instructions, iron the interfacing to the centre of each piece. You will need to do this for the outer layer of the larger box to provide extra stability, but the smaller boxes don’t need this.
Buy now: Hemline iron-on interfacing, £3.25, Hobbycraft
3. Sew the inner sides together
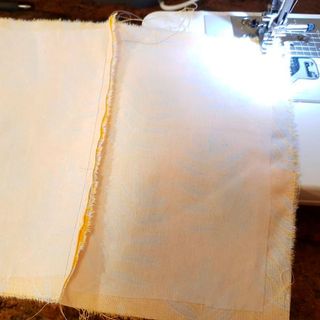
Using a 1cm seam allowance, sew two inner sides together lengthways and right sides (the pattern sides) facing. Add the next rectangle until all four rectangles are sewn in a row. Fold the open sides together and sew right sides together to create a cube.
Buy now: Hemline sewing thread 12 pack, £3, Hobbycraft
4. Attach the bottom
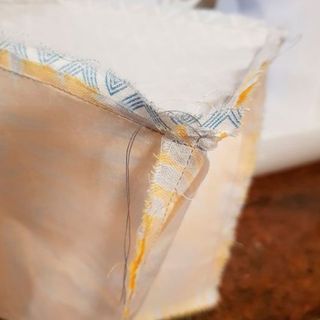
Using a 1cm seam allowance, sew the bottom square piece to the sides, right sides together, to form a cube.
5. Make the outer box
Repeat steps 3-4 using the outer fabric pieces to create the outer box. Turn the right way out and insert the inner layer inside.
6. Sew up the top
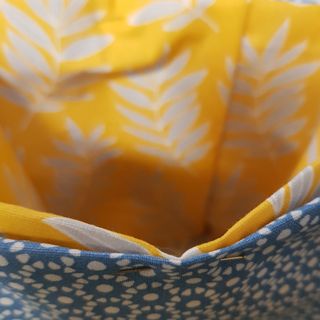
Fold the top edges of both the inner and outer layers inwards by 1cm and pin to secure. Sew around the top edge to close. Fold the top over to reveal the contrasting inner.
Buy now: Dressmaking pins 60 pack, £1.10, Hobbycraft
7. Place in position
Related: How to make a wall garden with succulent plants in picture frames
Your storage boxes are now finished!
Get the Ideal Home Newsletter
Sign up to our newsletter for style and decor inspiration, house makeovers, project advice and more.

Steph Durrant is the Deputy Editor of Ideal Home’s sister magazine, Style at Home. Steph is an experienced journalist with more than 12 years under her belt working across the UK’s leading craft and interiors magazines. She first joined the team back in 2016 writing for both homes brands, specialising in all things craft, upcycling and DIY.
-
 6 things that feel illegal to declutter — and how professional organisers reuse them around the home instead
Experts reveal what to do with those 'just in case' items
By Lauren Bradbury
-
 The 5 best plants for a Japanese garden – key trees and flowers to help nail the style
We checked in with garden experts to curate a checklist
By Sophie King
-
 The Grecian bookshelf trend adds a luxury look to your reading corner, and it’s super easy to get the look at home
It couldn't be easier to get the look, too
By Kezia Reynolds