How to make home office organisation with fabric – no-sew solutions for a pretty study
Get your working from home space in order using beautiful Joules fabric prints

Prettify your working-from-home space by learning how to make home office organisation with fabric by Joules.
Many of us have created make-shift work spaces in areas of our homes. Maybe it's a sneaky corner of the kitchen or you've transformed your bedroom into a part-time boardroom.
Find more projects to keep you busy on our DIY and Decorating channel
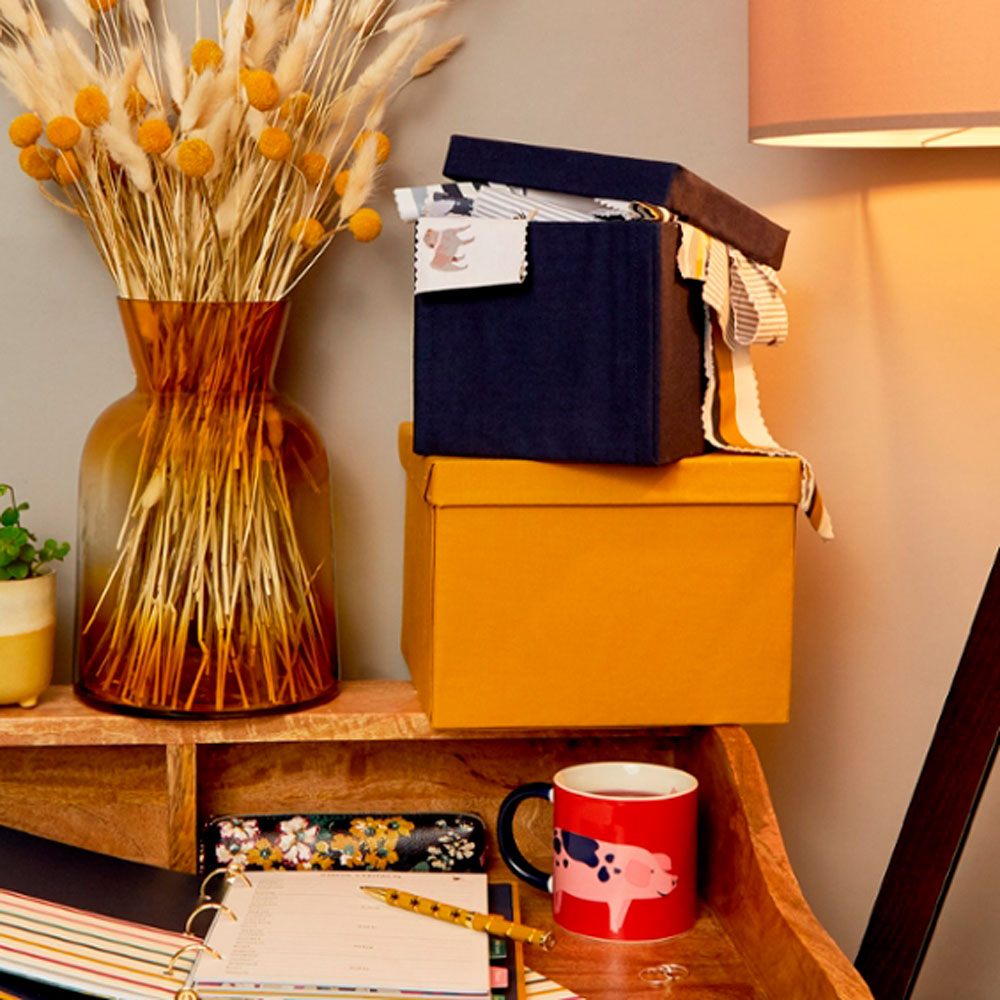
Keep your documents, stationery and mind (!) organised with handy fabric-covered storage boxes. Notice boards are ideal for pinning memos and photos, while hanging storage is great for tucking away other essentials. Here's how to make them...
How to make home office organisation with fabrics by Joules
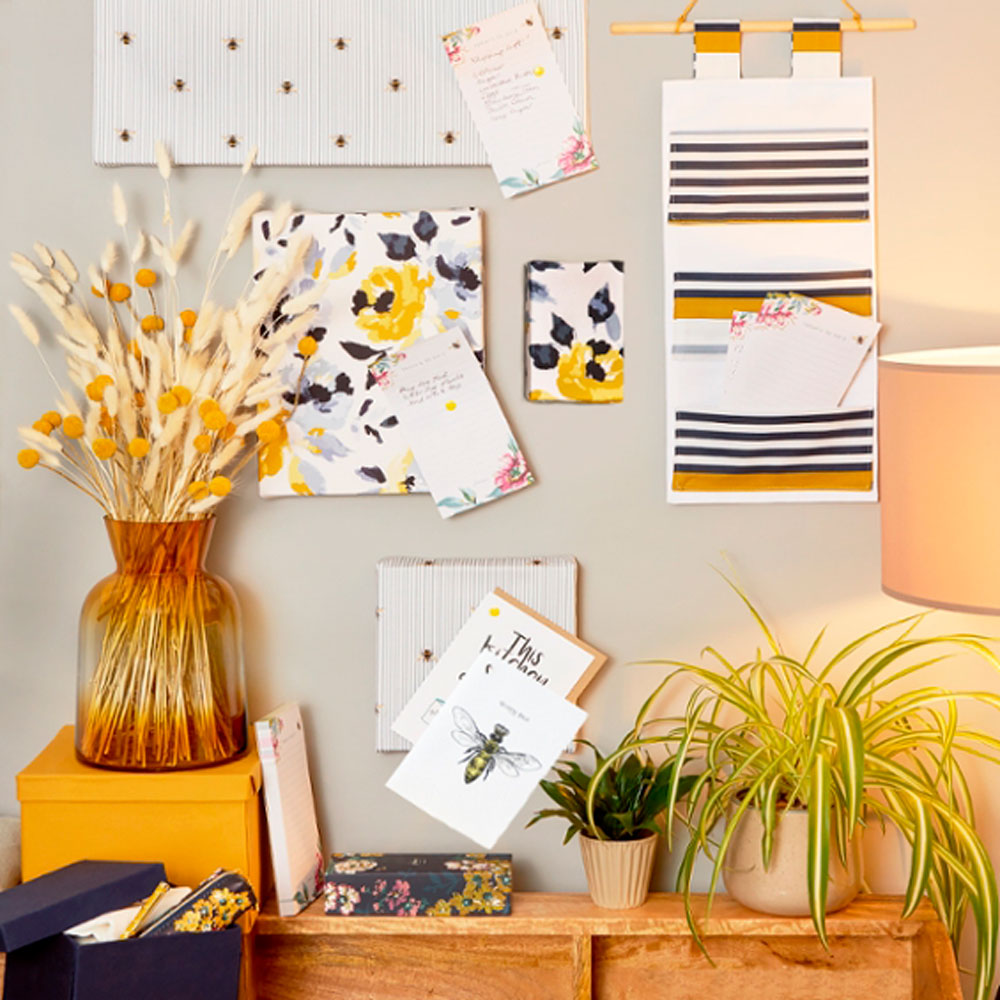
Hobbycraft has devised these fun and creative projects using its new and exclusive range of Joules fabrics. Inspired by the lifestyle brand's heritage style, think elegant florals, classic stripes and British wildlife prints.
The collection of Joules fabrics is available online and in-store as fat quarters, cotton fabric rolls and by the metre.
How to make fabric noticeboards
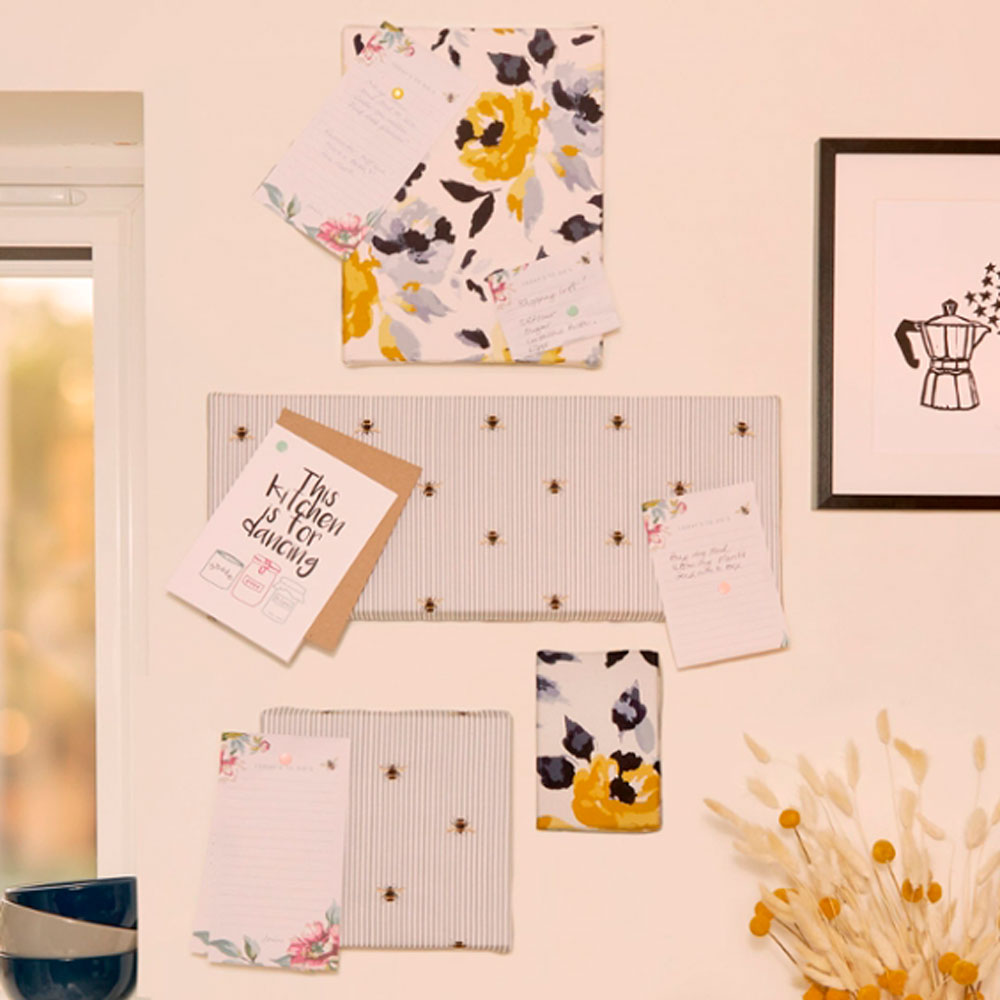
You will need
- White stretched canvas 20.3cm x 25.4cm
- Fat quarter of fabric
- Staple gun
- Push pins
1. Position the fabric on the canvas
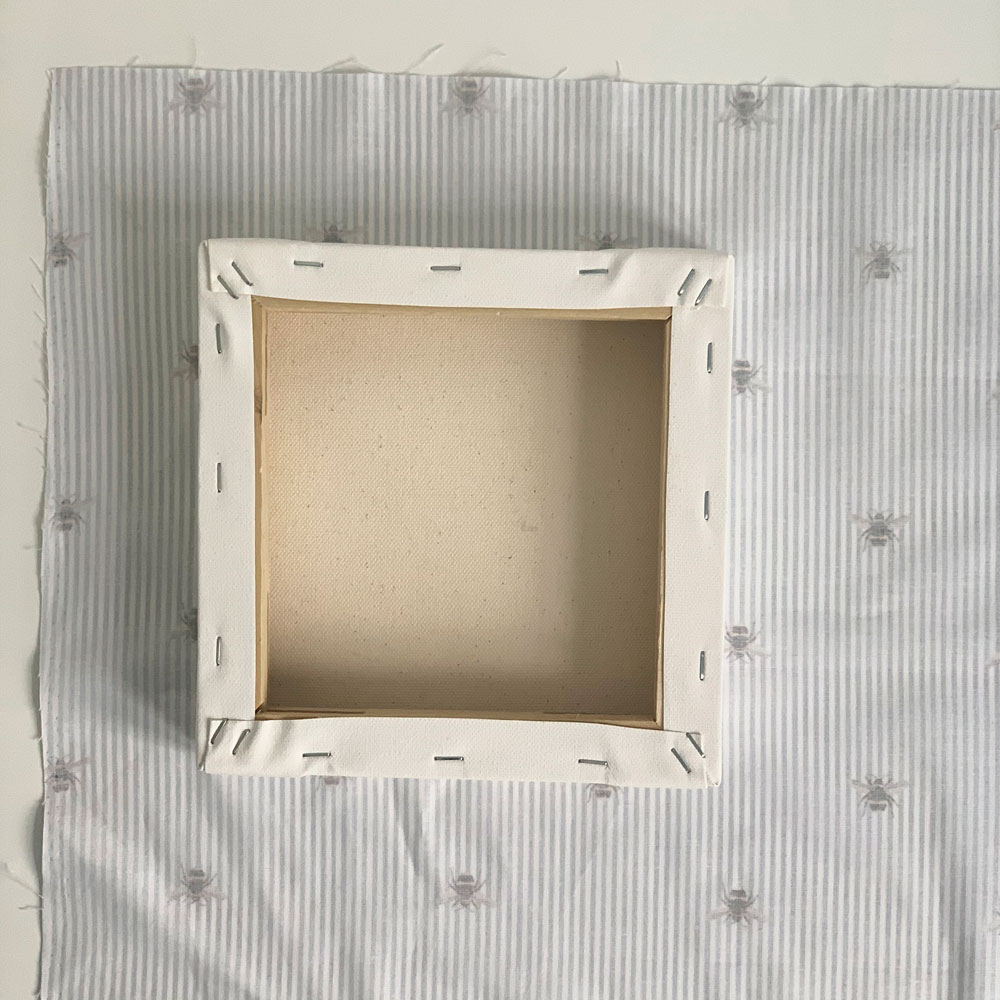
Lay a piece of fabric right (patterned) side down on a flat surface. Place a stretched canvas upside down on top of the fabric. Make sure there is at least 10cm excess around all edges.
Buy now: Joules Ocean Bloom cotton fat quarters 4 pack, £7, Hobbycraft
Buy now: White stretched canvas, £2.06, Hobbycraft
2. Begin folding the fabric
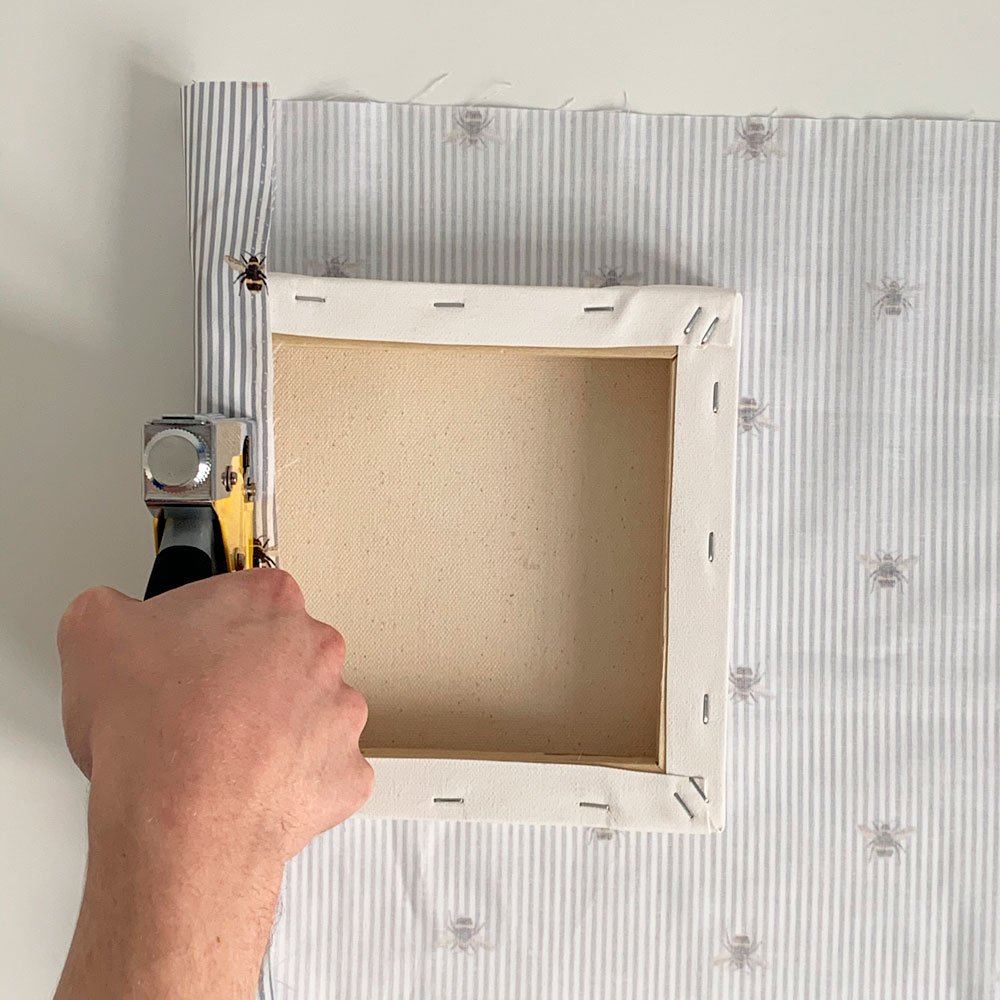
Fold the fabric over one side of the canvas so it's smooth and taut. Staple gun to secure in place. Be careful not to staple over any staples already in the canvas.
Buy now: Black staple gun, £8, Hobbycraft
3. Staple the fabric in place
Add additional staples to secure the first side. Aim for one staple every 5-10cm.
4. Secure the other side
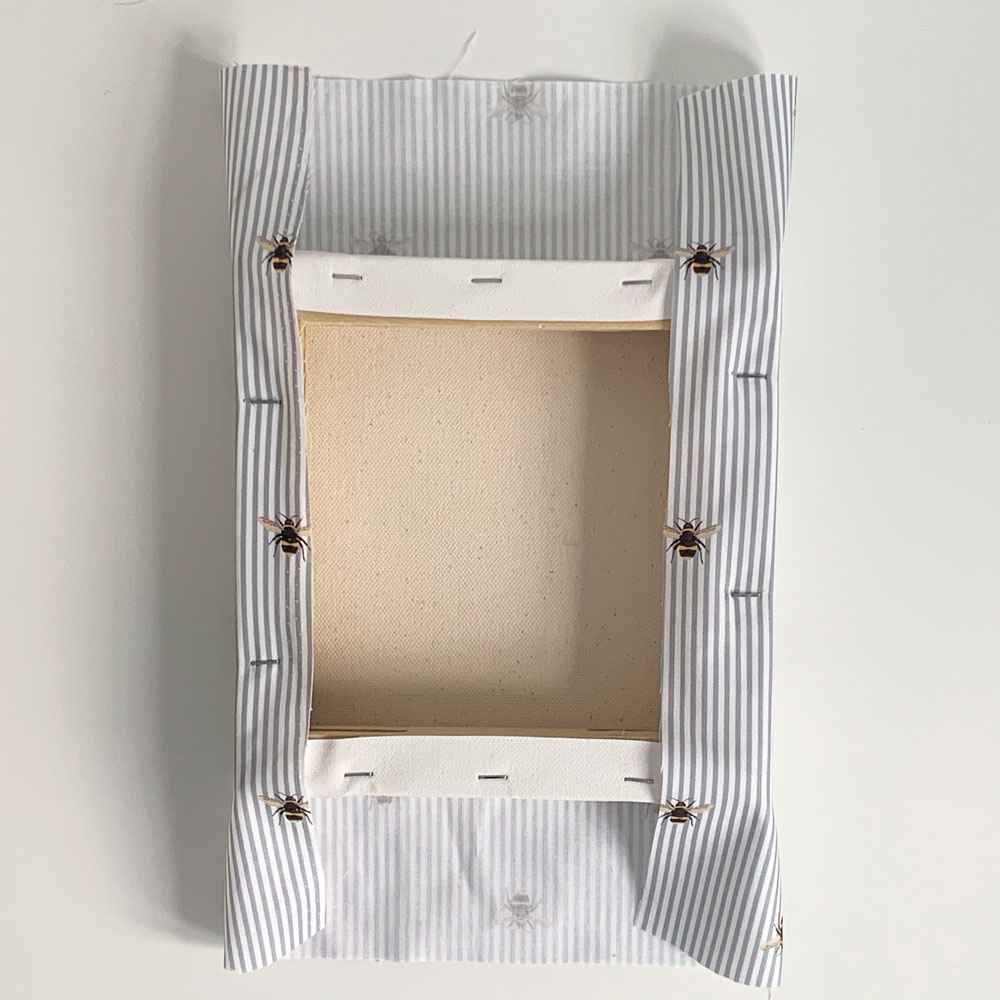
Repeat for the opposite side of the canvas. Remember to make sure there are no wrinkles in the fabric but do not overstretch it.
5. Finish your noticeboard
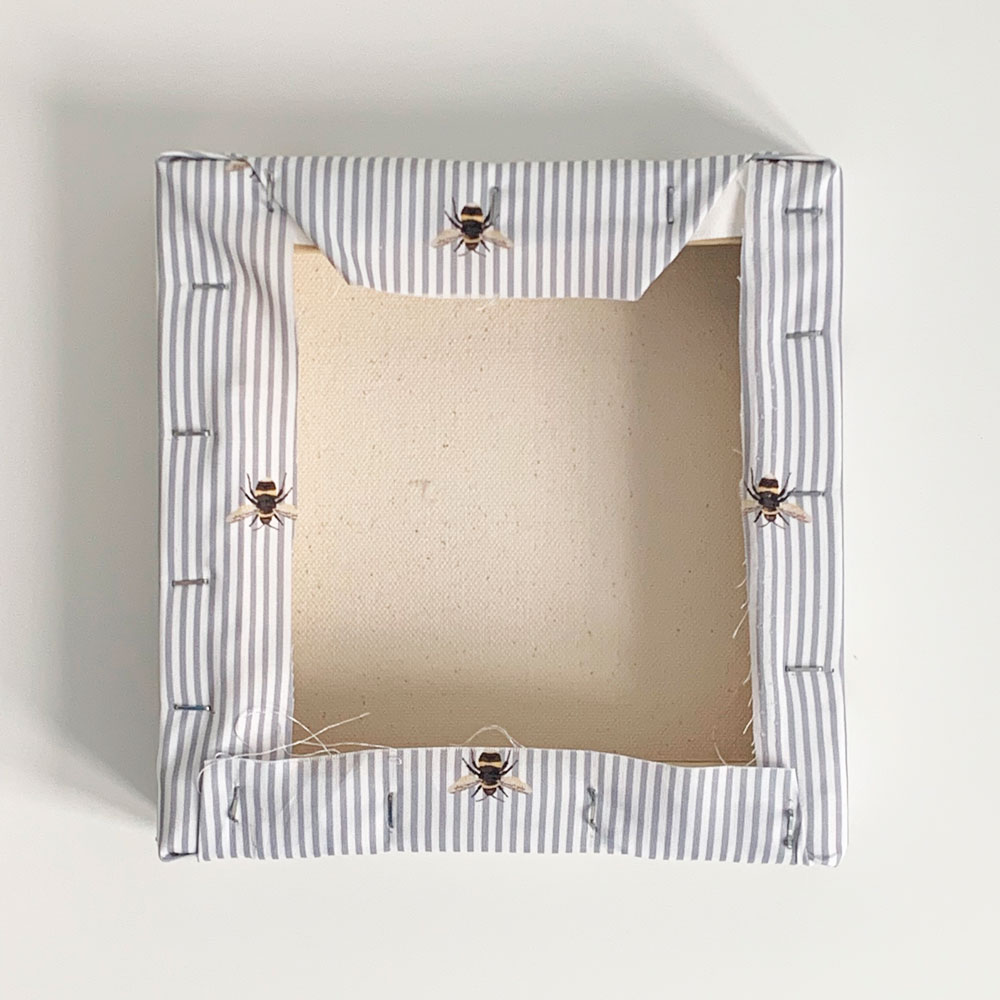
For the final sides, fold the fabric edges like you are wrapping a gift. Secure in place as before.
Position on the wall and use push pins to add memos, notes and postcards.
Related: Hobbycraft has seen a spike in searches for this craft - we can't wait to try it
How to make fabric boxes
You will need
- Fabric
- Mache box
- Tape measure
- Scissors
- Double-sided tape
1. Measure and cut your fabric
Measure your square box. Cut two strips of fabric, each 2cm wider than the base and long enough to cover two sides and the base, plus an extra 10cm.
Buy now: Mache box 22cm, £5, Hobbycraft
For example, for a 22cm square box, the strips will be 64cm long (22cm base + two 16cm sides + 10cm).
Related: Home office storage ideas for any space – to help you keep on top of your work
2. Hem the short edges
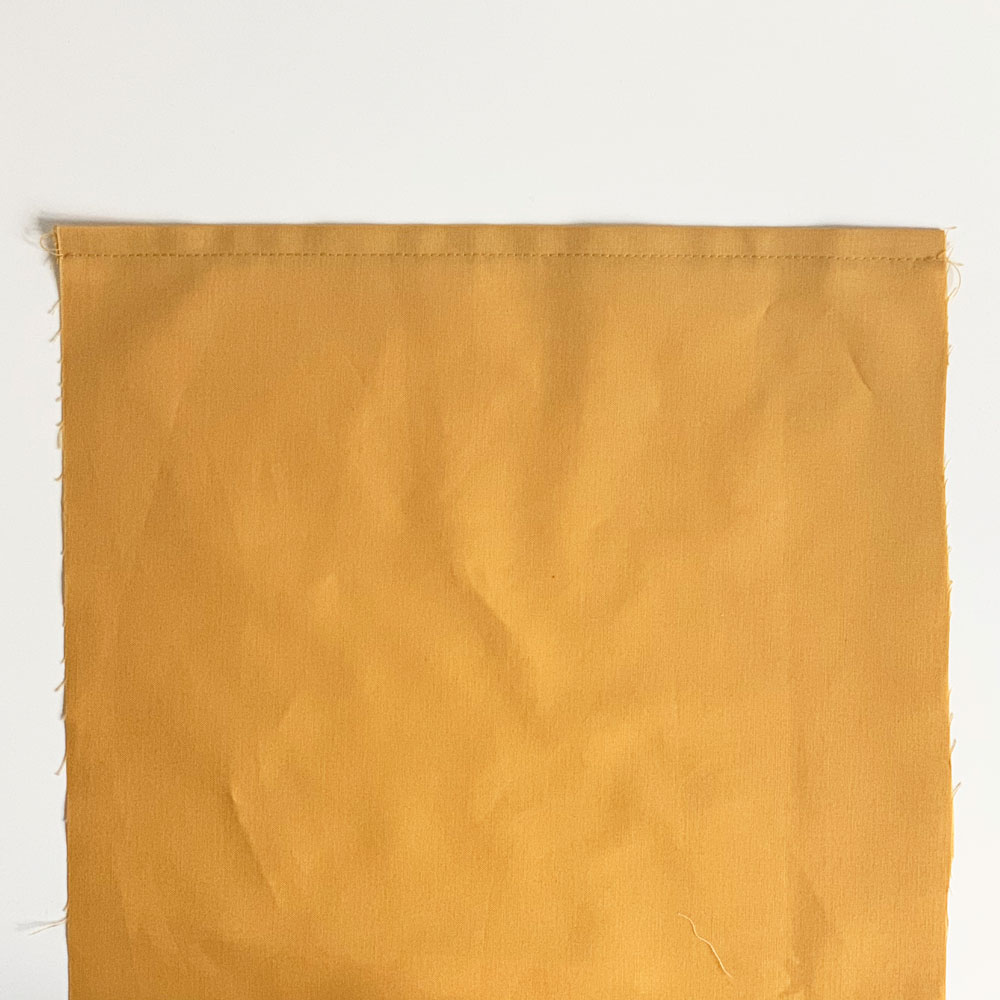
Hem the short edges of one fabric piece. Do this by folding over each short edge once, press with a hot iron, then sew in place with a 3.5mm straight stitch.
Buy now: Singer M1605 sewing machine, £100, Hobbycraft
3. Add double-sided tape
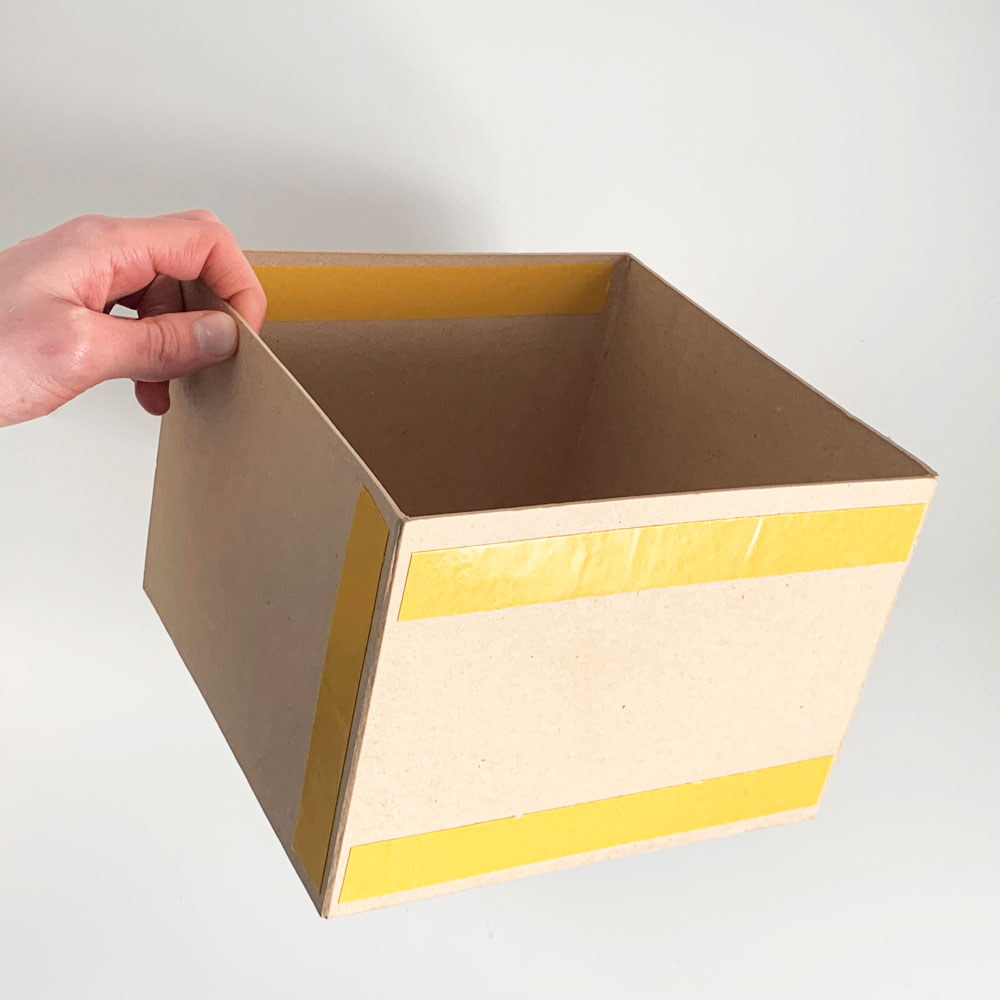
Add some strong double-sided tape to the sides and base of the box (as pictured).
Buy now: Stix 2 Anything double-sided ultra sticky tape, £8, Hobbycraft
4. Stick down the first side
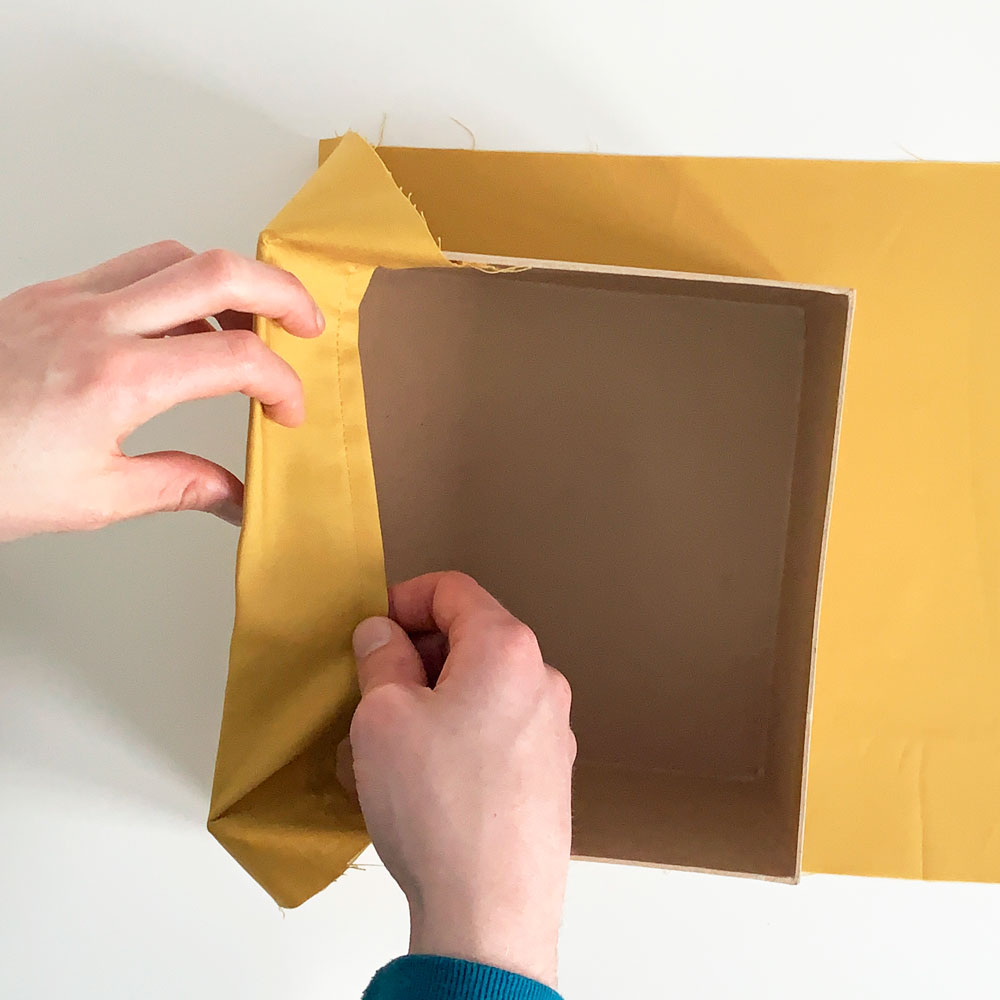
Lay the hemmed fabric flat, right sides down. Place the box in the centre of the fabric. Peel off the backing from the tape. Carefully fold one side of the fabric up so the hemmed edge tucks into the open box.
Press the fabric in place so it's stuck to the outer side of the box as well as inside.
5. Stick down the opposite side
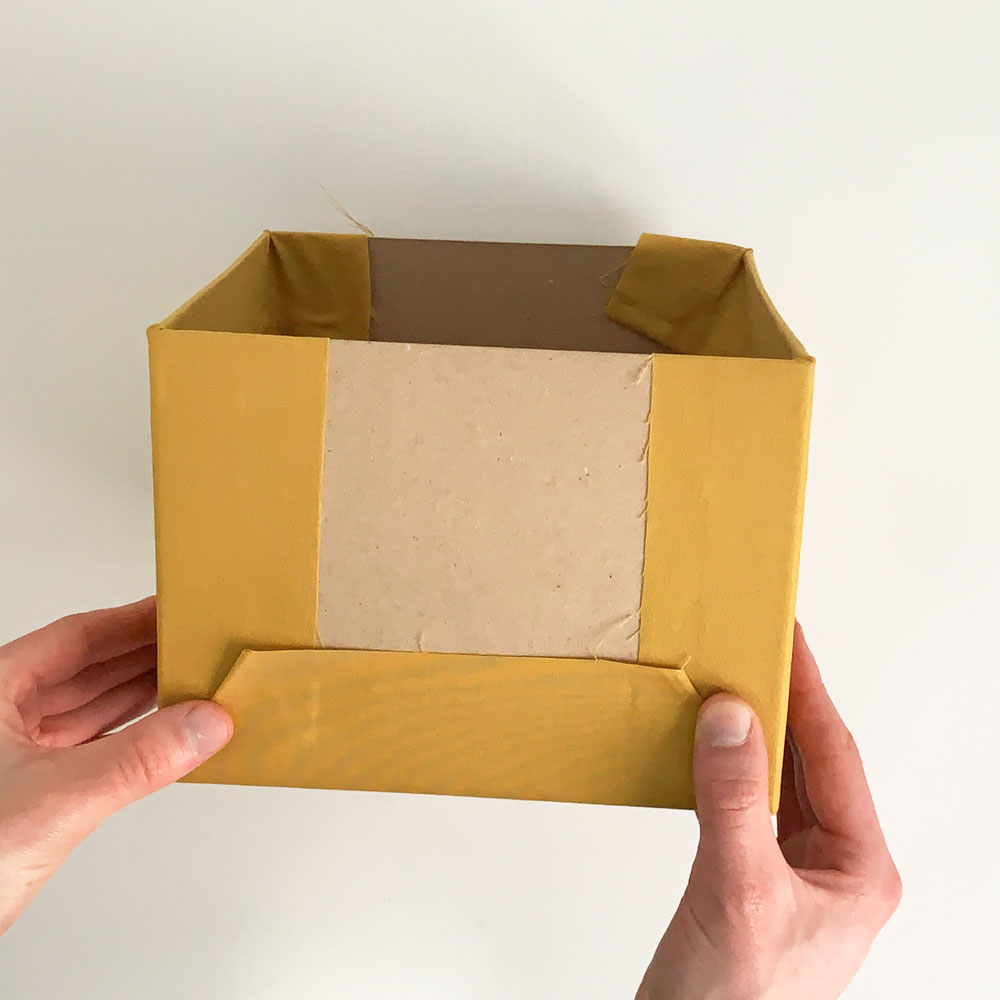
Repeat for the opposite side of the fabric and box. You'll be left with a flap of fabric on either side. Stick down with double sided tape.
6 Hem the other fabric piece
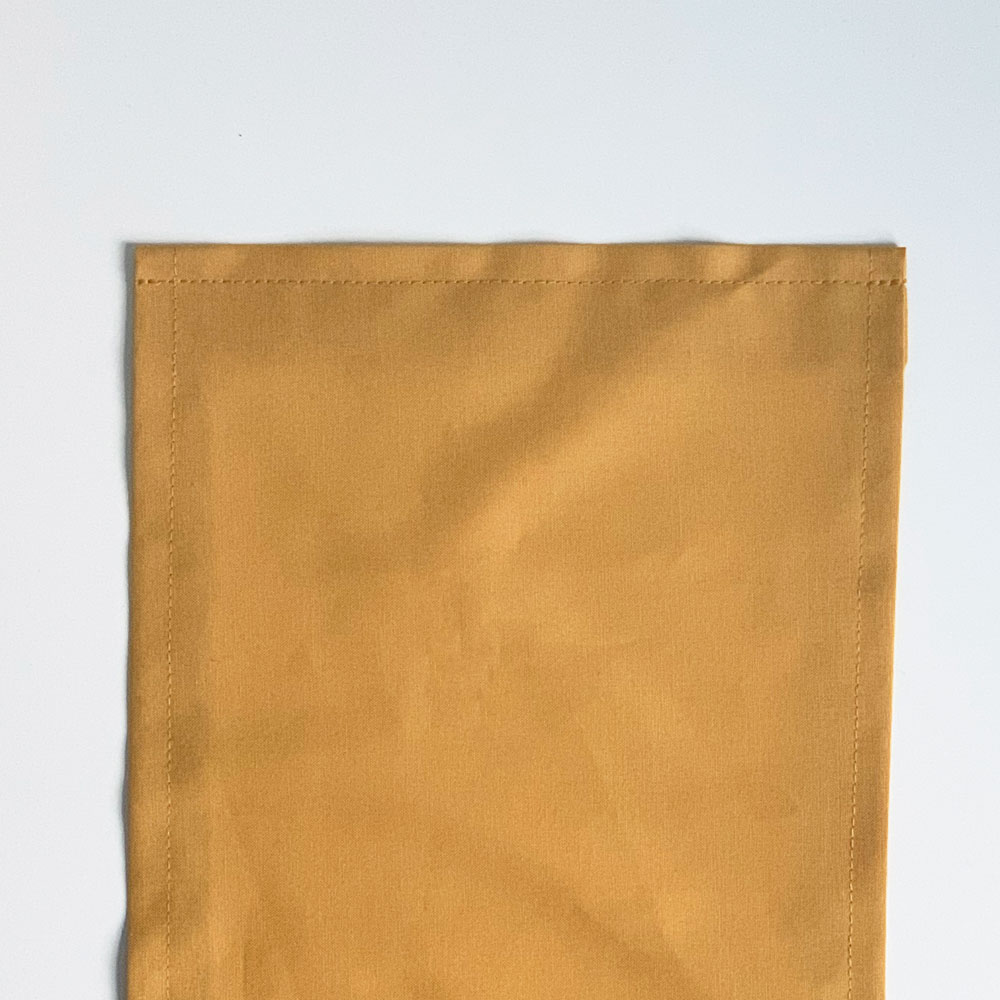
Return to the second piece of fabric you cut in step 1. Hem all four edges. When hemming the long edges, fold over enough fabric so the final piece is the same width as the base of your box.
7. Cover the rest of the box
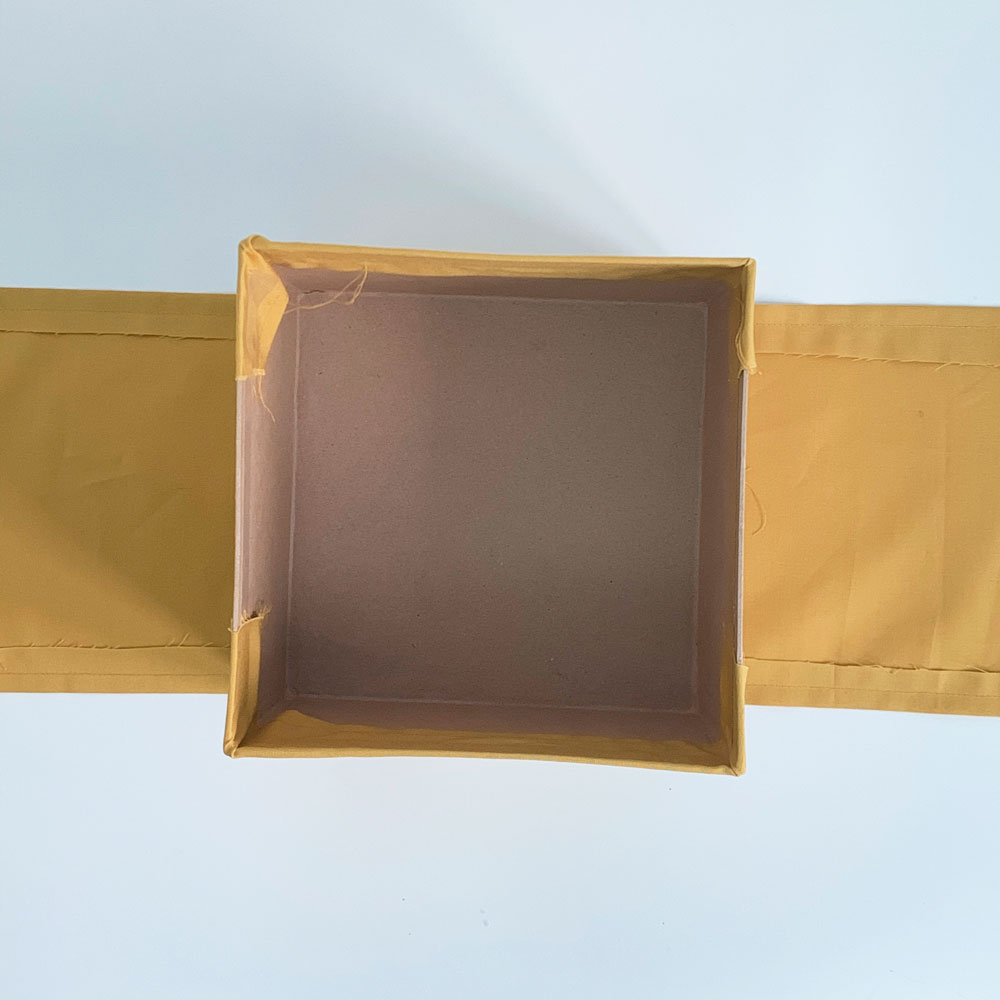
Stick tape to the two sides of the box not covered in fabric.
Place the box on the hemmed fabric piece, right sides down. Fold the fabric round the sides of the box and stick in place. The hemmed long edges should line up neatly with the box edges.
8. Cover the lid
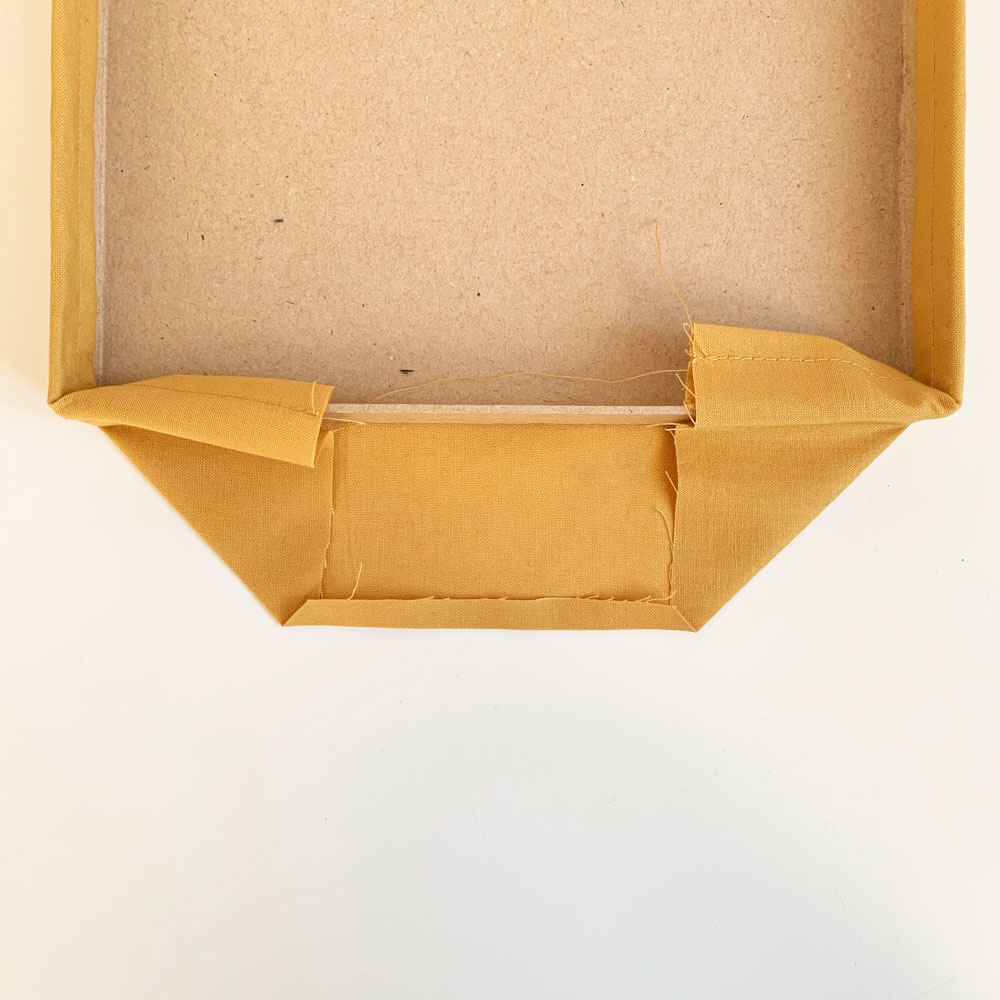
Cover the lid of the box in the same way. You will need to use a smaller piece of fabric. Once the fabric is stuck to the lid, fold the remaining raw edges in by 1-2cm, then fold the fabric up and over the edges of the lid. Stick in place with tape.
Take inspiration from this transformation: Home office before and after: Wickes transforms hallway into functional desk space
How to make hanging storage for paperwork
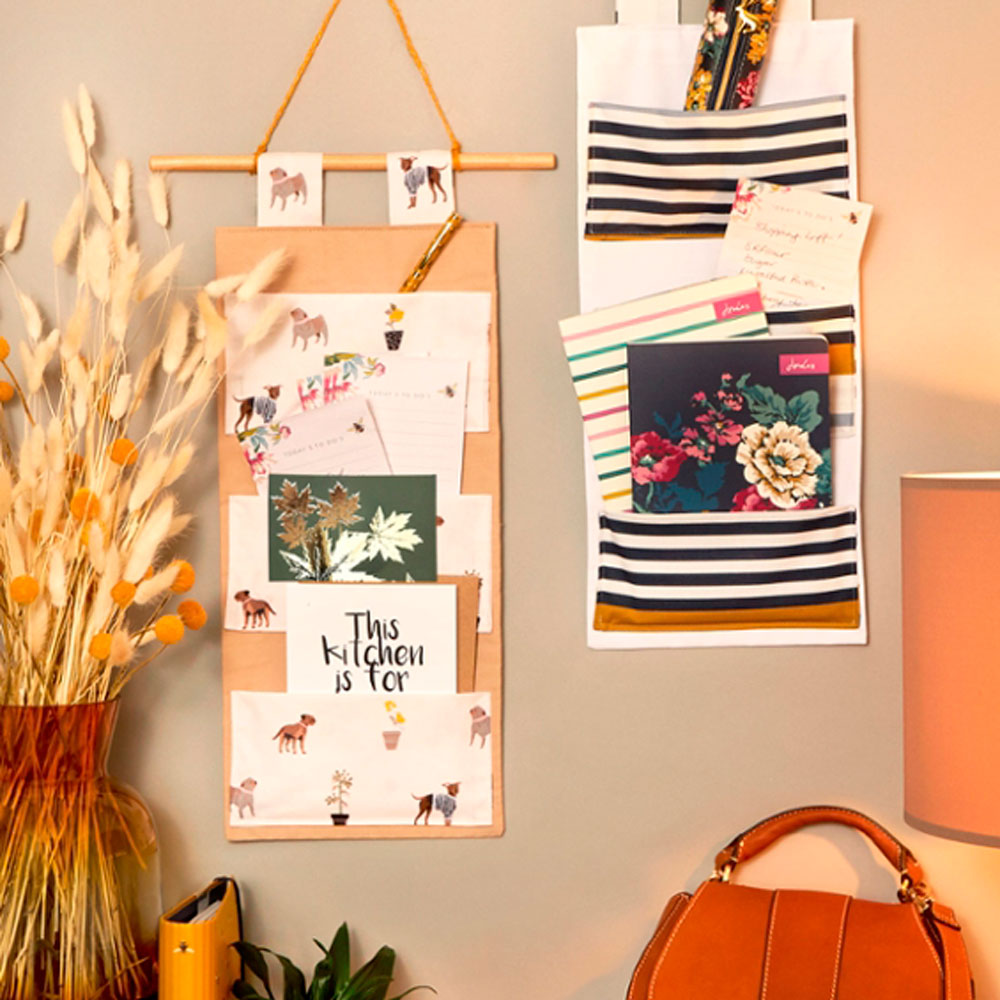
This is a great small home office idea as it clears your desk of paperwork where drawer space is limited.
You will need
- Two patterned fabrics
- Tape measure
- Scissors
- Lightweight interfacing
- Sewing machine
- Sewing thread
- Wooden dowel
- String
1. Cut out your backing fabric
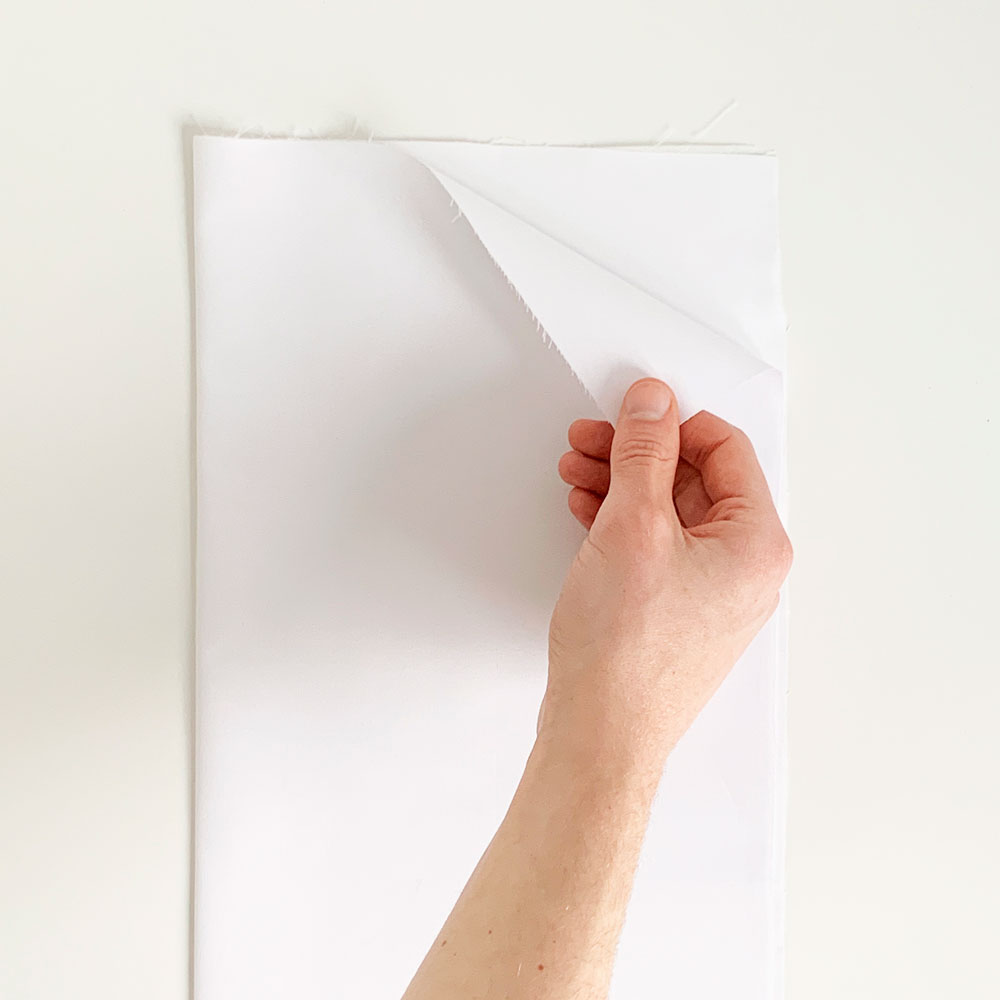
Cut 44cm x 52cm from fabric. Apply lightweight interfacing to the wrong side. Then fold in half lengthways, with the wrong side facing outwards.
Buy now: Joules Ocean Bloom cotton fat quarters 4 pack, £7, Hobbycraft
2. Stitch the fabric
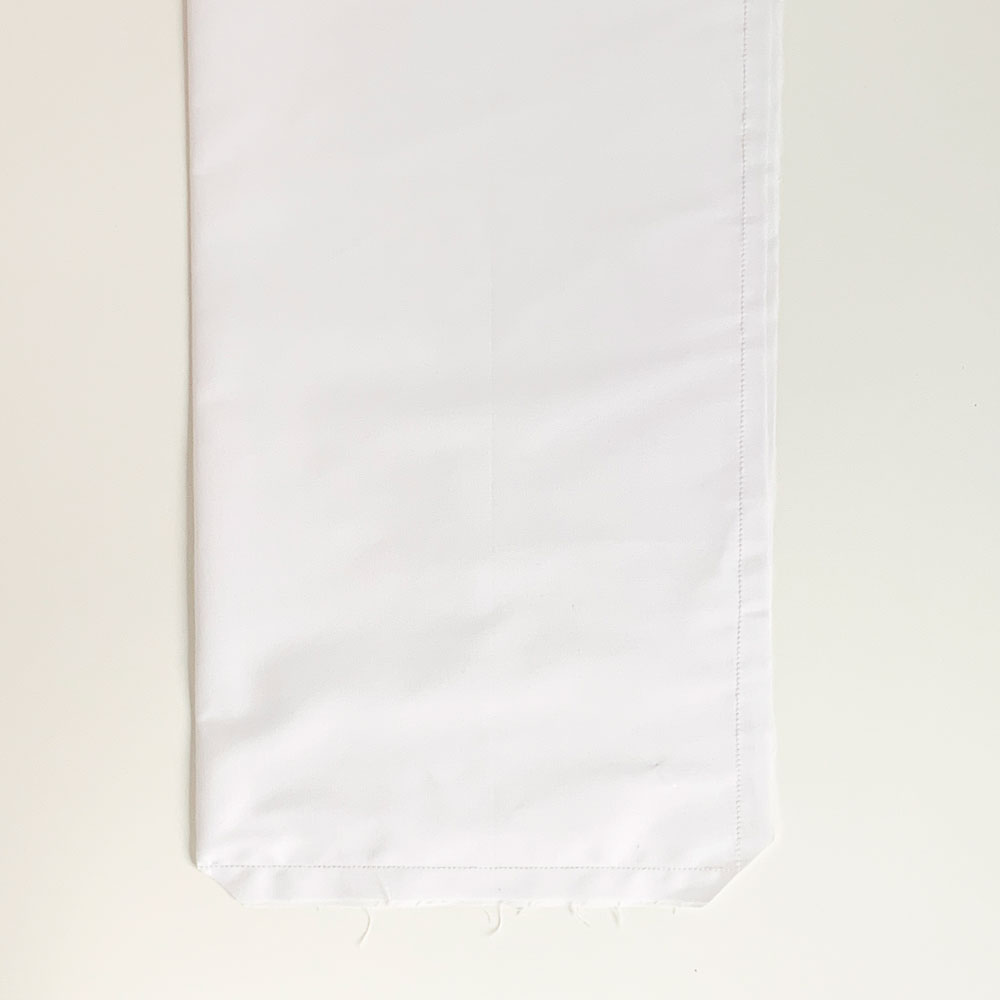
Stitch down the long edge and one of the shorter edges using a 1cm seam allowance. Trim the corners close to the stitching.
Buy now: Singer M1605 sewing machine, £100, Hobbycraft
Turn the right way out through the open short edge. Press flat with a hot iron.
3. Fold in the raw edges
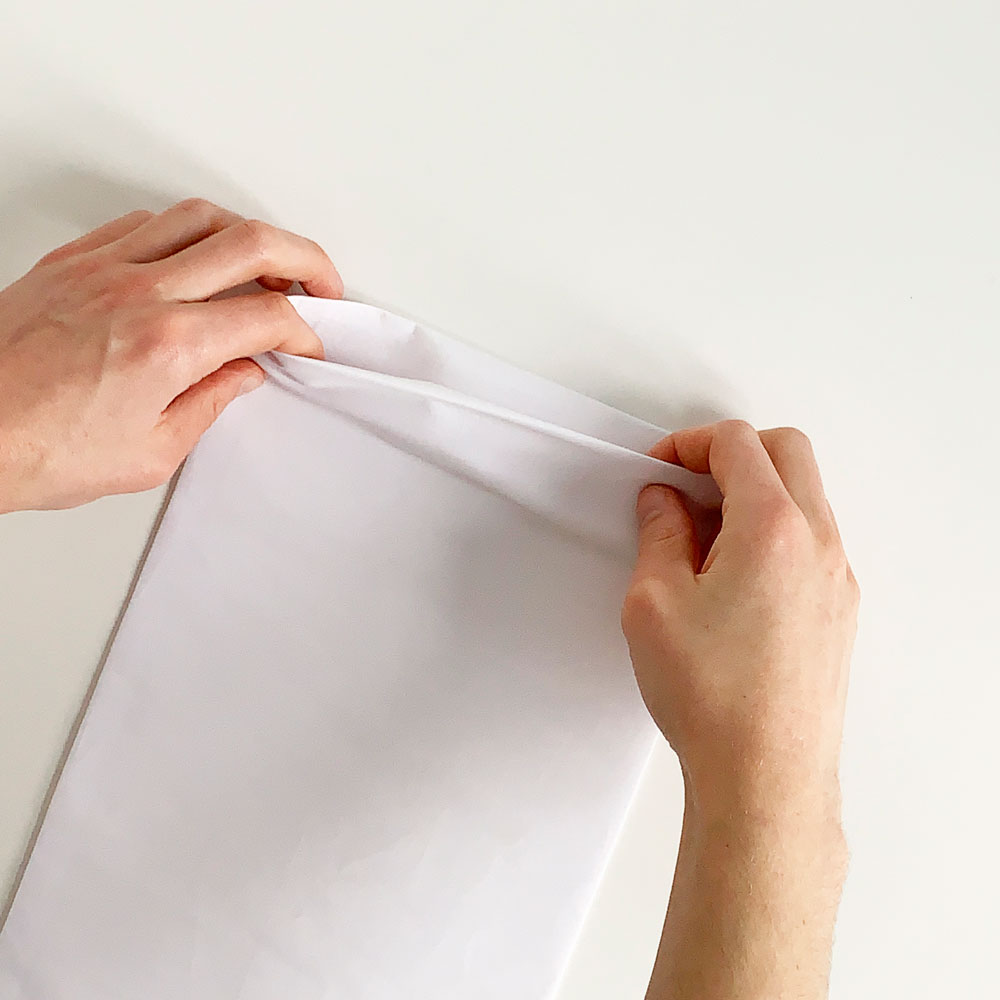
Tuck the remaining raw edges inside by 5-10cm. Press flat but do not sew shut.
4. Cut and sew the hanging strips
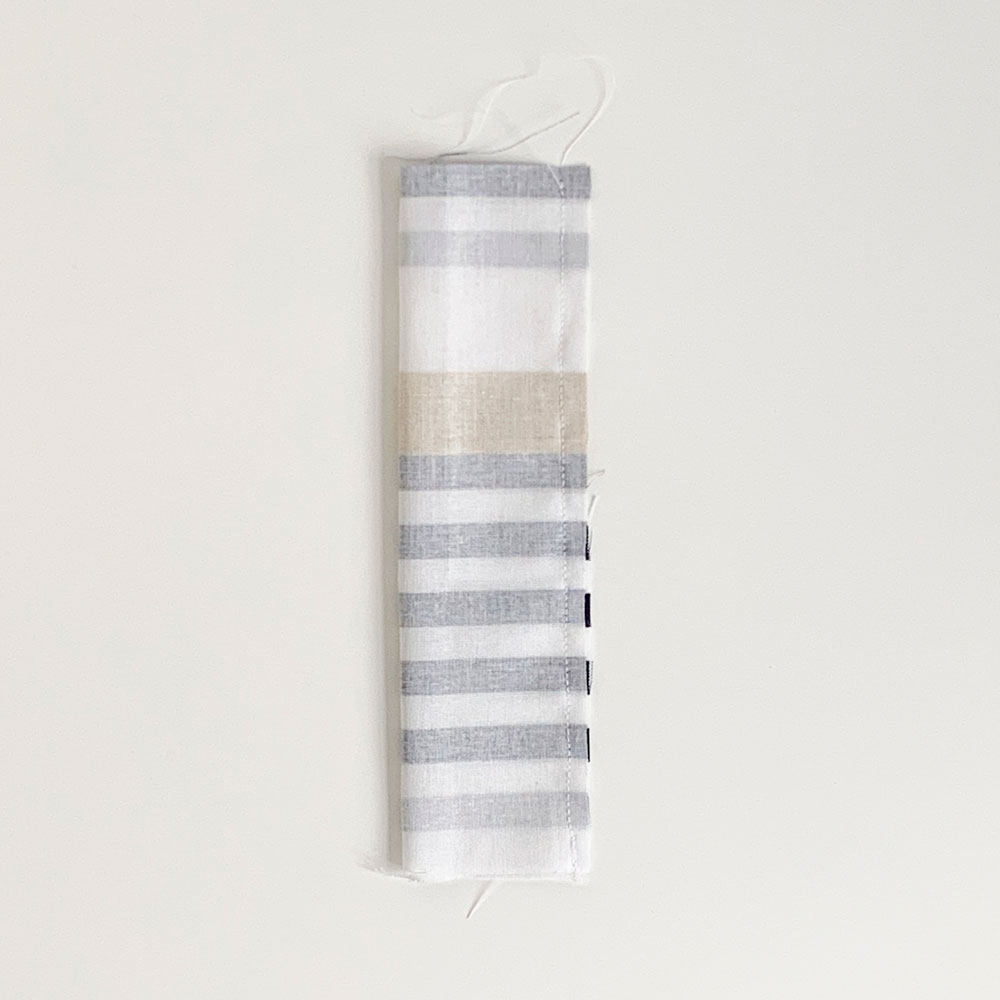
For the hanging strips, cut 12cm x 20cm from a contrasting fabric. Fold in half lengthways with right sides facing. Stitch the long edge with a 1cm seam allowance. This will create a tube.
5. Turn out and press
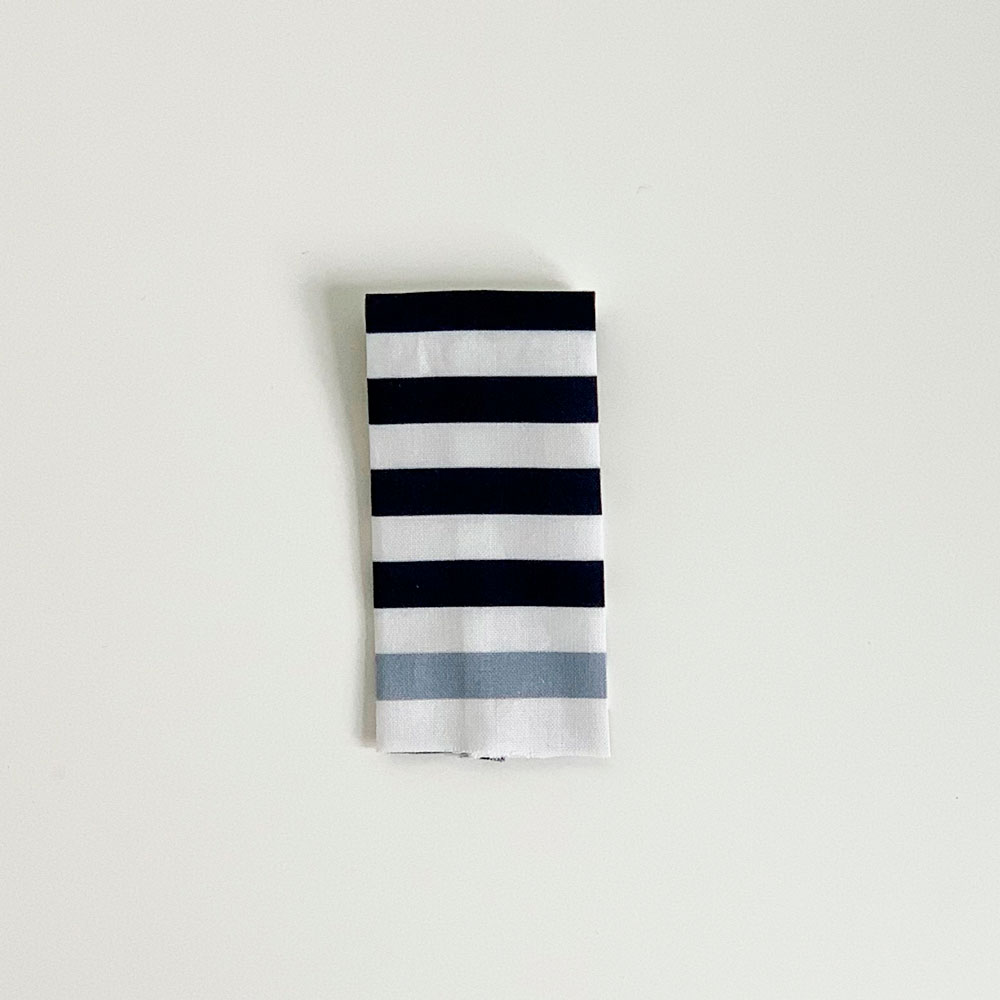
Turn the tube right sides out. Lay flat so the seam is in the middle and press. Fold this piece in half widthways so the seam is now hidden.
6. Insert into the backing fabric
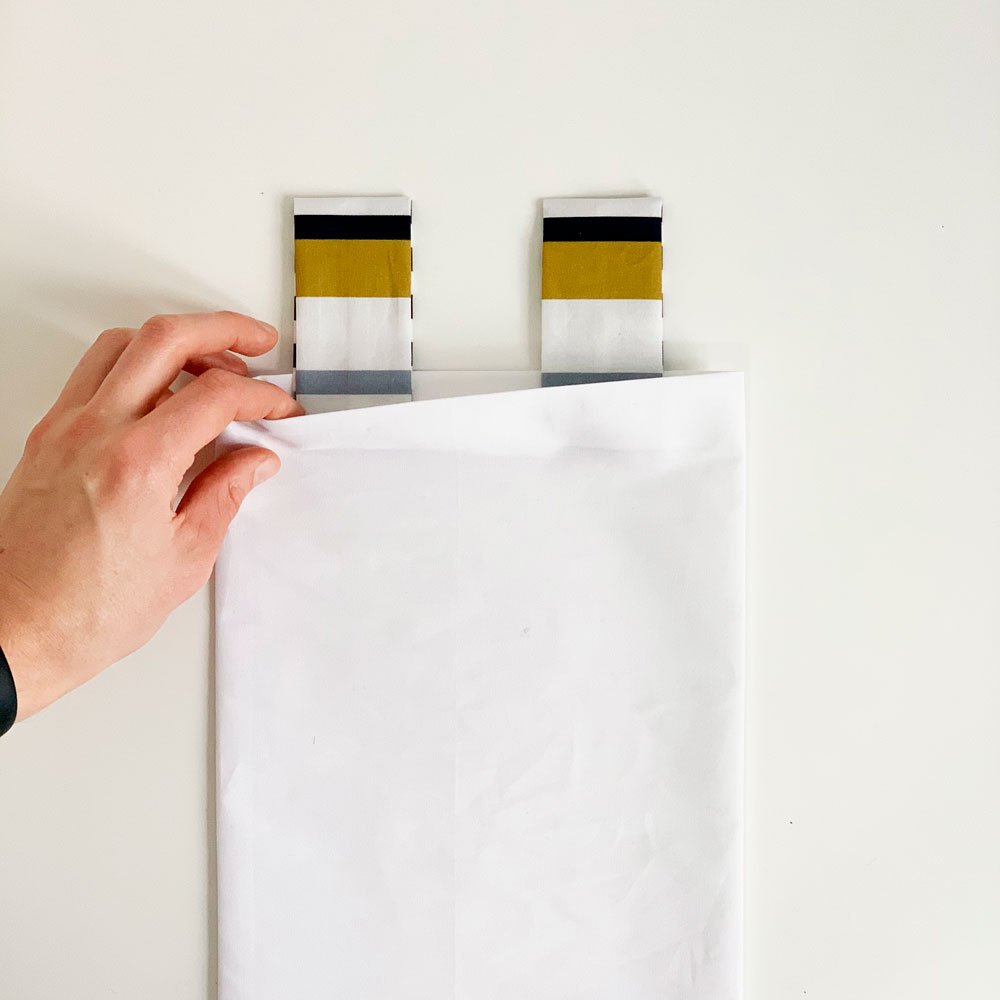
Tuck the folded fabric into the open end of the larger piece. Repeat so you have two hanging straps in position.
7. Secure the straps
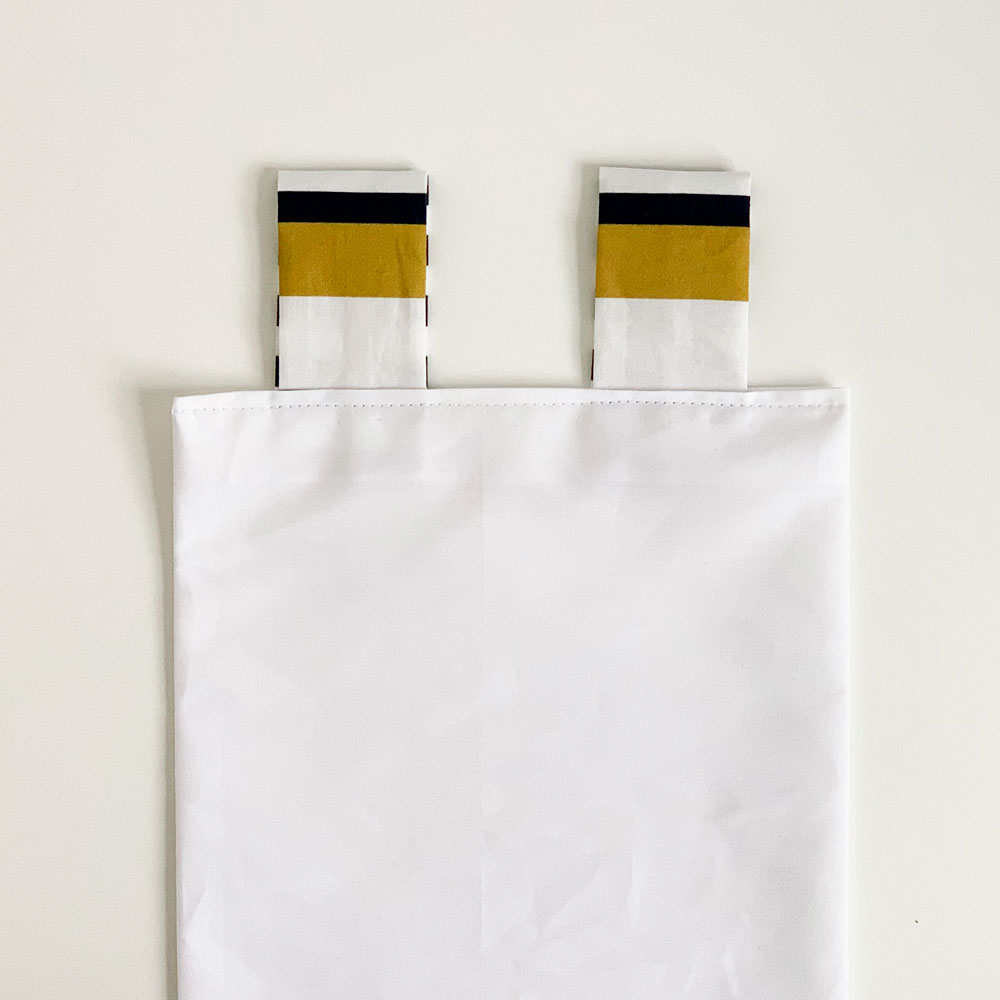
Top stitch along the open edge and over the two straps to secure them in place.
8. Cut and sew the pockets
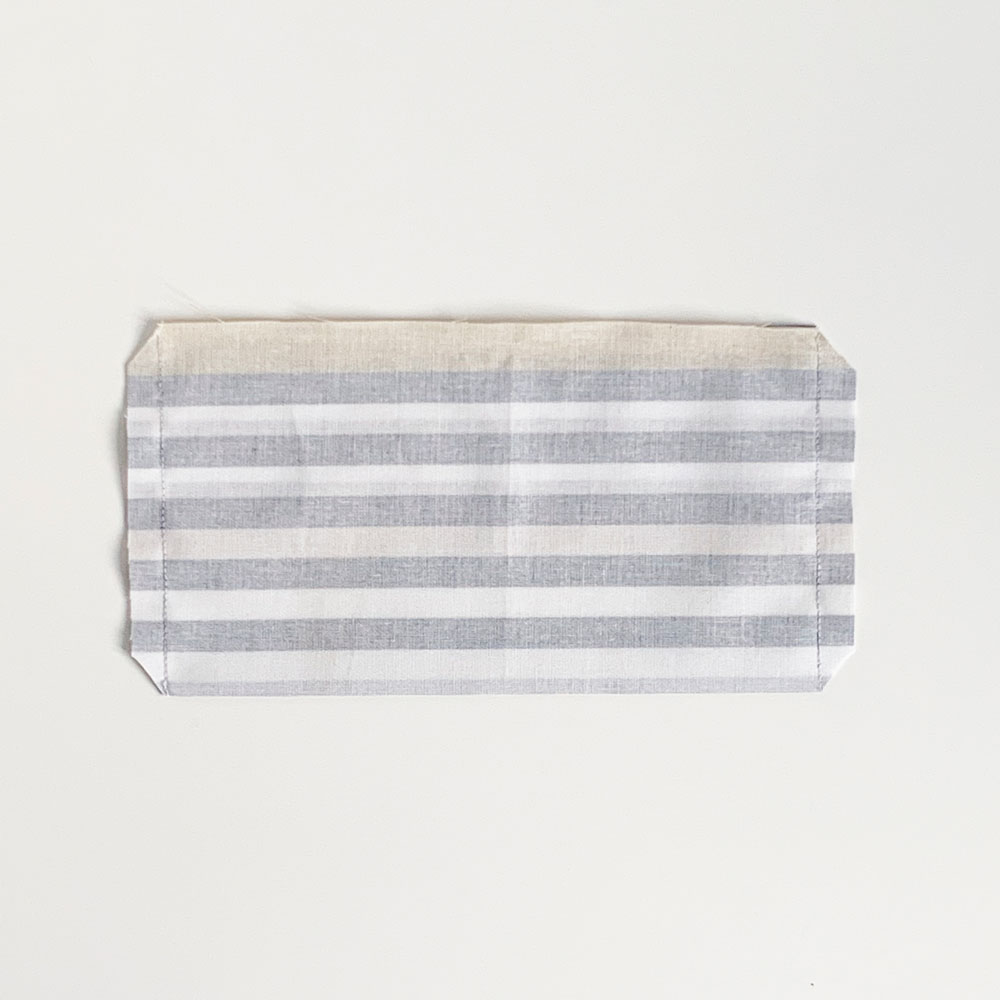
For the pocket, cut a 22cm square from fabric. Fold in half, right sides facing. Sew down the two short edges using a 1cm seam allowance. Trim the corners.
Turn right sides out. Tuck the raw edges inside by 1-2cm. Press flat.
9. Add the pockets
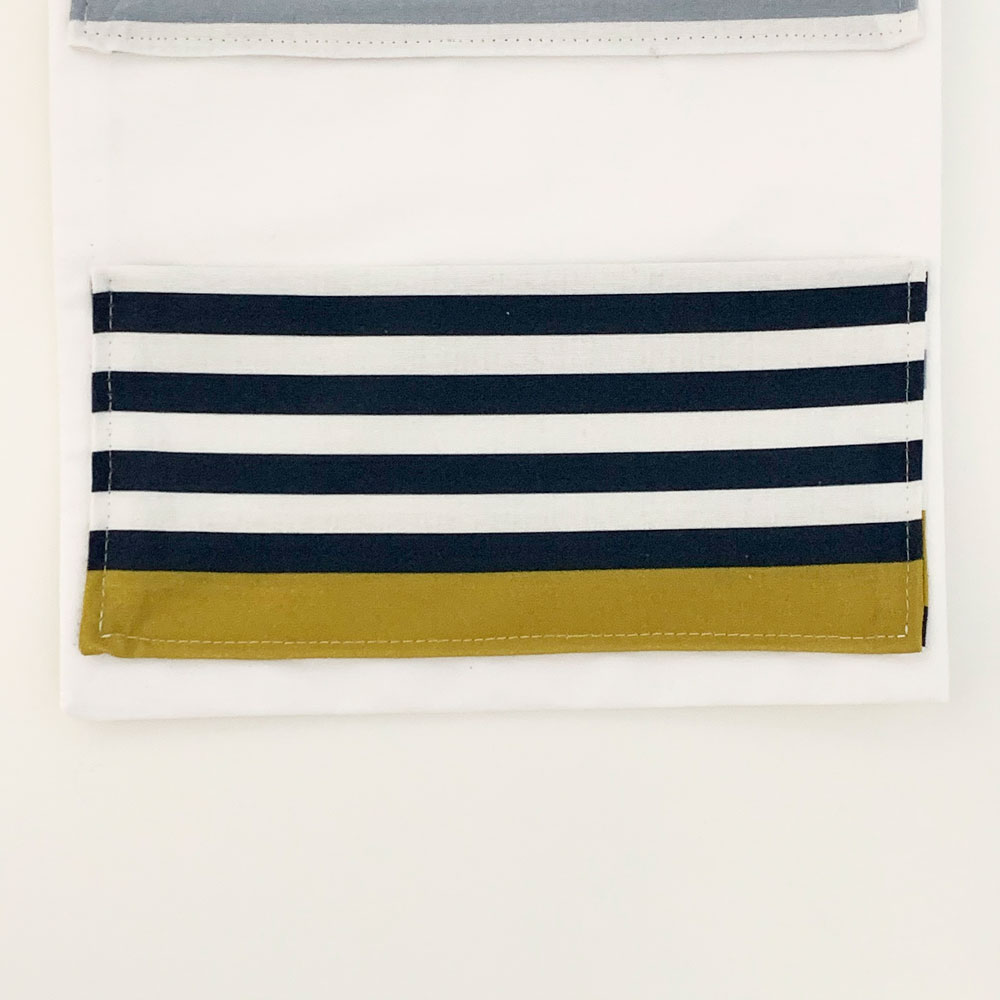
Pin the pocket to the backing piece. Position with the open edge at the bottom. Top stitch in place with a 3.5mm straight stitch along the bottom and both sides.
Repeat to make two more pockets.
Looking for your next transformation? Here's How to make a macrame plant hanger and add some greenery to your home
10. Hang up your wall storage
Thread wooden dowels through the hanging straps at the top of the storage. Tie string to the dowels and hang from a hook or nail.
Visit Hobbycraft's Ideas Hub for more Joules sewing projects to make.
Or just sit back and enjoy your neat and tidy home office.
Get the Ideal Home Newsletter
Sign up to our newsletter for style and decor inspiration, house makeovers, project advice and more.

Steph Durrant is the Deputy Editor of Ideal Home’s sister magazine, Style at Home. Steph is an experienced journalist with more than 12 years under her belt working across the UK’s leading craft and interiors magazines. She first joined the team back in 2016 writing for both homes brands, specialising in all things craft, upcycling and DIY.
-
 Zoe Ball's colourful kitchen island shows how easy it is to create a characterful cooking space - here's how she did it
Being brave with colour will reap huge rewards
By Holly Cockburn
-
 7 plants that will make your patio smell gorgeous - the top fragrant picks experts recommend potting up
From aromatic flowers to fragrant herbs
By Kayleigh Dray
-
 I won't gatekeep - Magimix's new small kitchen-friendly mini chopper is my secret to delicious lazy dinners
My homemade pesto pasta has never been better
By Holly Cockburn