How to make a wire wreath - adorn your home with this unique spin on a spring wreath
This DIY decoration can be used every spring for a stylish display
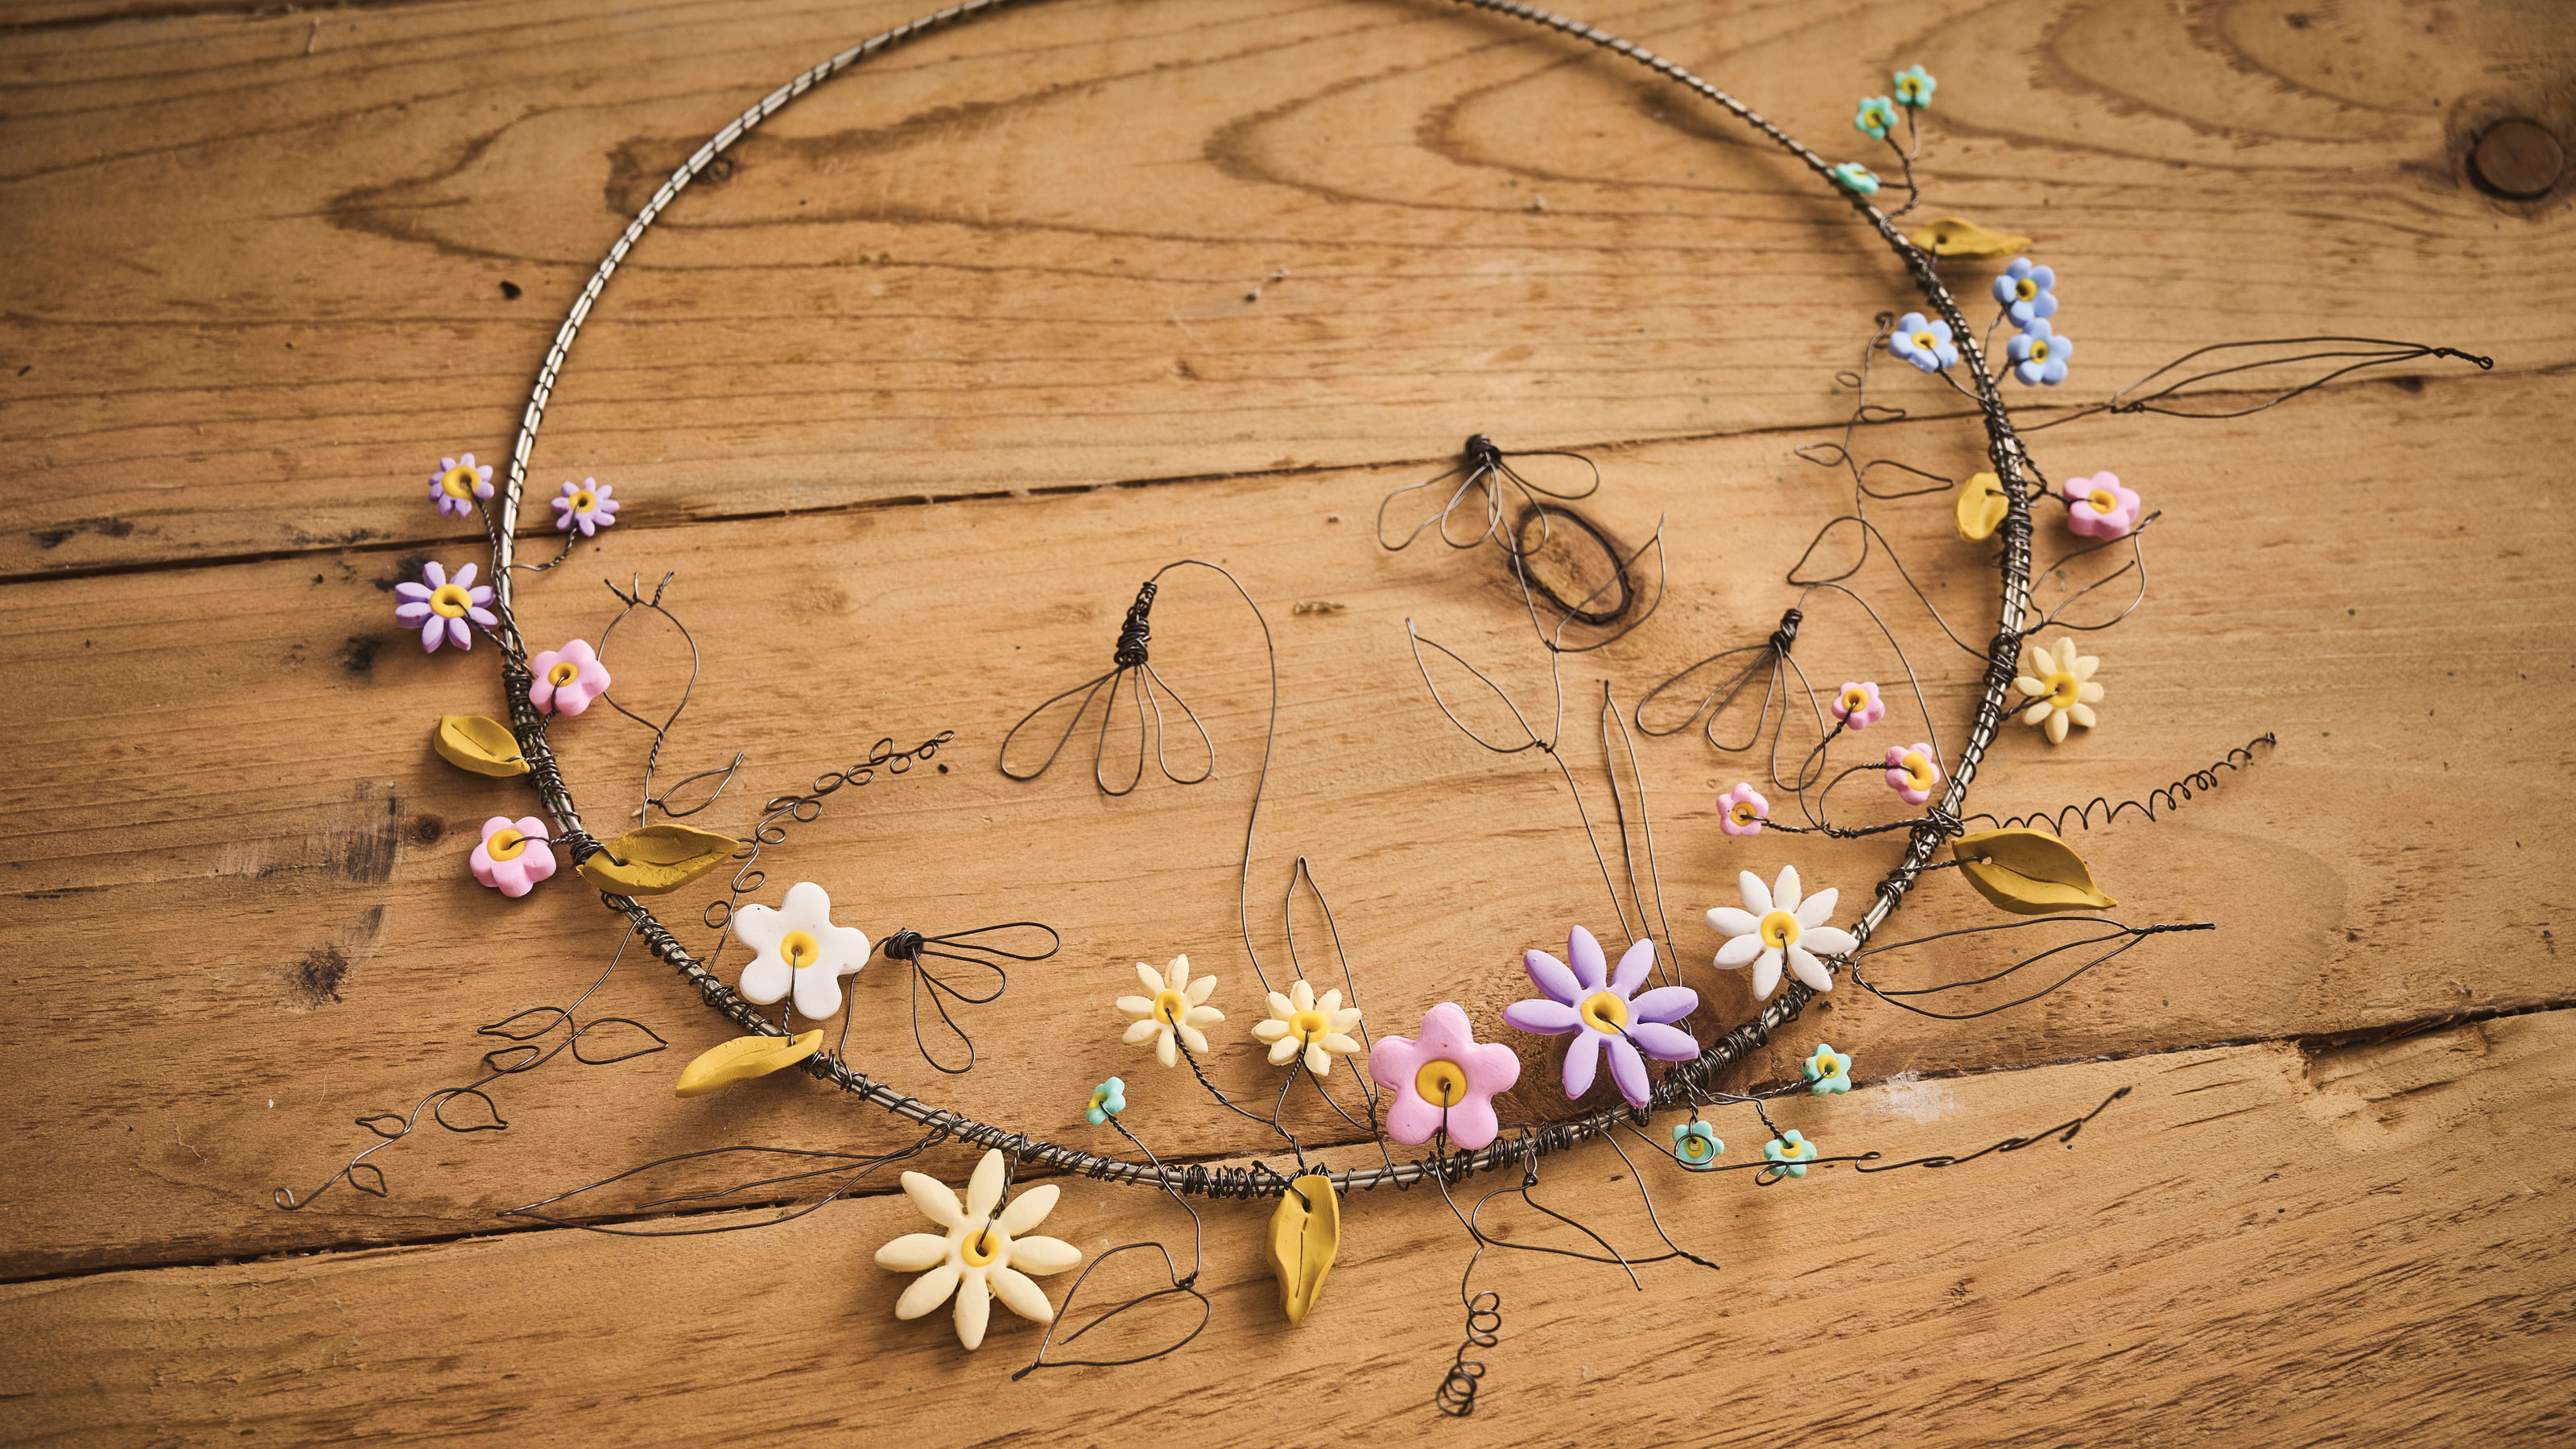

Spring wreath ideas usually focus on fresh or dried flowers, whether that's a timeless wreath that can be used all year round, or a design made with spring blooms or living bulbs.
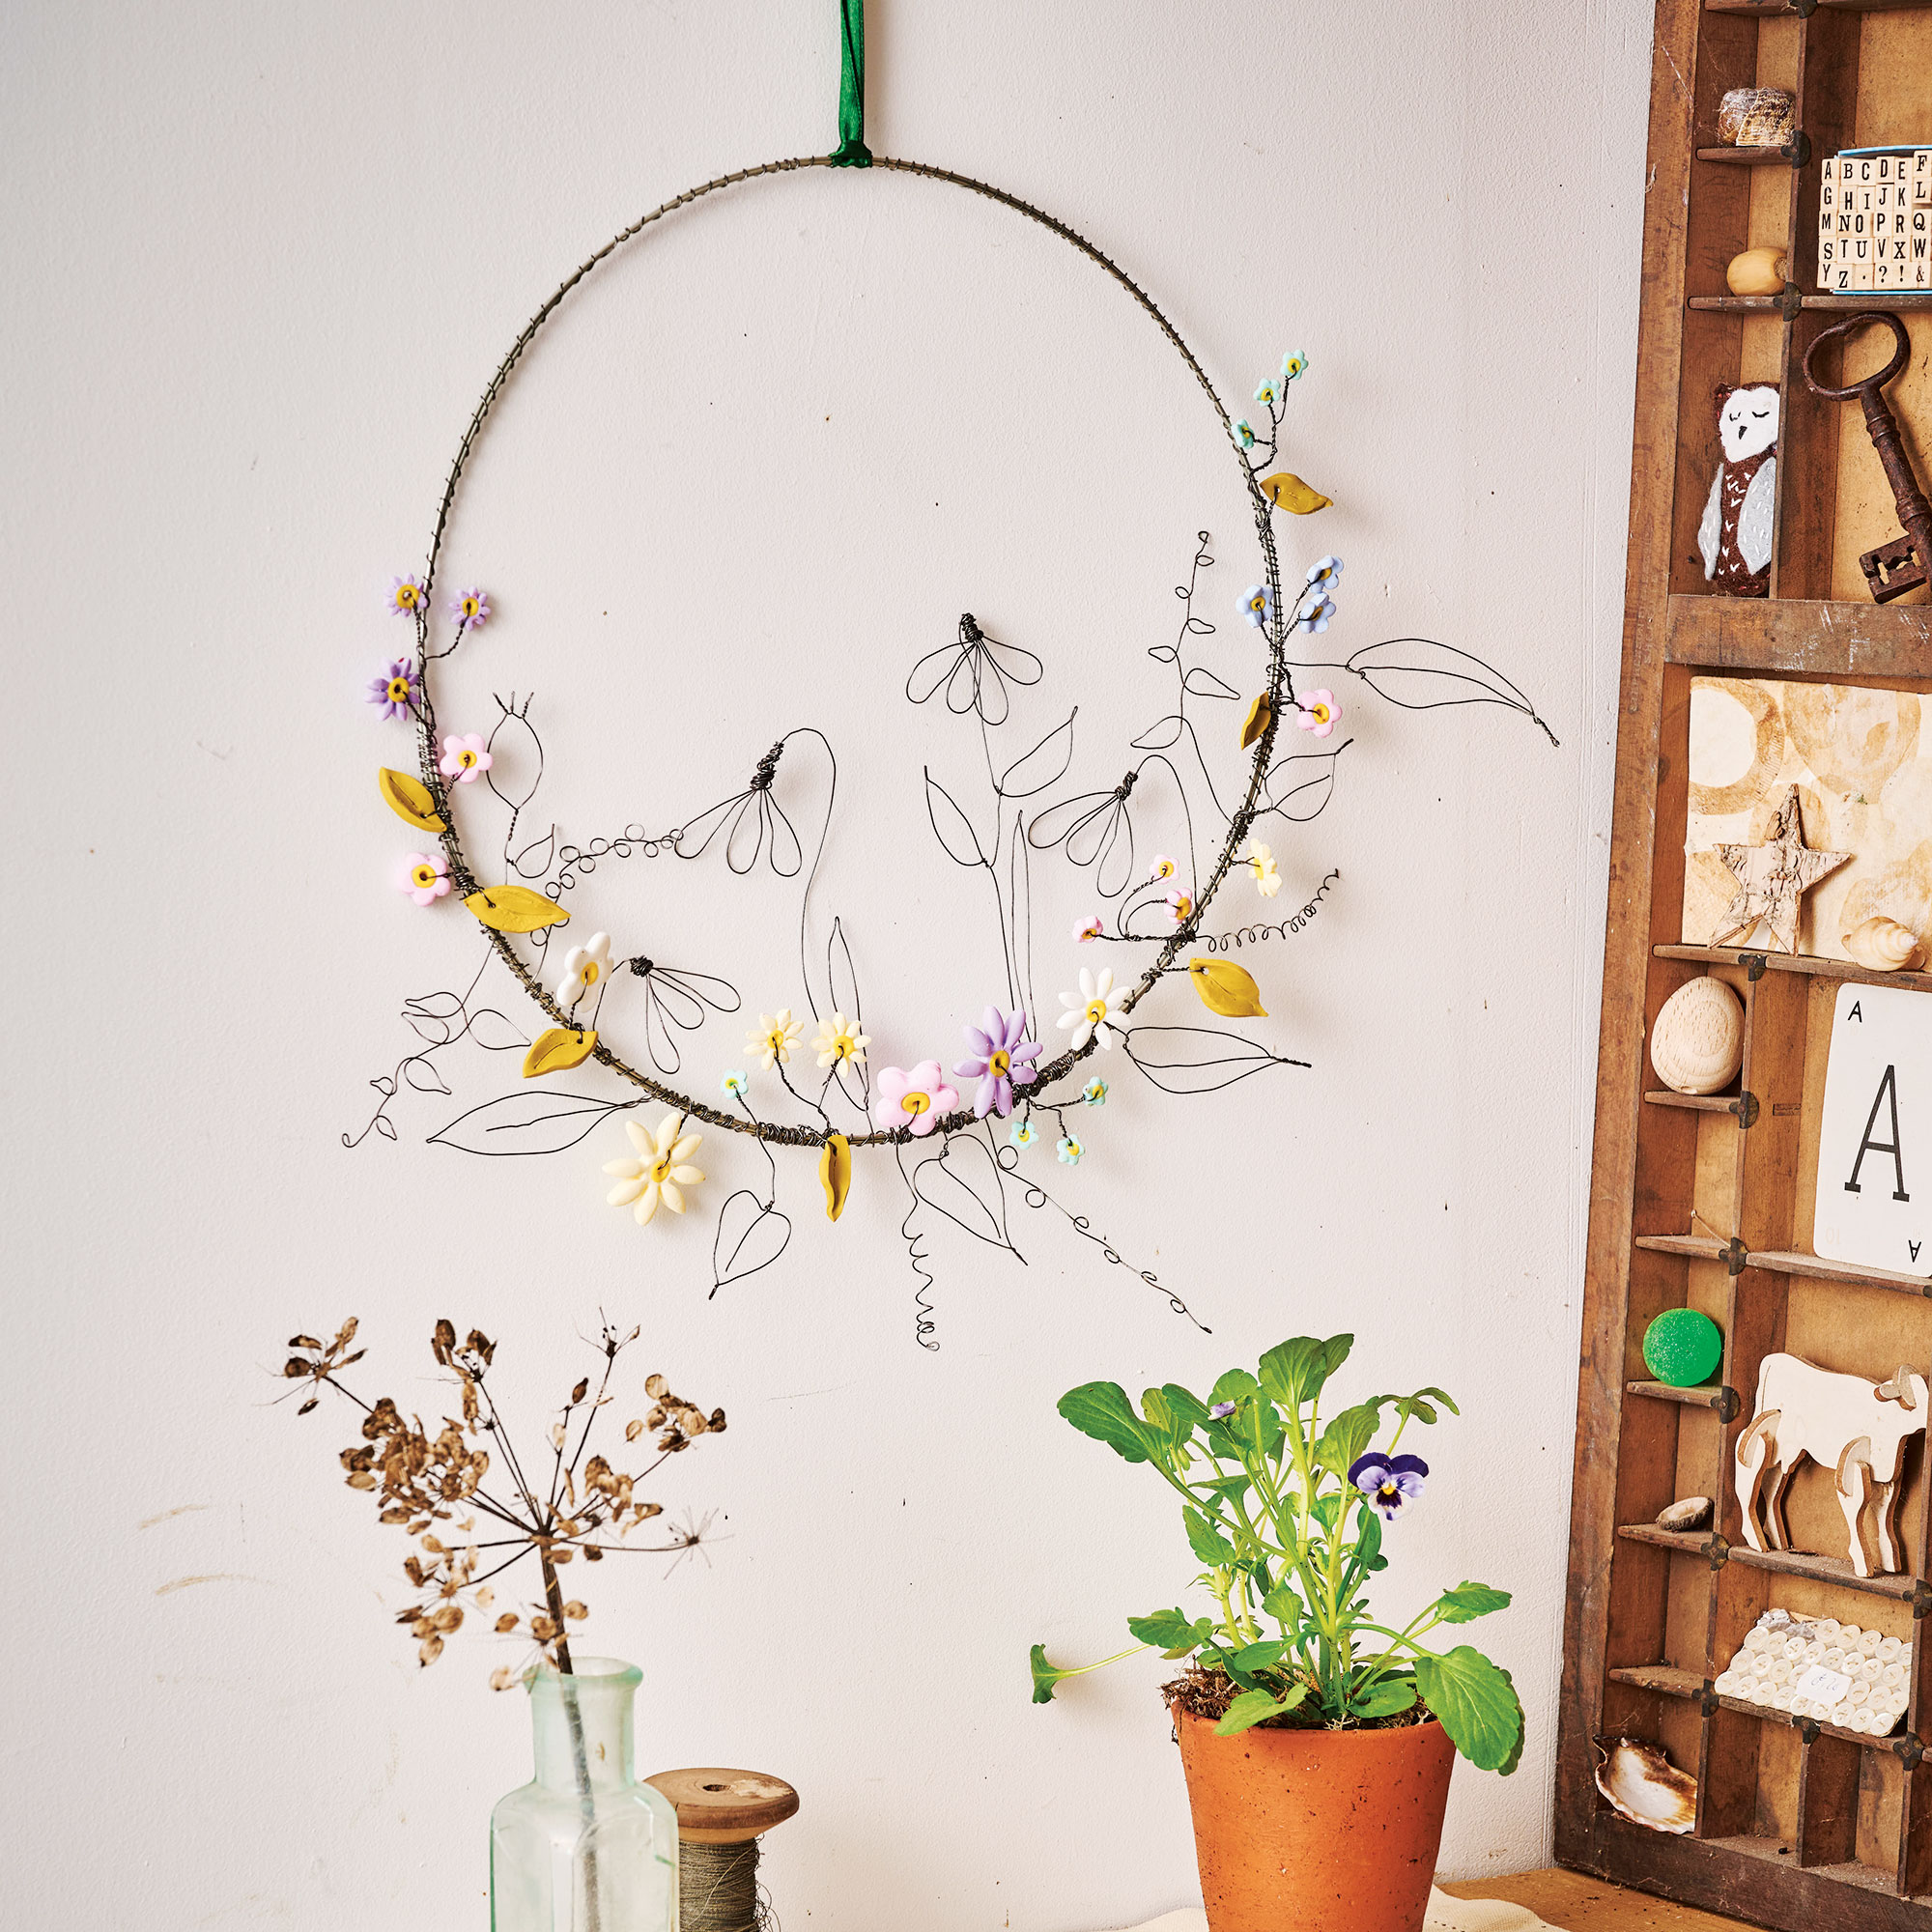
But this stylish metal wreath puts a twist on traditional spring wreath ideas. Using wire and modelling clay, it can be used year after year, welcoming spring into your home with its everlasting display.
Craft expert and writer Anna-Lisa De-Ath from My Crafty Country Life shares her step-by-step instructions for making your own.
This article first appeared in Country Homes & Interiors. Subscribe and save here.
You will need
Most of the items listed below are easily available at Hobbycraft and Amazon.
- Oasis silver 2mm aluminium wire
- Reel of florist’s binding wire
- Flat nose jewellery pliers
- Knitting needle
- Fimo pastel modelling clay set
- Whisk daisy plunge cutters
- Whisk blossom plunge cutters
- Rolling pin
- Baking parchment
- Baking tray
- Ribbon
1. Make the hoop
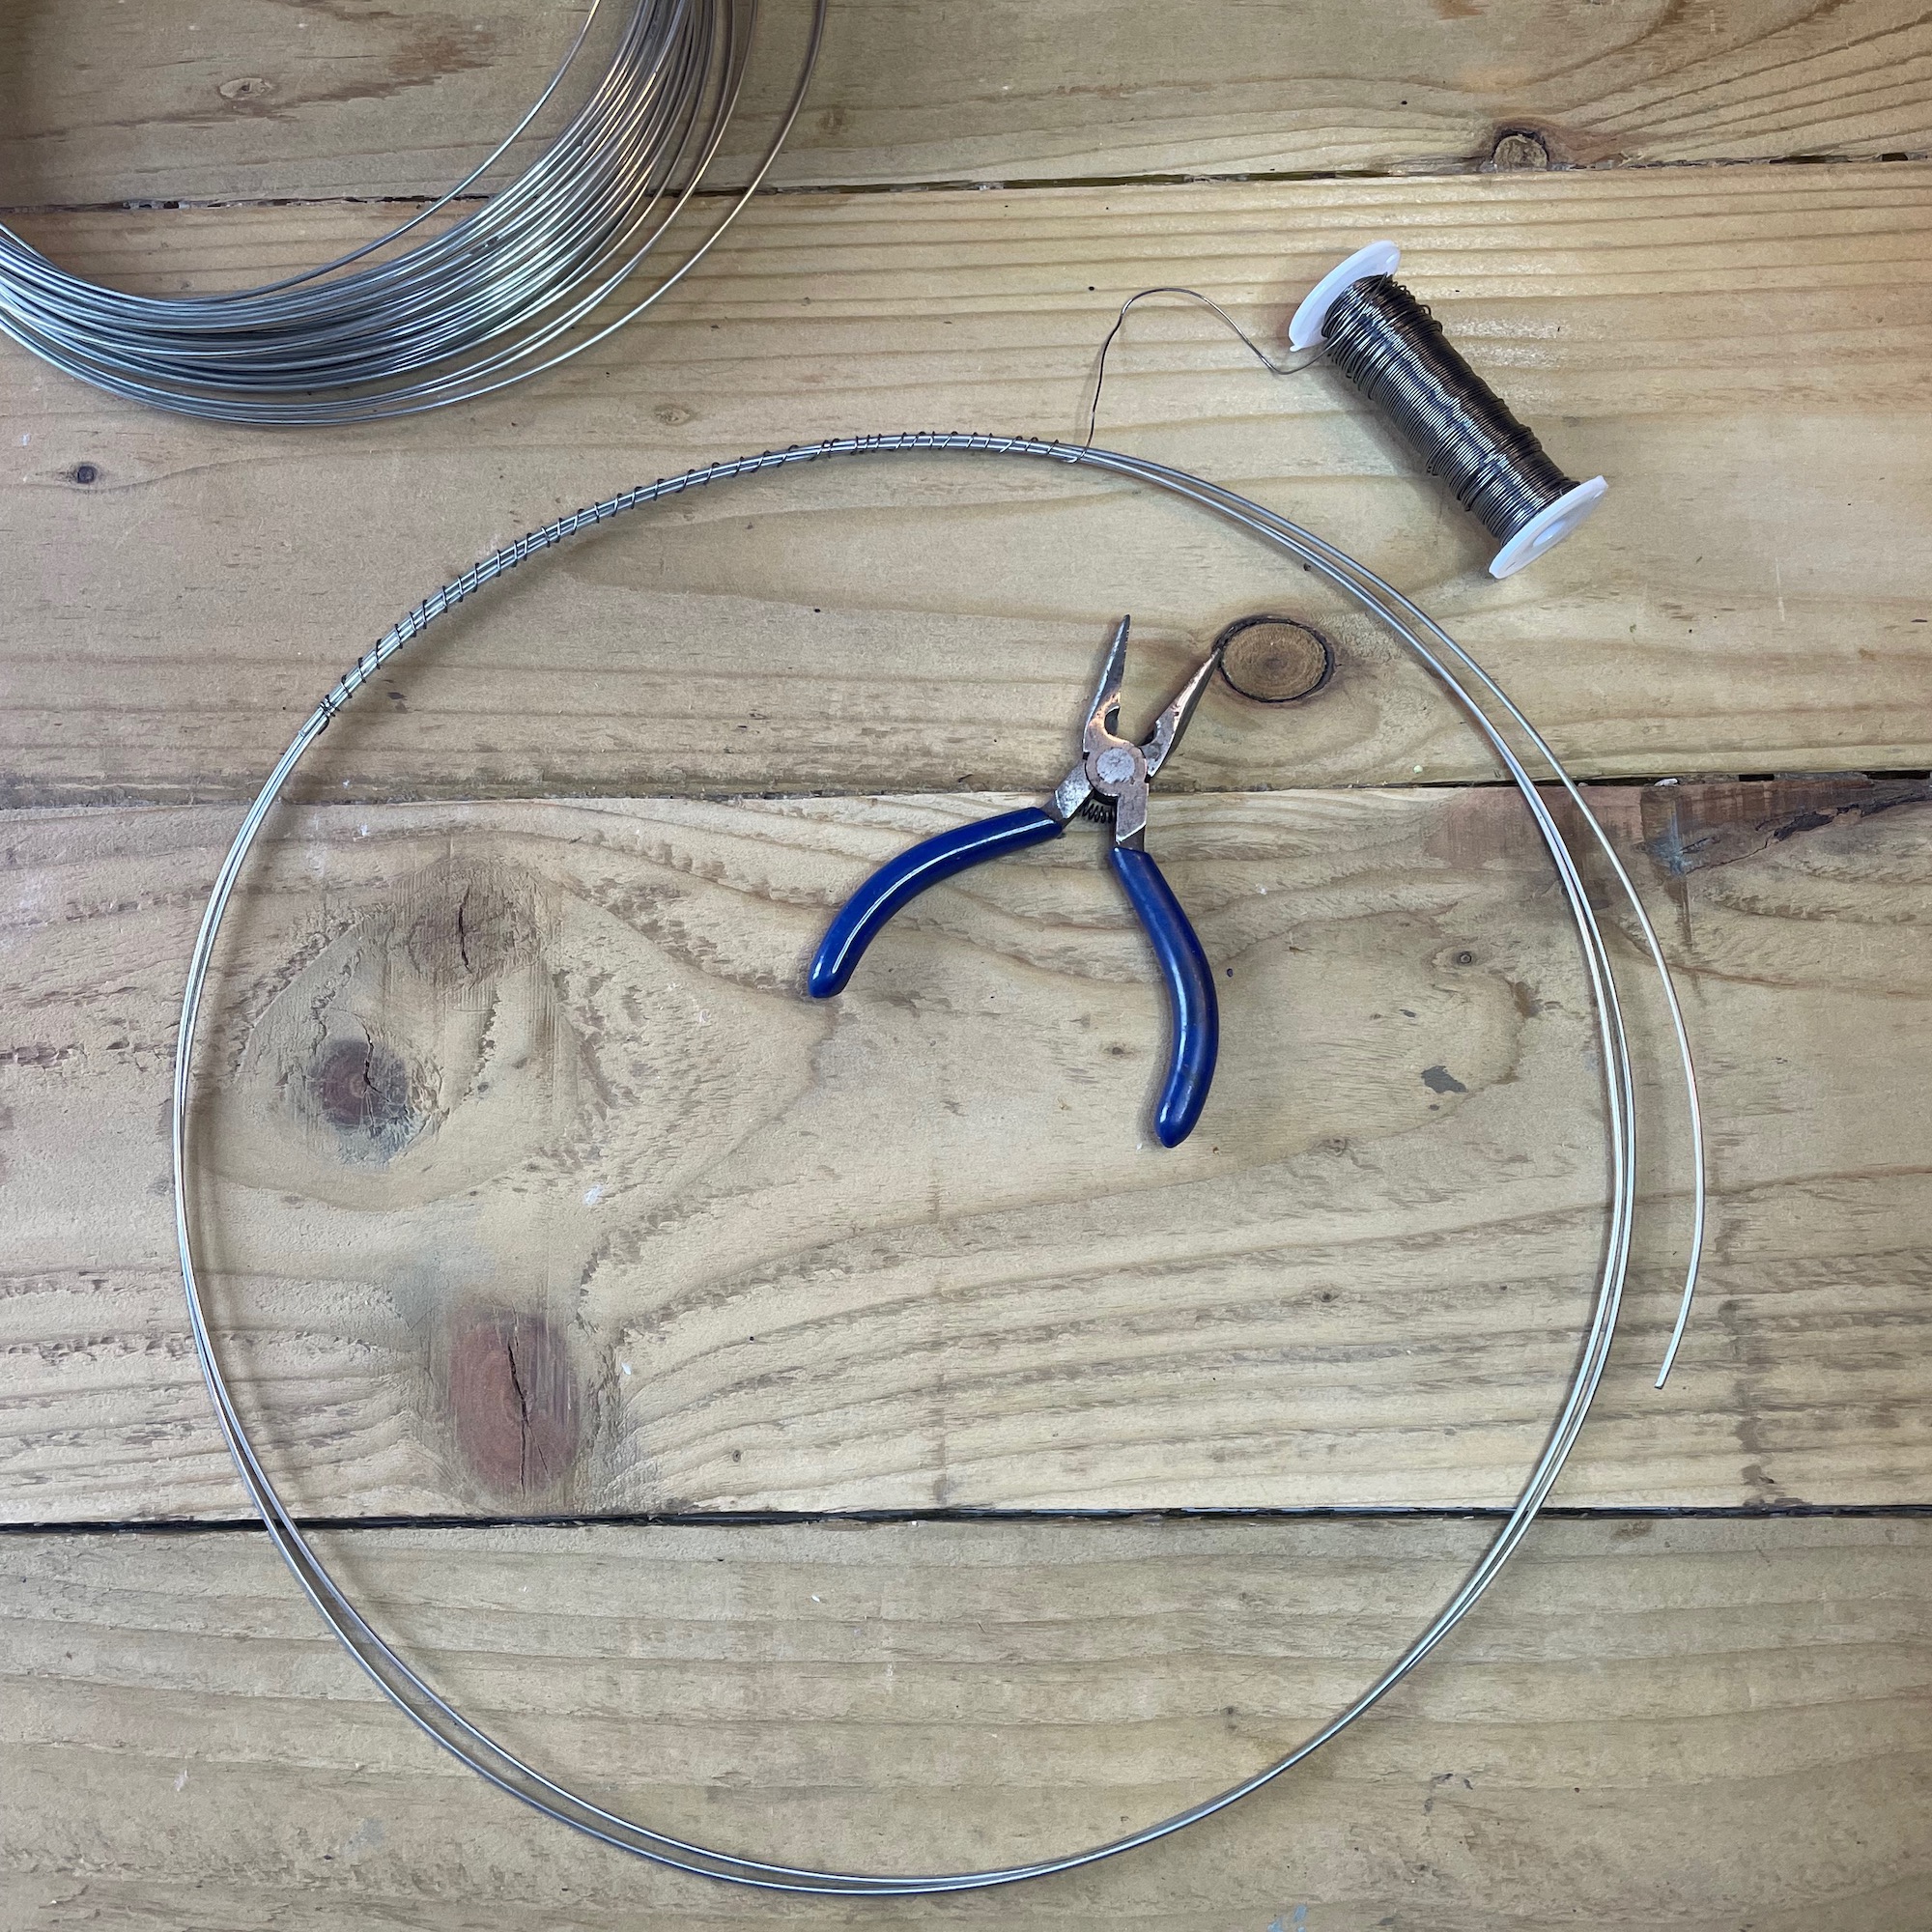
Begin by making your basic hoop shape.
Cut a 2m length of aluminium wire and bend it into a circle with a 30cm diameter and a double thickness of wire. There should be an overlap of wire approximately halfway around the hoop where you’ll have three layers of wire; this will form the base of the hoop.
Sign up to our newsletter for style and decor inspiration, house makeovers, project advice and more.
Use florist’s binding wire to wrap all the way around the hoop to hold it together and add strength. Keep checking as you bind the hoop to ensure it stays in a nice circular shape.
2. Make the wire flowers
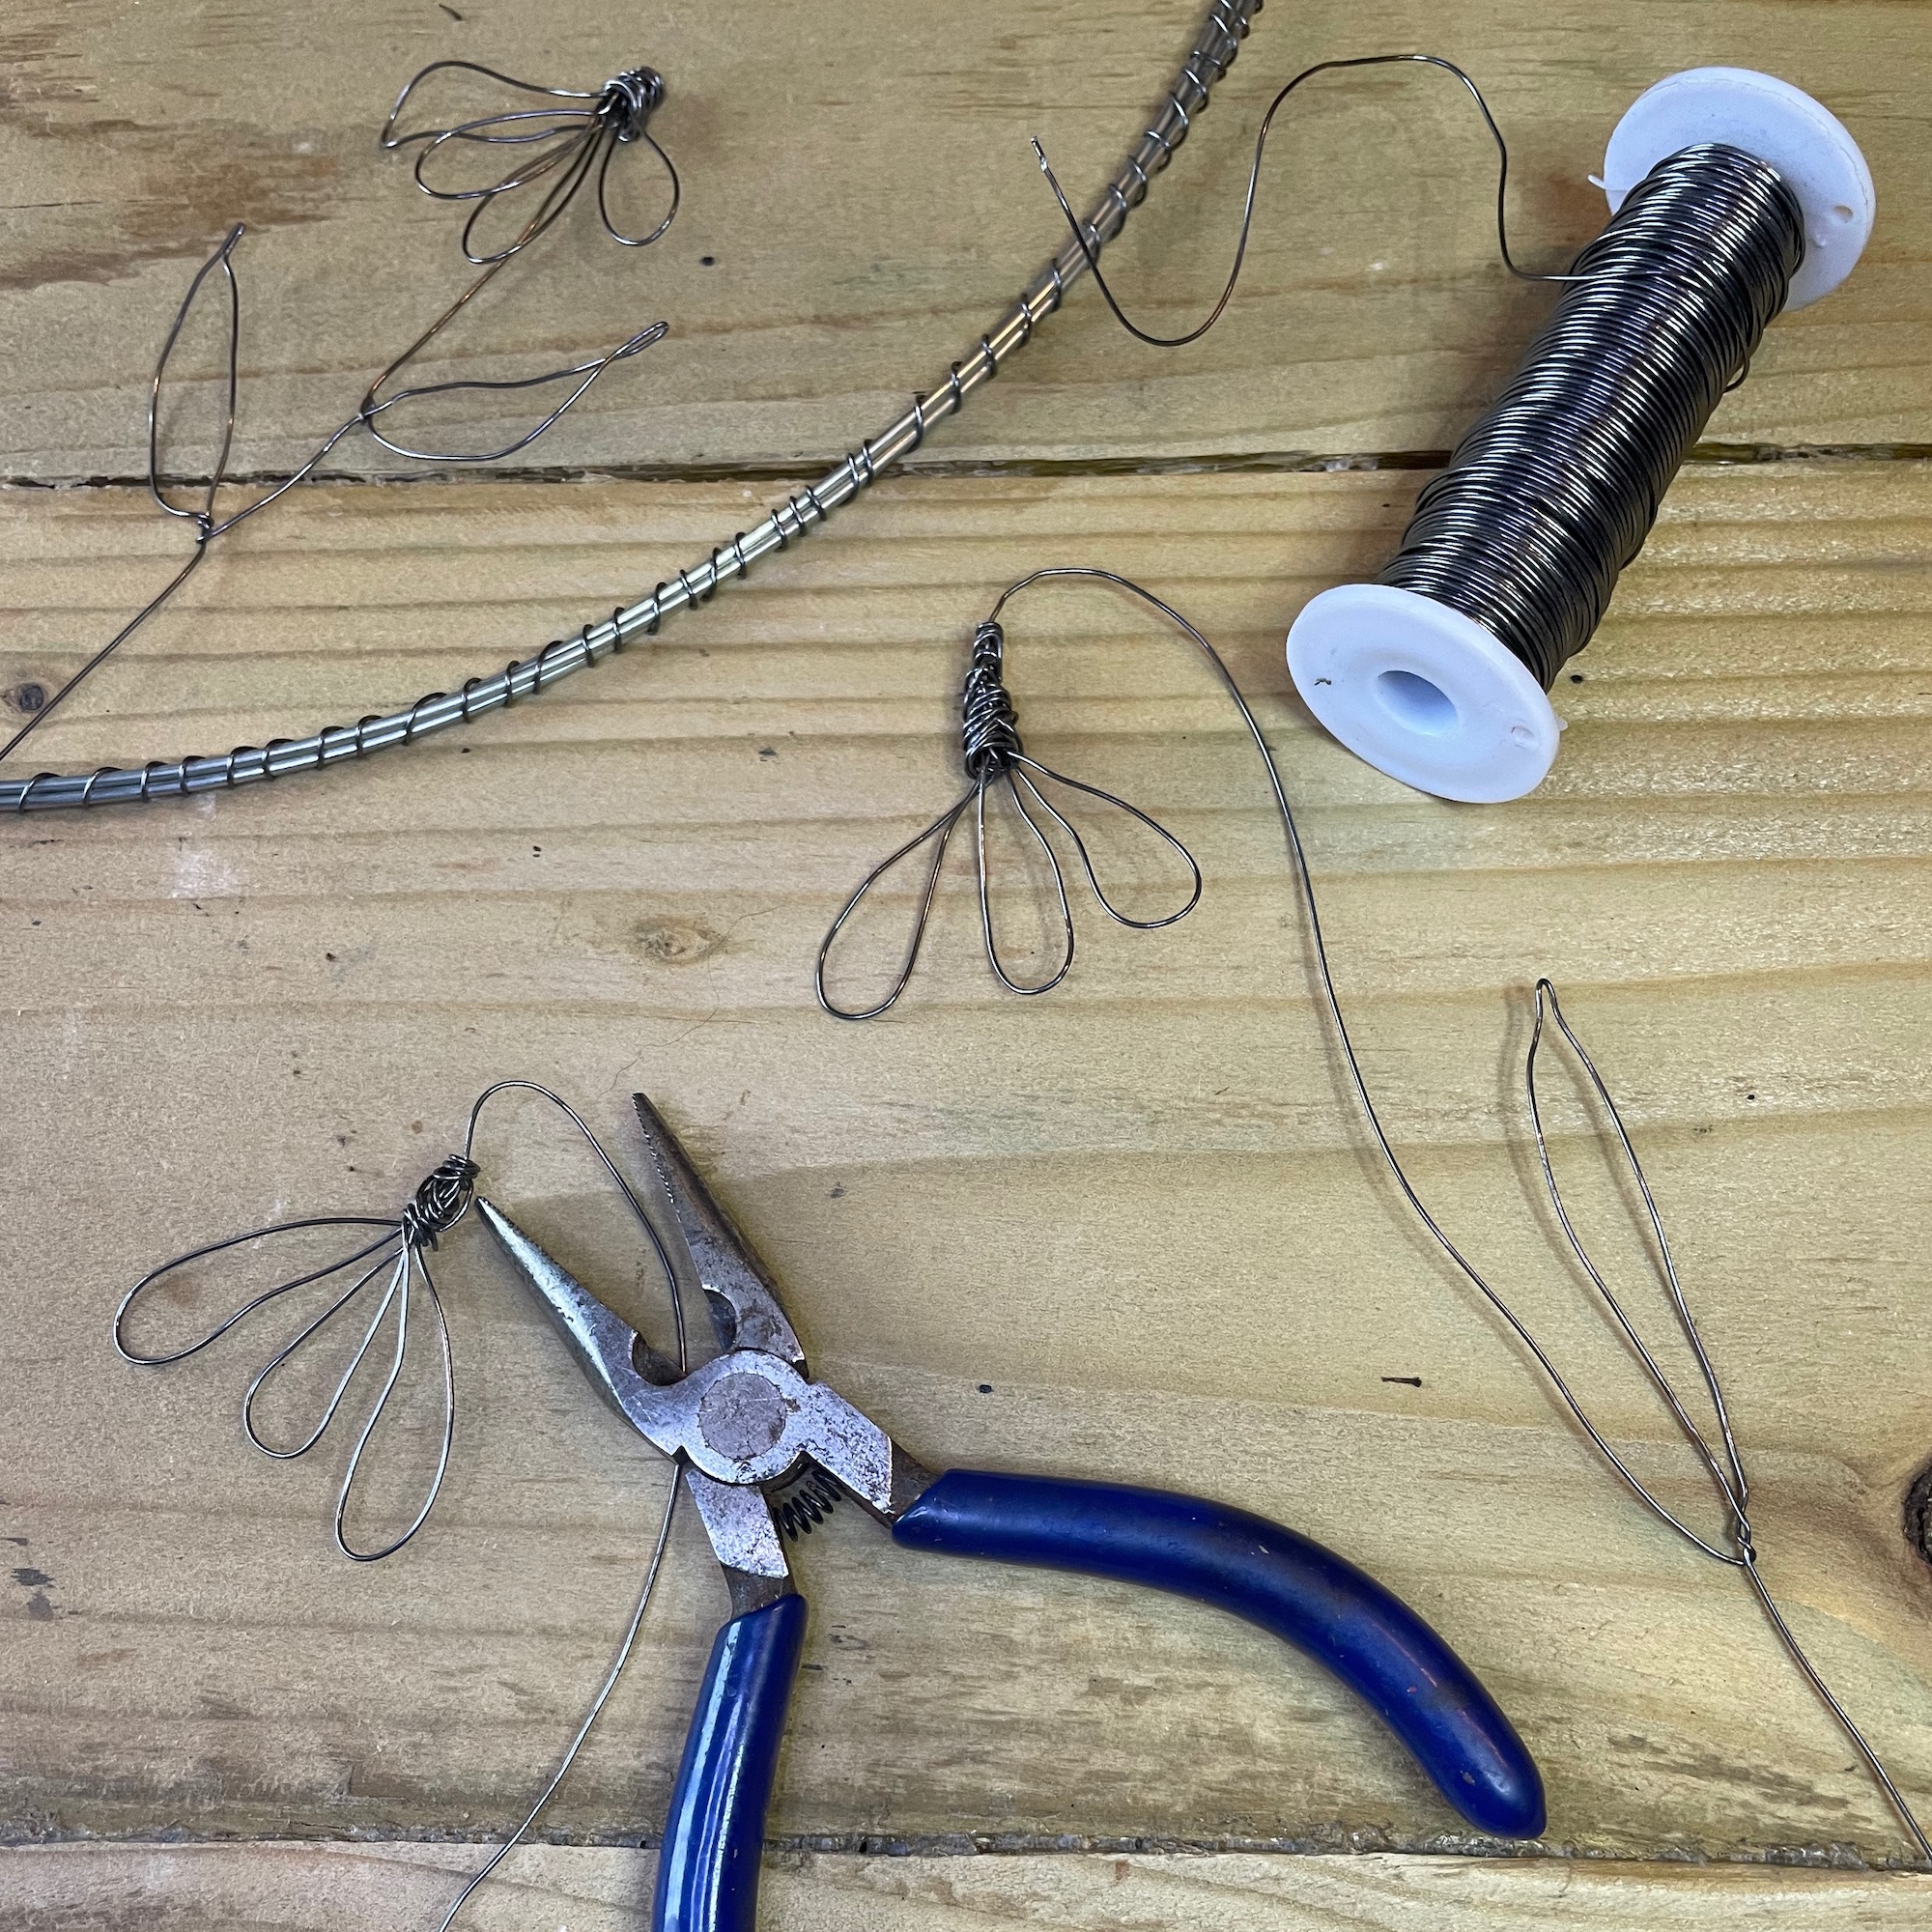
We made wire snowdrops. To make the flowers, cut a 30cm length of binding wire and make a loop halfway along it. Use jewellery pliers and your fingers to bend the loop into three petal shapes. Pinch the narrow ends of the petals together with the pliers and bind them together with the other end of the wire to form the bulbous ‘ovary’ of the snowdrop.
Make another loop further down the stem of the snowdrop, twist the base of the loop to hold it in place, then pinch the ends together to form a narrow leaf shape.
To attach the snowdrop to the wreath, simply wind the end of the stem tightly around the wire hoop.
3. Make the wire leaves
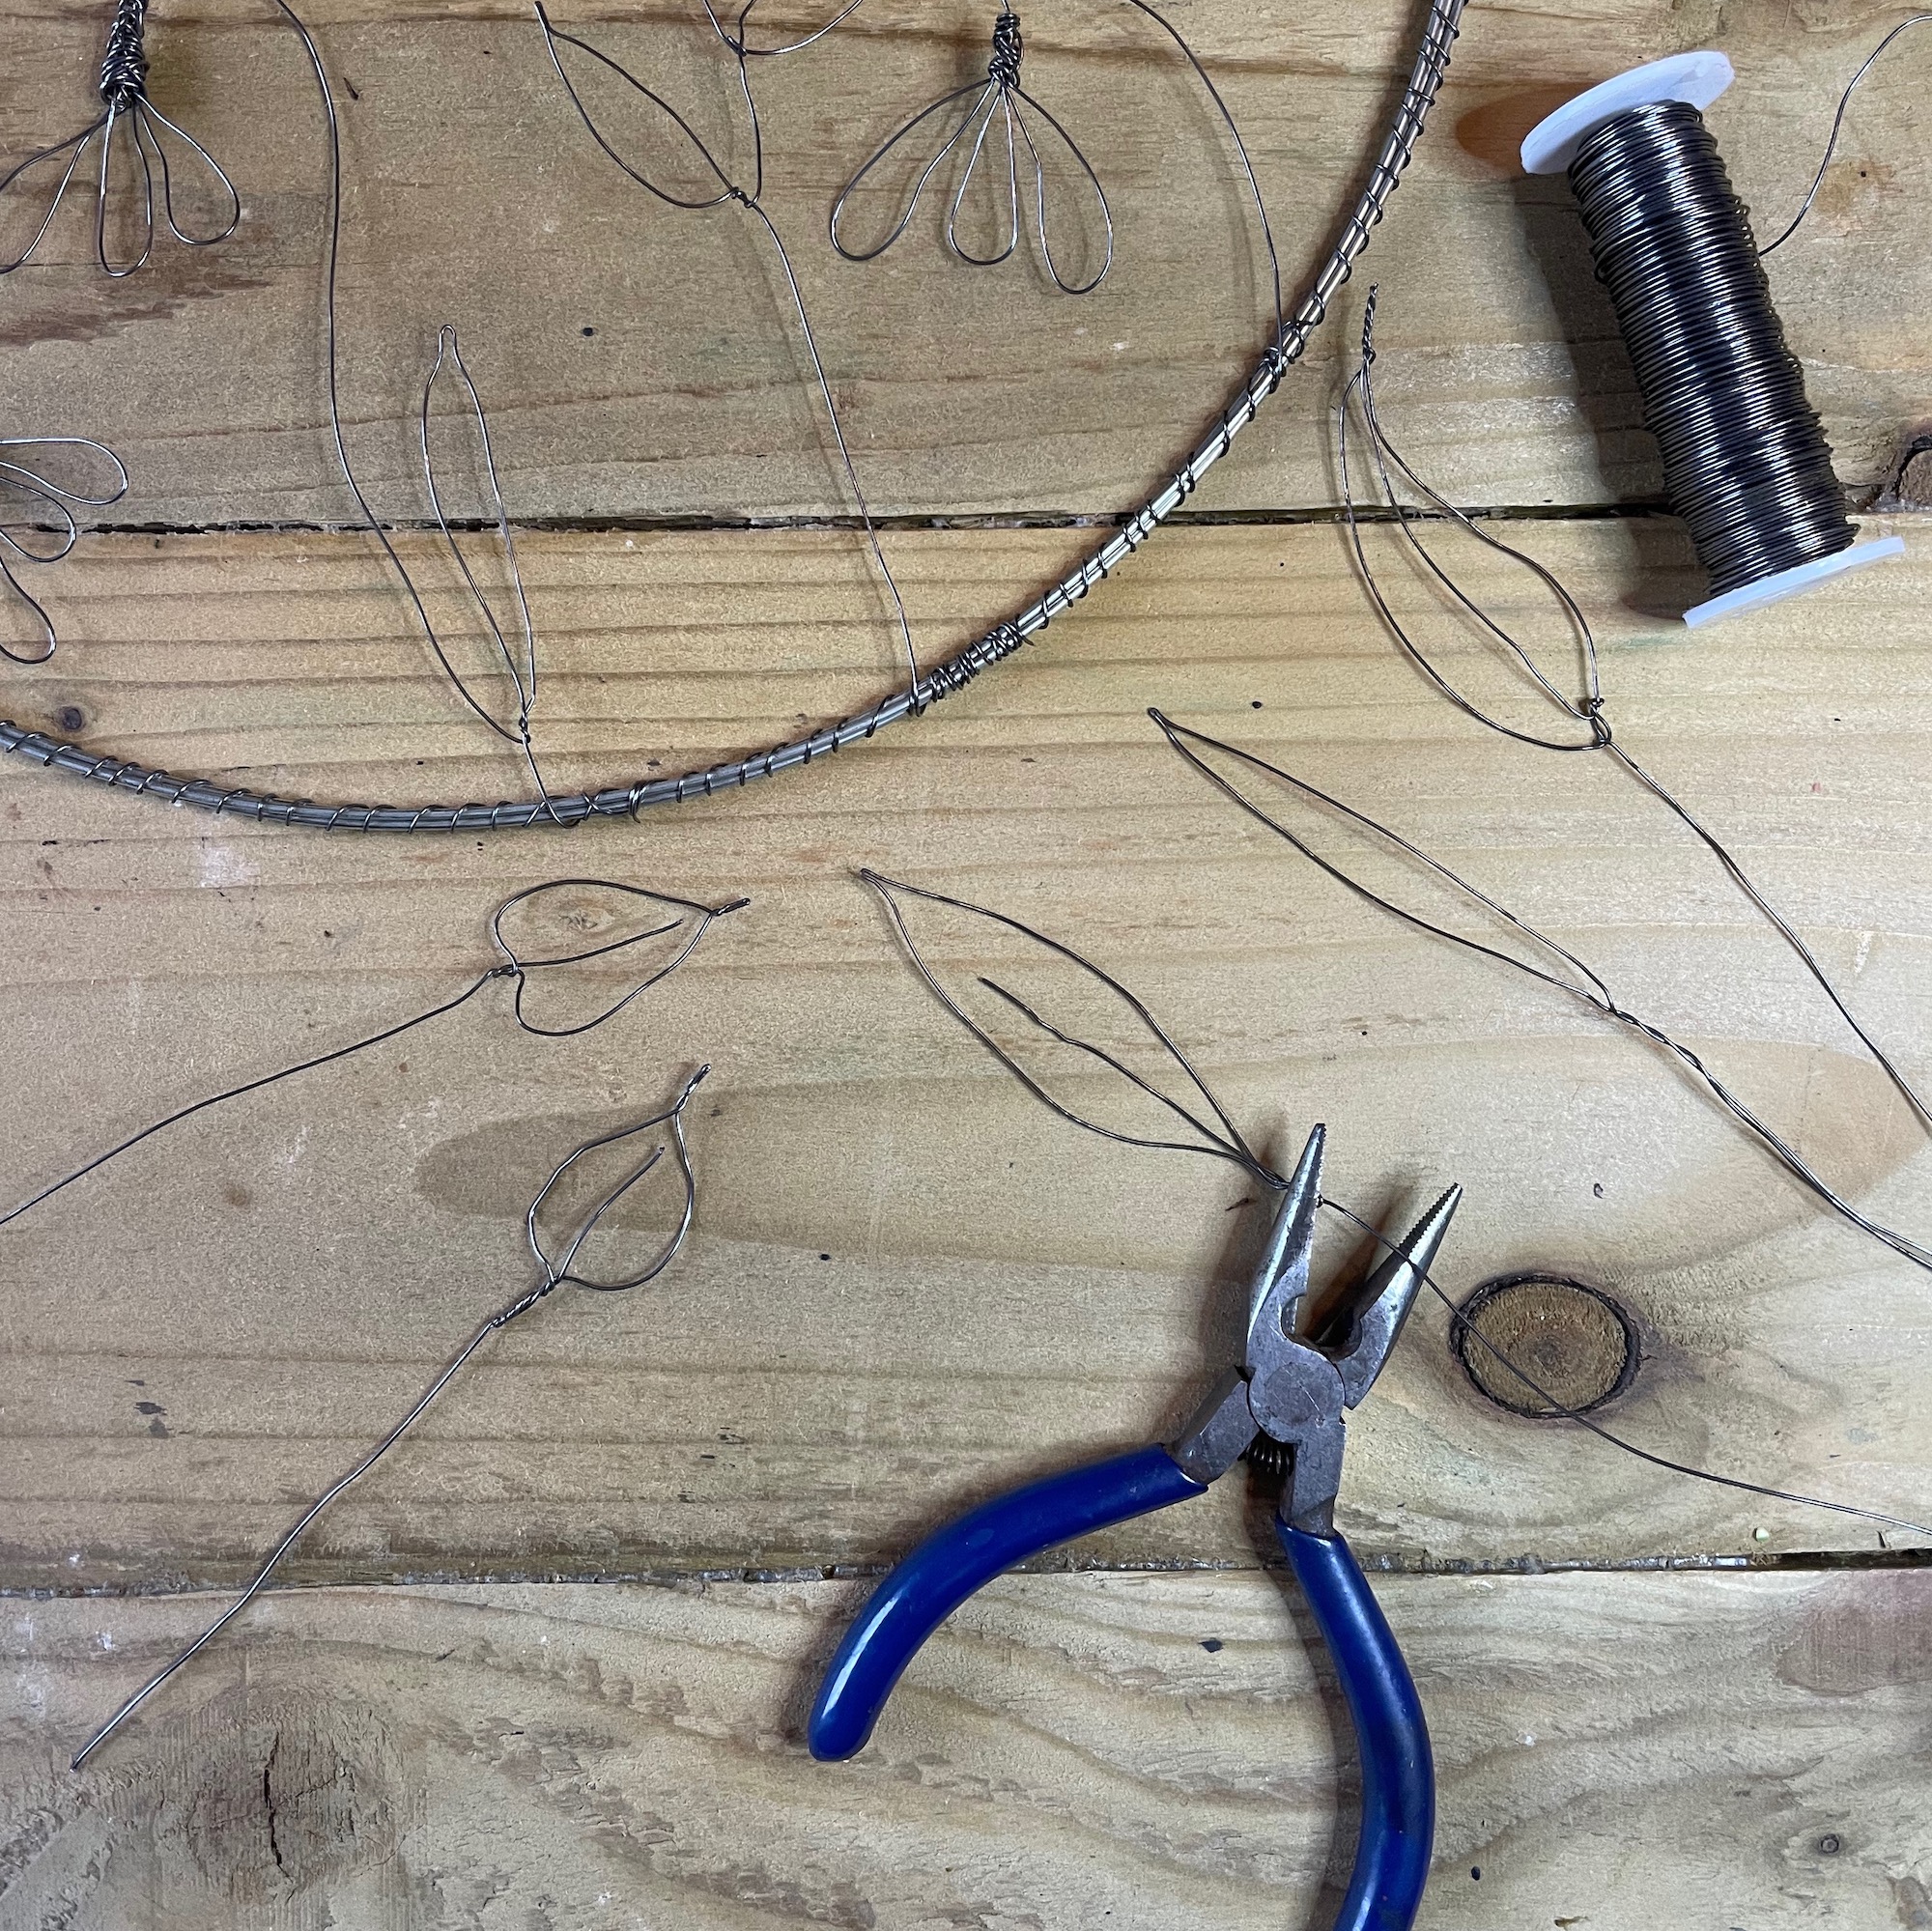
To create leaf shapes, cut a 20cm length of binding wire.
Make a loop at one end, leaving a ‘tail’ of wire, twist to hold the loop in place.
Use jewellery pliers to pinch the loop into your desired leaf shape, then bend the ‘tail’ into the centre of the leaf shape to create a ‘spine’.
To attach the leaves to the wreath, wind the ends of the stems tightly around the wire hoop, as before.
4. Make the wire grasses
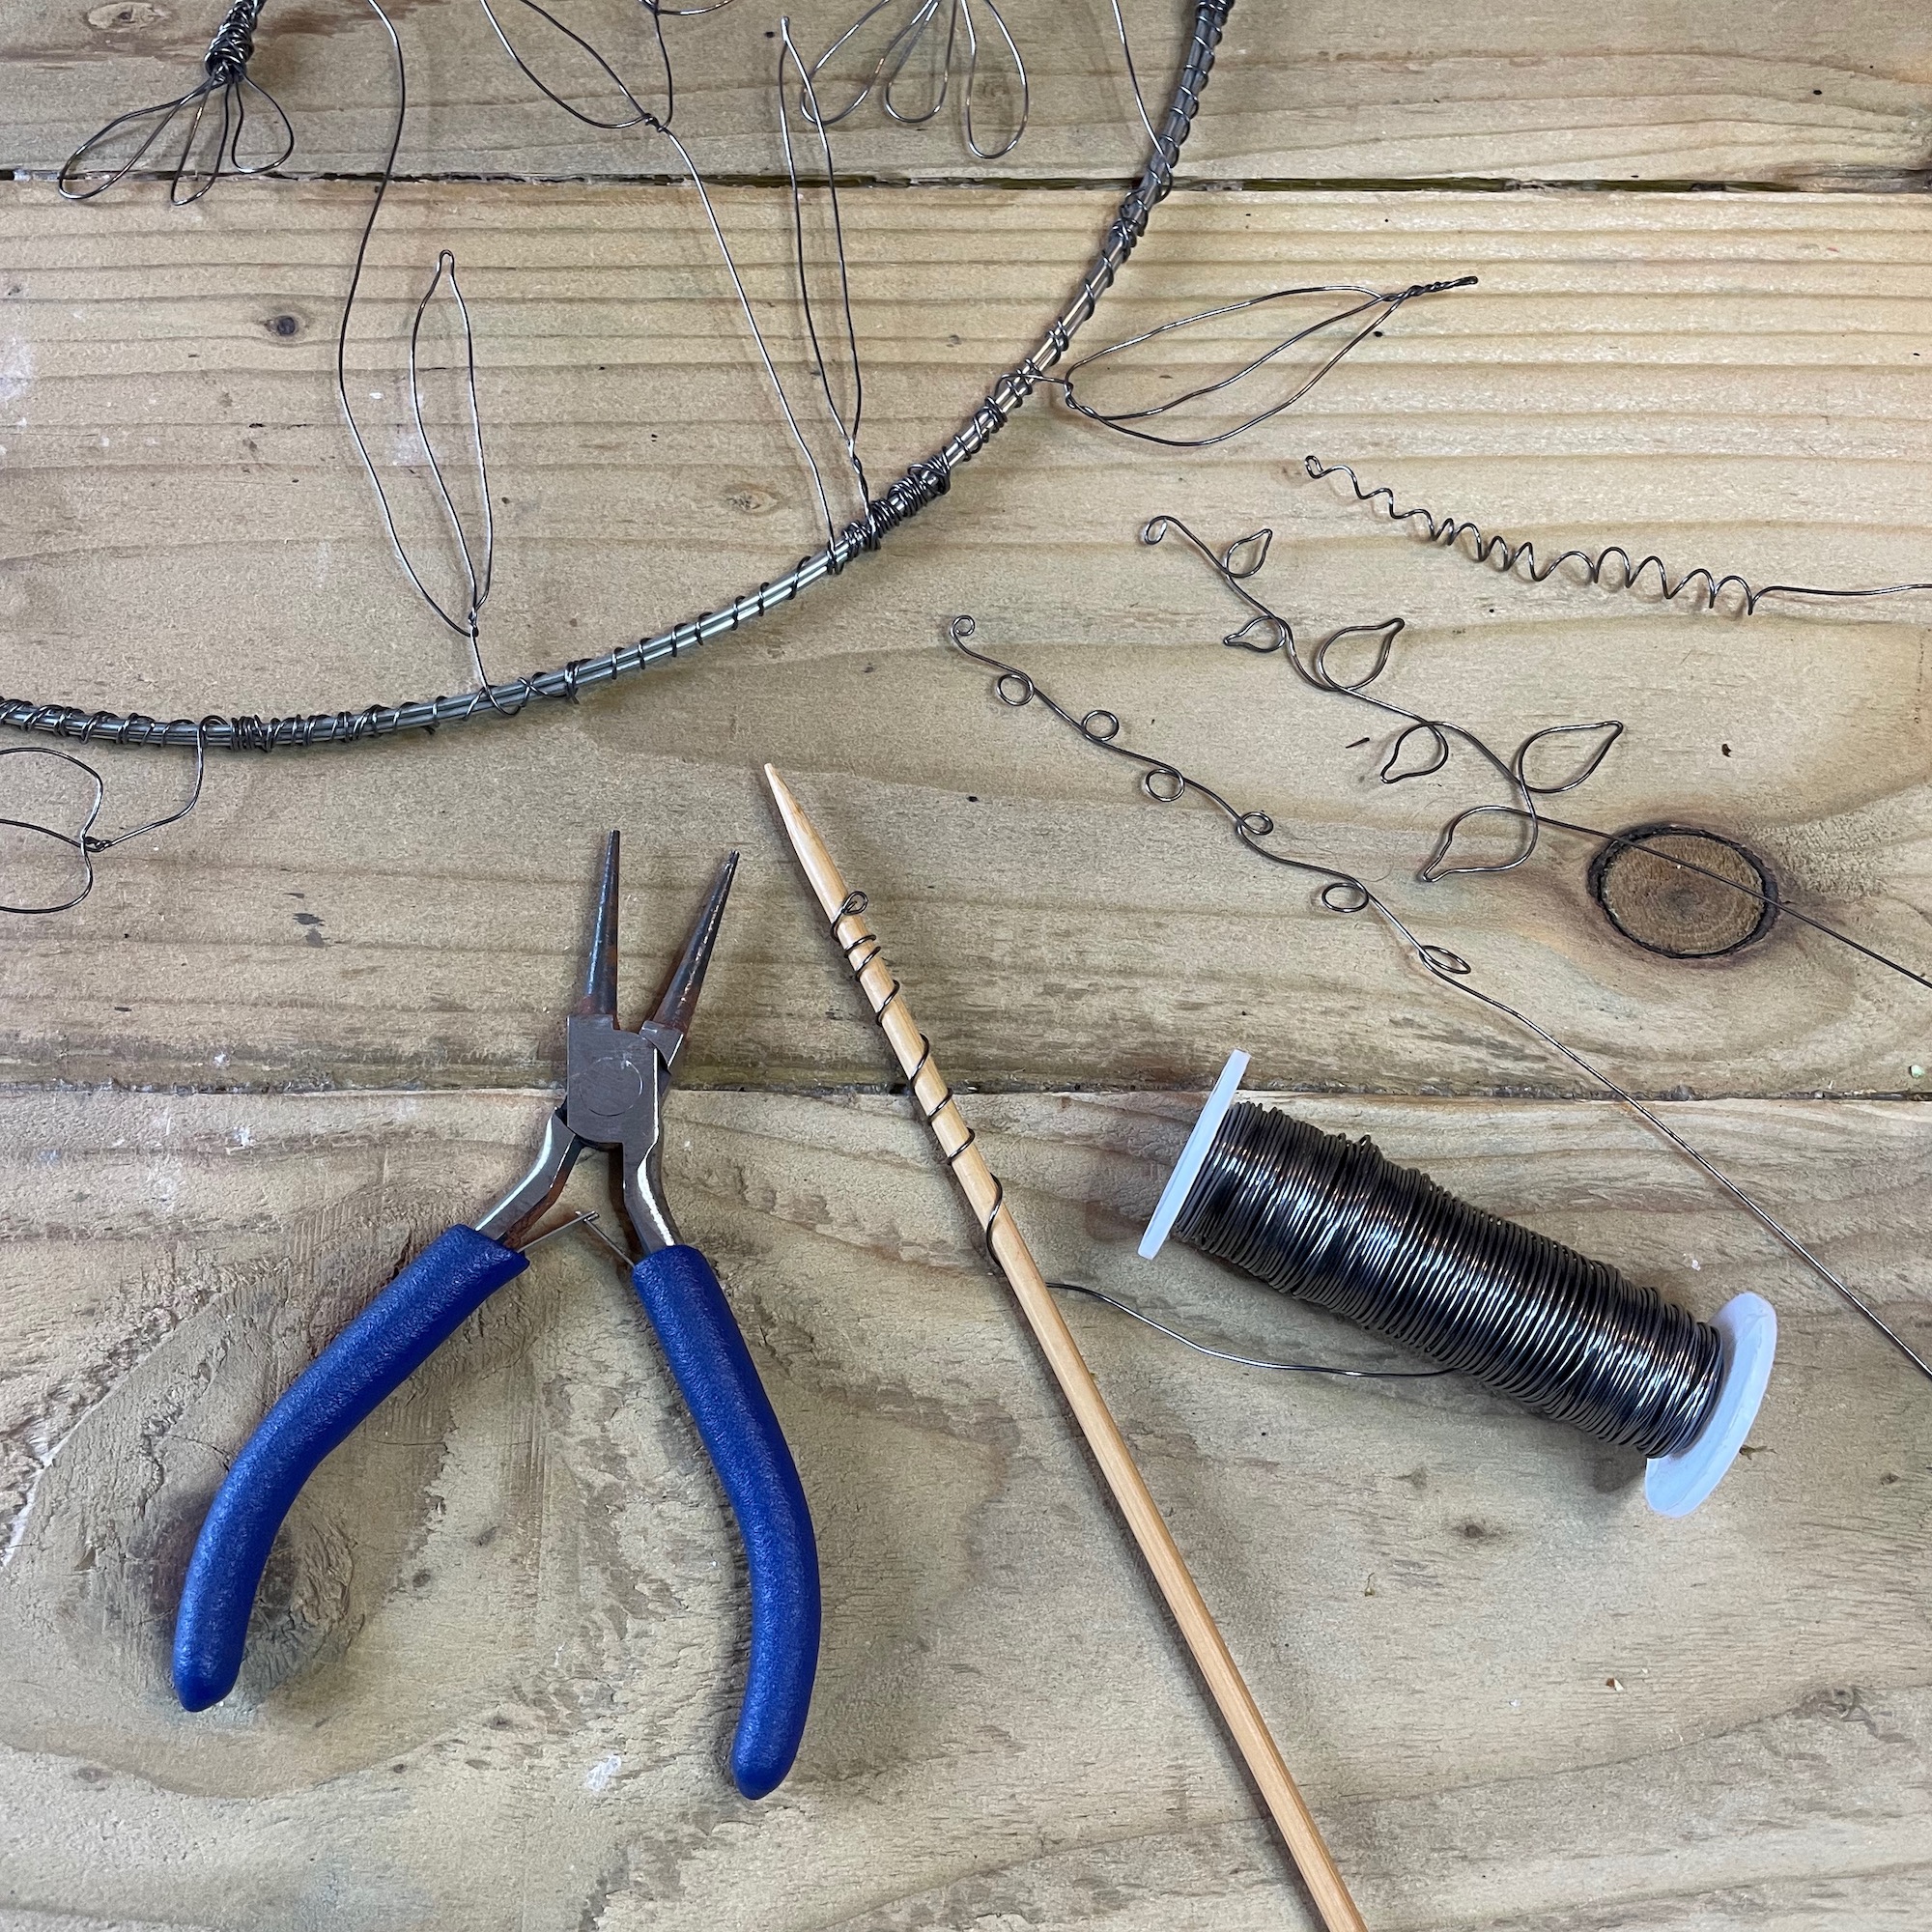
To form the wire grasses, you’ll need a knitting needle to wind the wire around.
Making the spiral grasses is easy, simply cut a 20cm length of binding wire and wind one end around the knitting needle to form a spiral, leaving 10cm wire straight at the other end.
To create the other grass shapes, cut a 20cm length of binding wire and wind it once in alternate directions around the knitting needle to create loops on either side of the stem. You can choose to keep these loops round, or pinch the ends with your pliers to form more pointed seed shapes. Attach the ends of the stems to the wreath as before.
5. Cut out the clay flowers
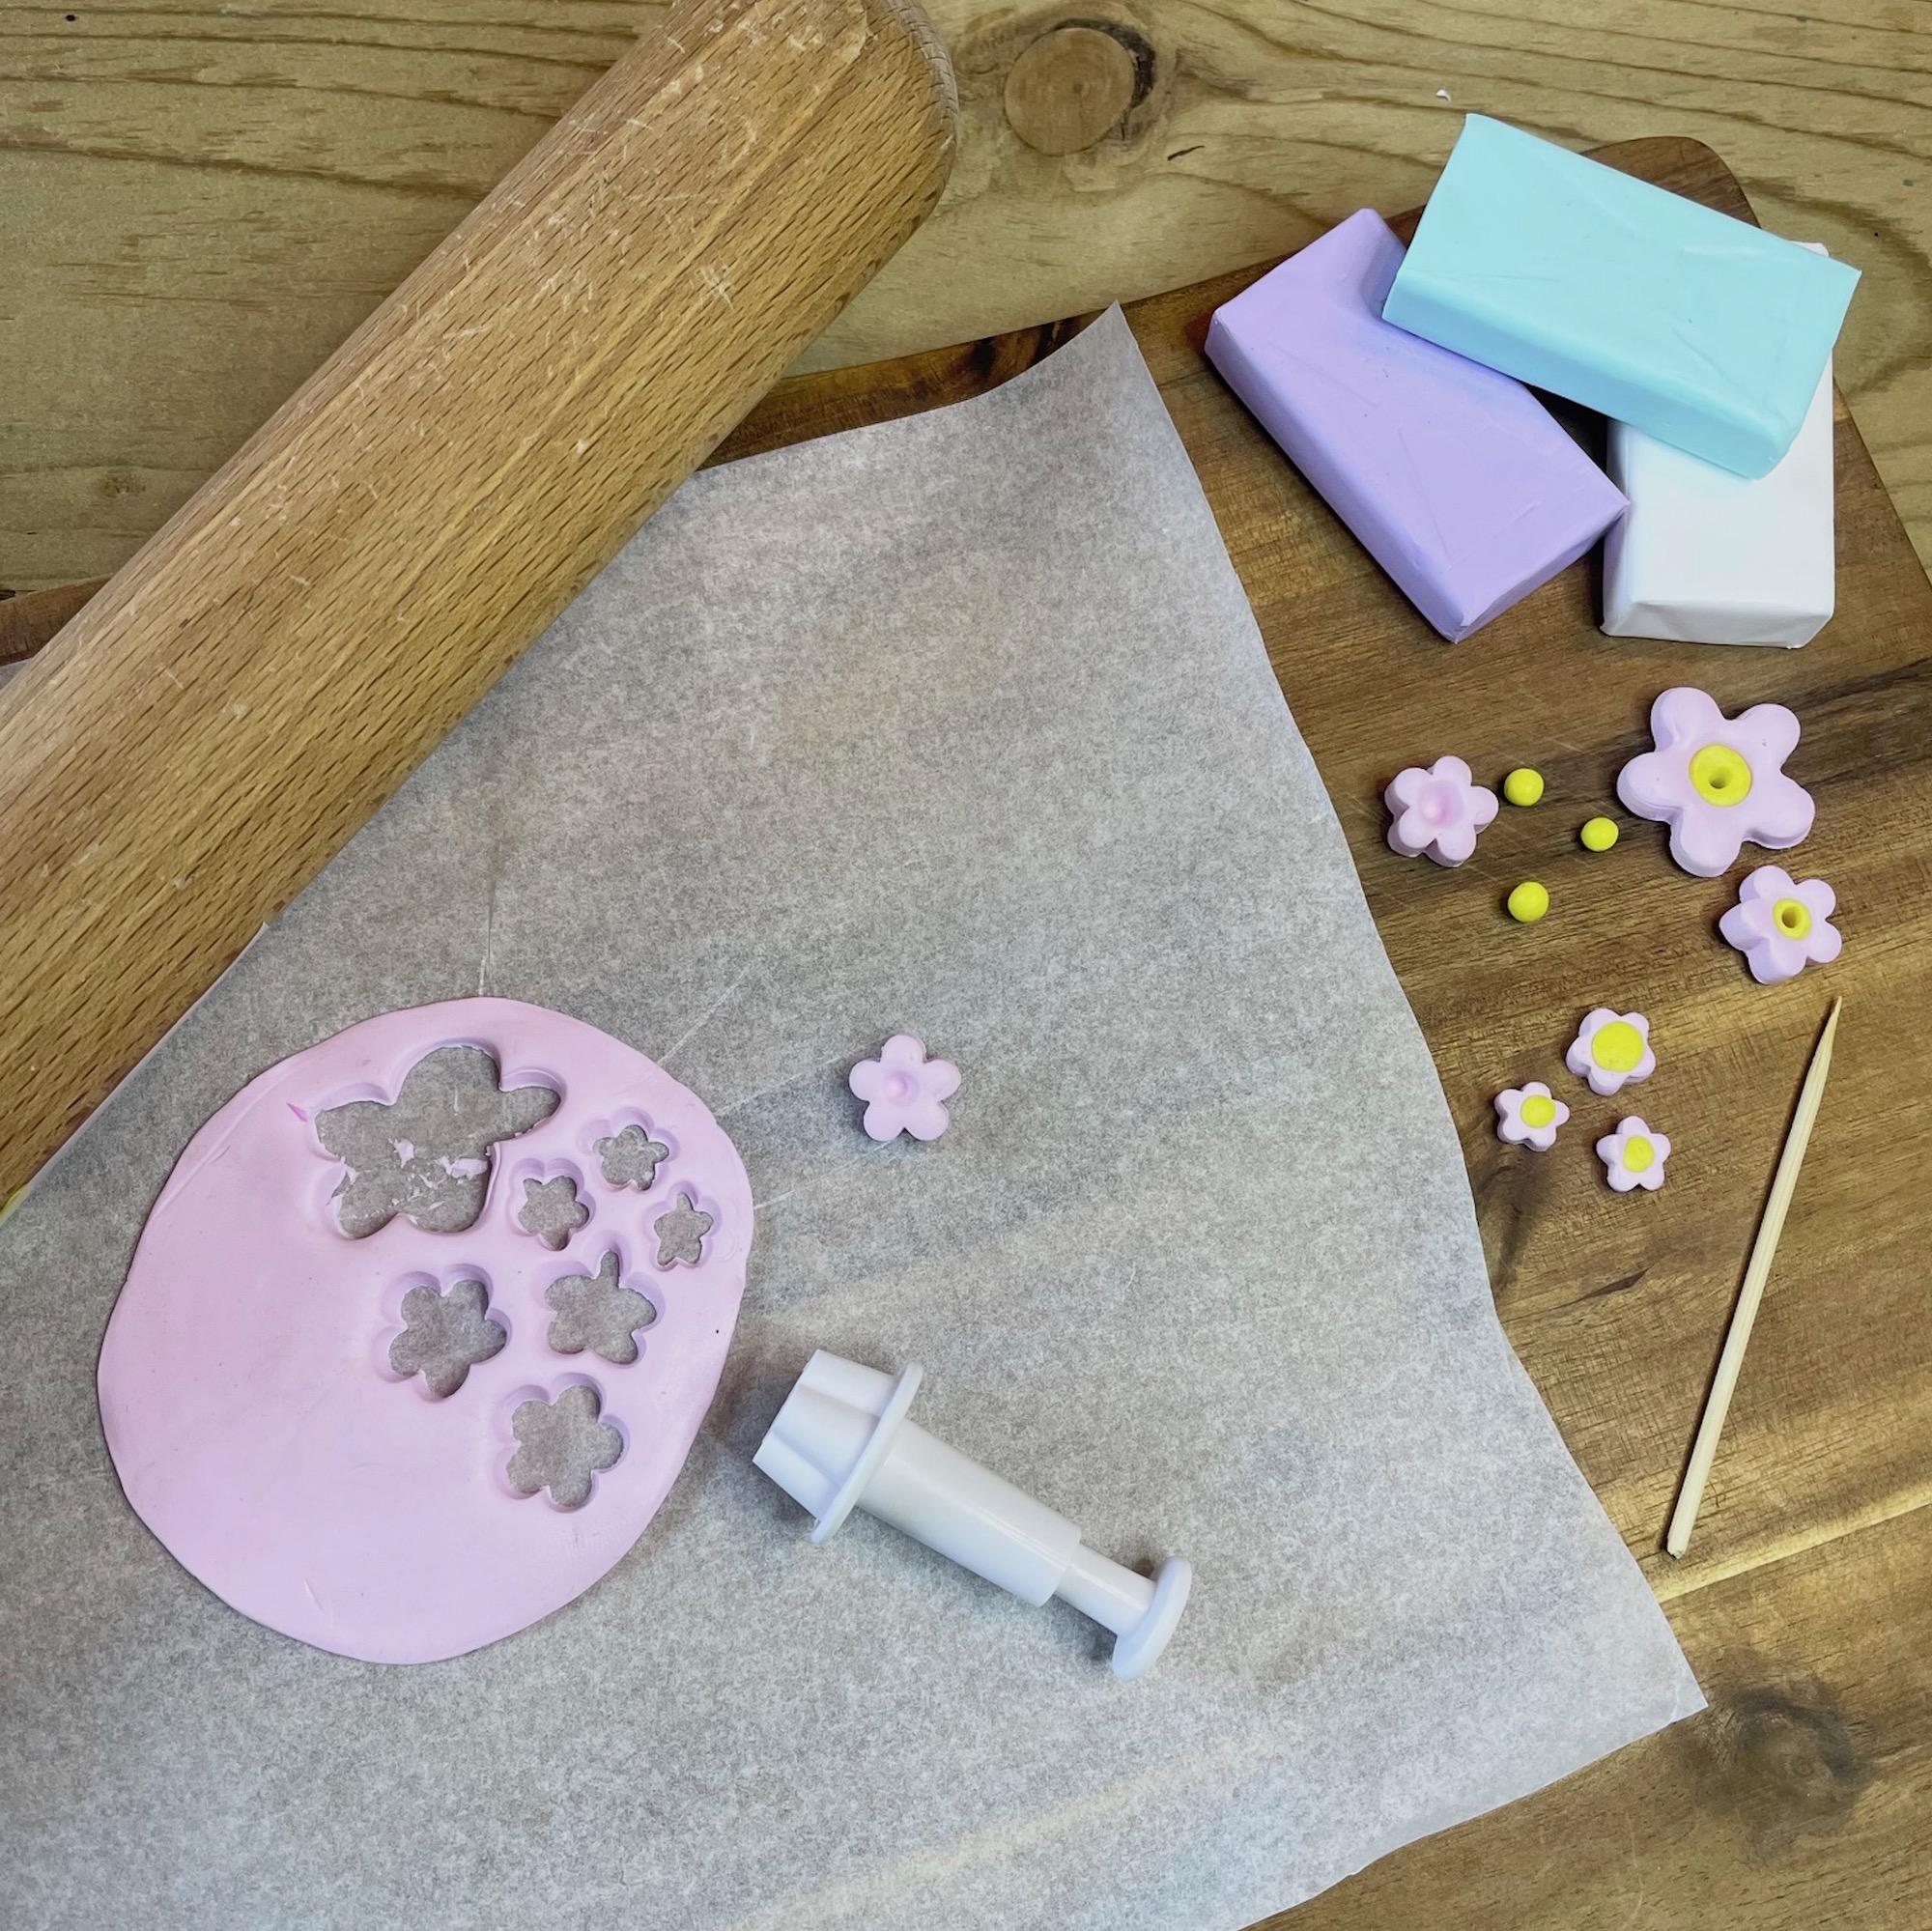
To create the clay flower shapes, roll out a block of polymer clay between two sheets of baking parchment to a depth of 2-3mm. The parchment will prevent the clay from sticking to your work surface and stop it picking up any fluff and dust.
Use icing cutters to cut a selection of flowers from the clay. Roll a small ball of yellow clay between your fingers and press it into the centre of each flower shape.
Use a scalpel to cut leaf shapes from green polymer clay. Make a hole in the centre of each flower and leaf, using a cocktail stick or skewer.
Place the flowers and leaves on a baking tray, lined with parchment, and cure in a preheated oven at 110ºC for 30 minutes.
6. Construct the wreath
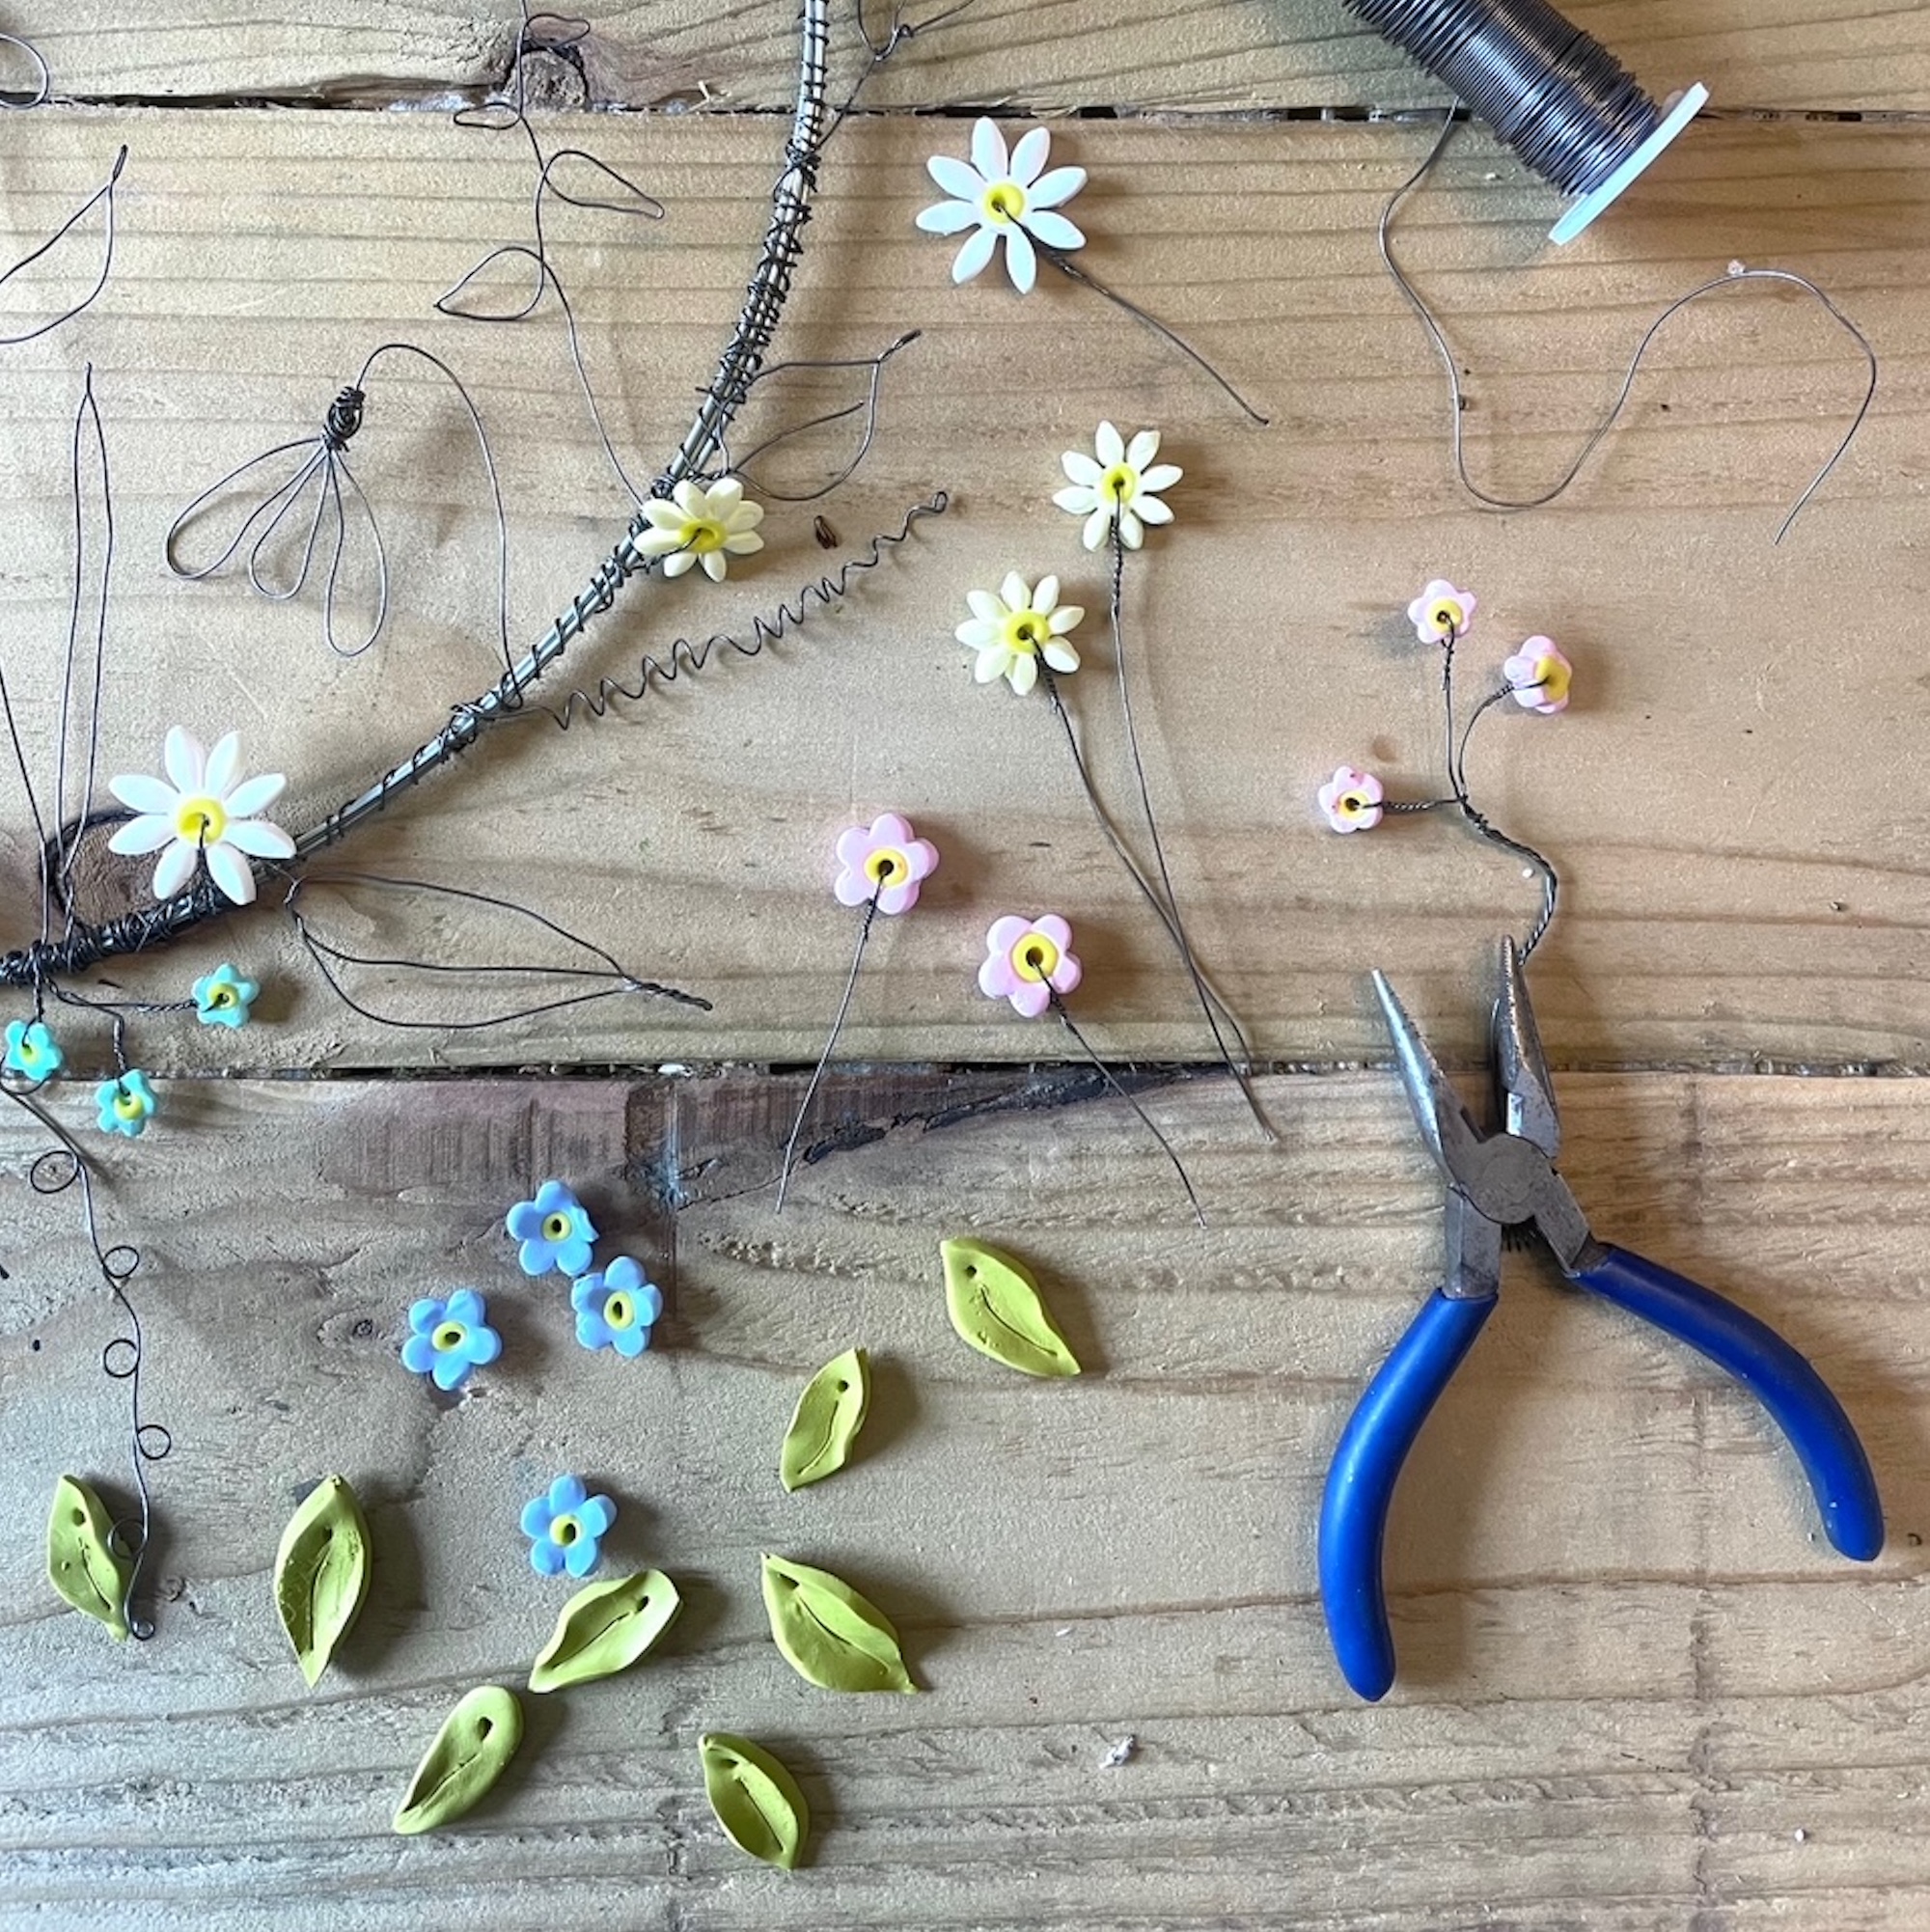
Once the leaves and flowers have cooled, thread a 10cm length of wire through the hole in each one and twist with your pliers to hold the clay firmly in place to stop it from flopping.
As before, wind the stems of the flowers and leaves tightly into position between the wire snowdrops, leaves and grasses on the wire hoop. Finally, attached a length of ribbon to the top of the wreath to hang it from.
Your beautiful wreath should brighten up any wall or door and last for years to come.

Anna-Lisa is a writer, crafter and smallholder living in Devon, where she creates unique pieces and runs workshops from her studio.
You must confirm your public display name before commenting
Please logout and then login again, you will then be prompted to enter your display name.