DIY outdoor furniture ideas – get creative with clever makes and easy upcycling
Try your hand at a spot of DIY, with these easy outdoor furniture makes that won’t cost a fortune

Warmer weather means that we’ll soon be spending more time out and about in our gardens, so sprucing up outdoor spaces is a top priority. If garden furniture is looking past its best and needs replacing, there are plenty of easy DIY outdoor furniture ideas that are worth a try and won’t cost a fortune to put together.
Repurposing something unused or unloved, or using recycled materials to create a new piece, is far kinder to the environment than buying new and can save you money too. Plus there’s the joy of knowing that you’ve created something yourself and have a unique one-off item rather than something that’s mass produced.
DIY outdoor furniture ideas
If it’s your first attempt at making your own DIY outdoor furniture, then start small and attempt an easy make that doesn’t require any expert carpentry skills first. Repurposing existing pieces or revamping an item with paint or new upholstery shouldn’t be too tricky to do, and as your skills get better and confidence grows, you can attempt trickier projects.
Using recycled materials, such as reclaimed timber, old wooden pallets and scaffolding boards is a brilliant way of preventing waste and keeping costs down. While making use of any leftover paints, wood stains, fabric remnants and trims will cost nothing and is more eco-friendly than throwing unused materials away.
1. Use pallets to make simple garden seating
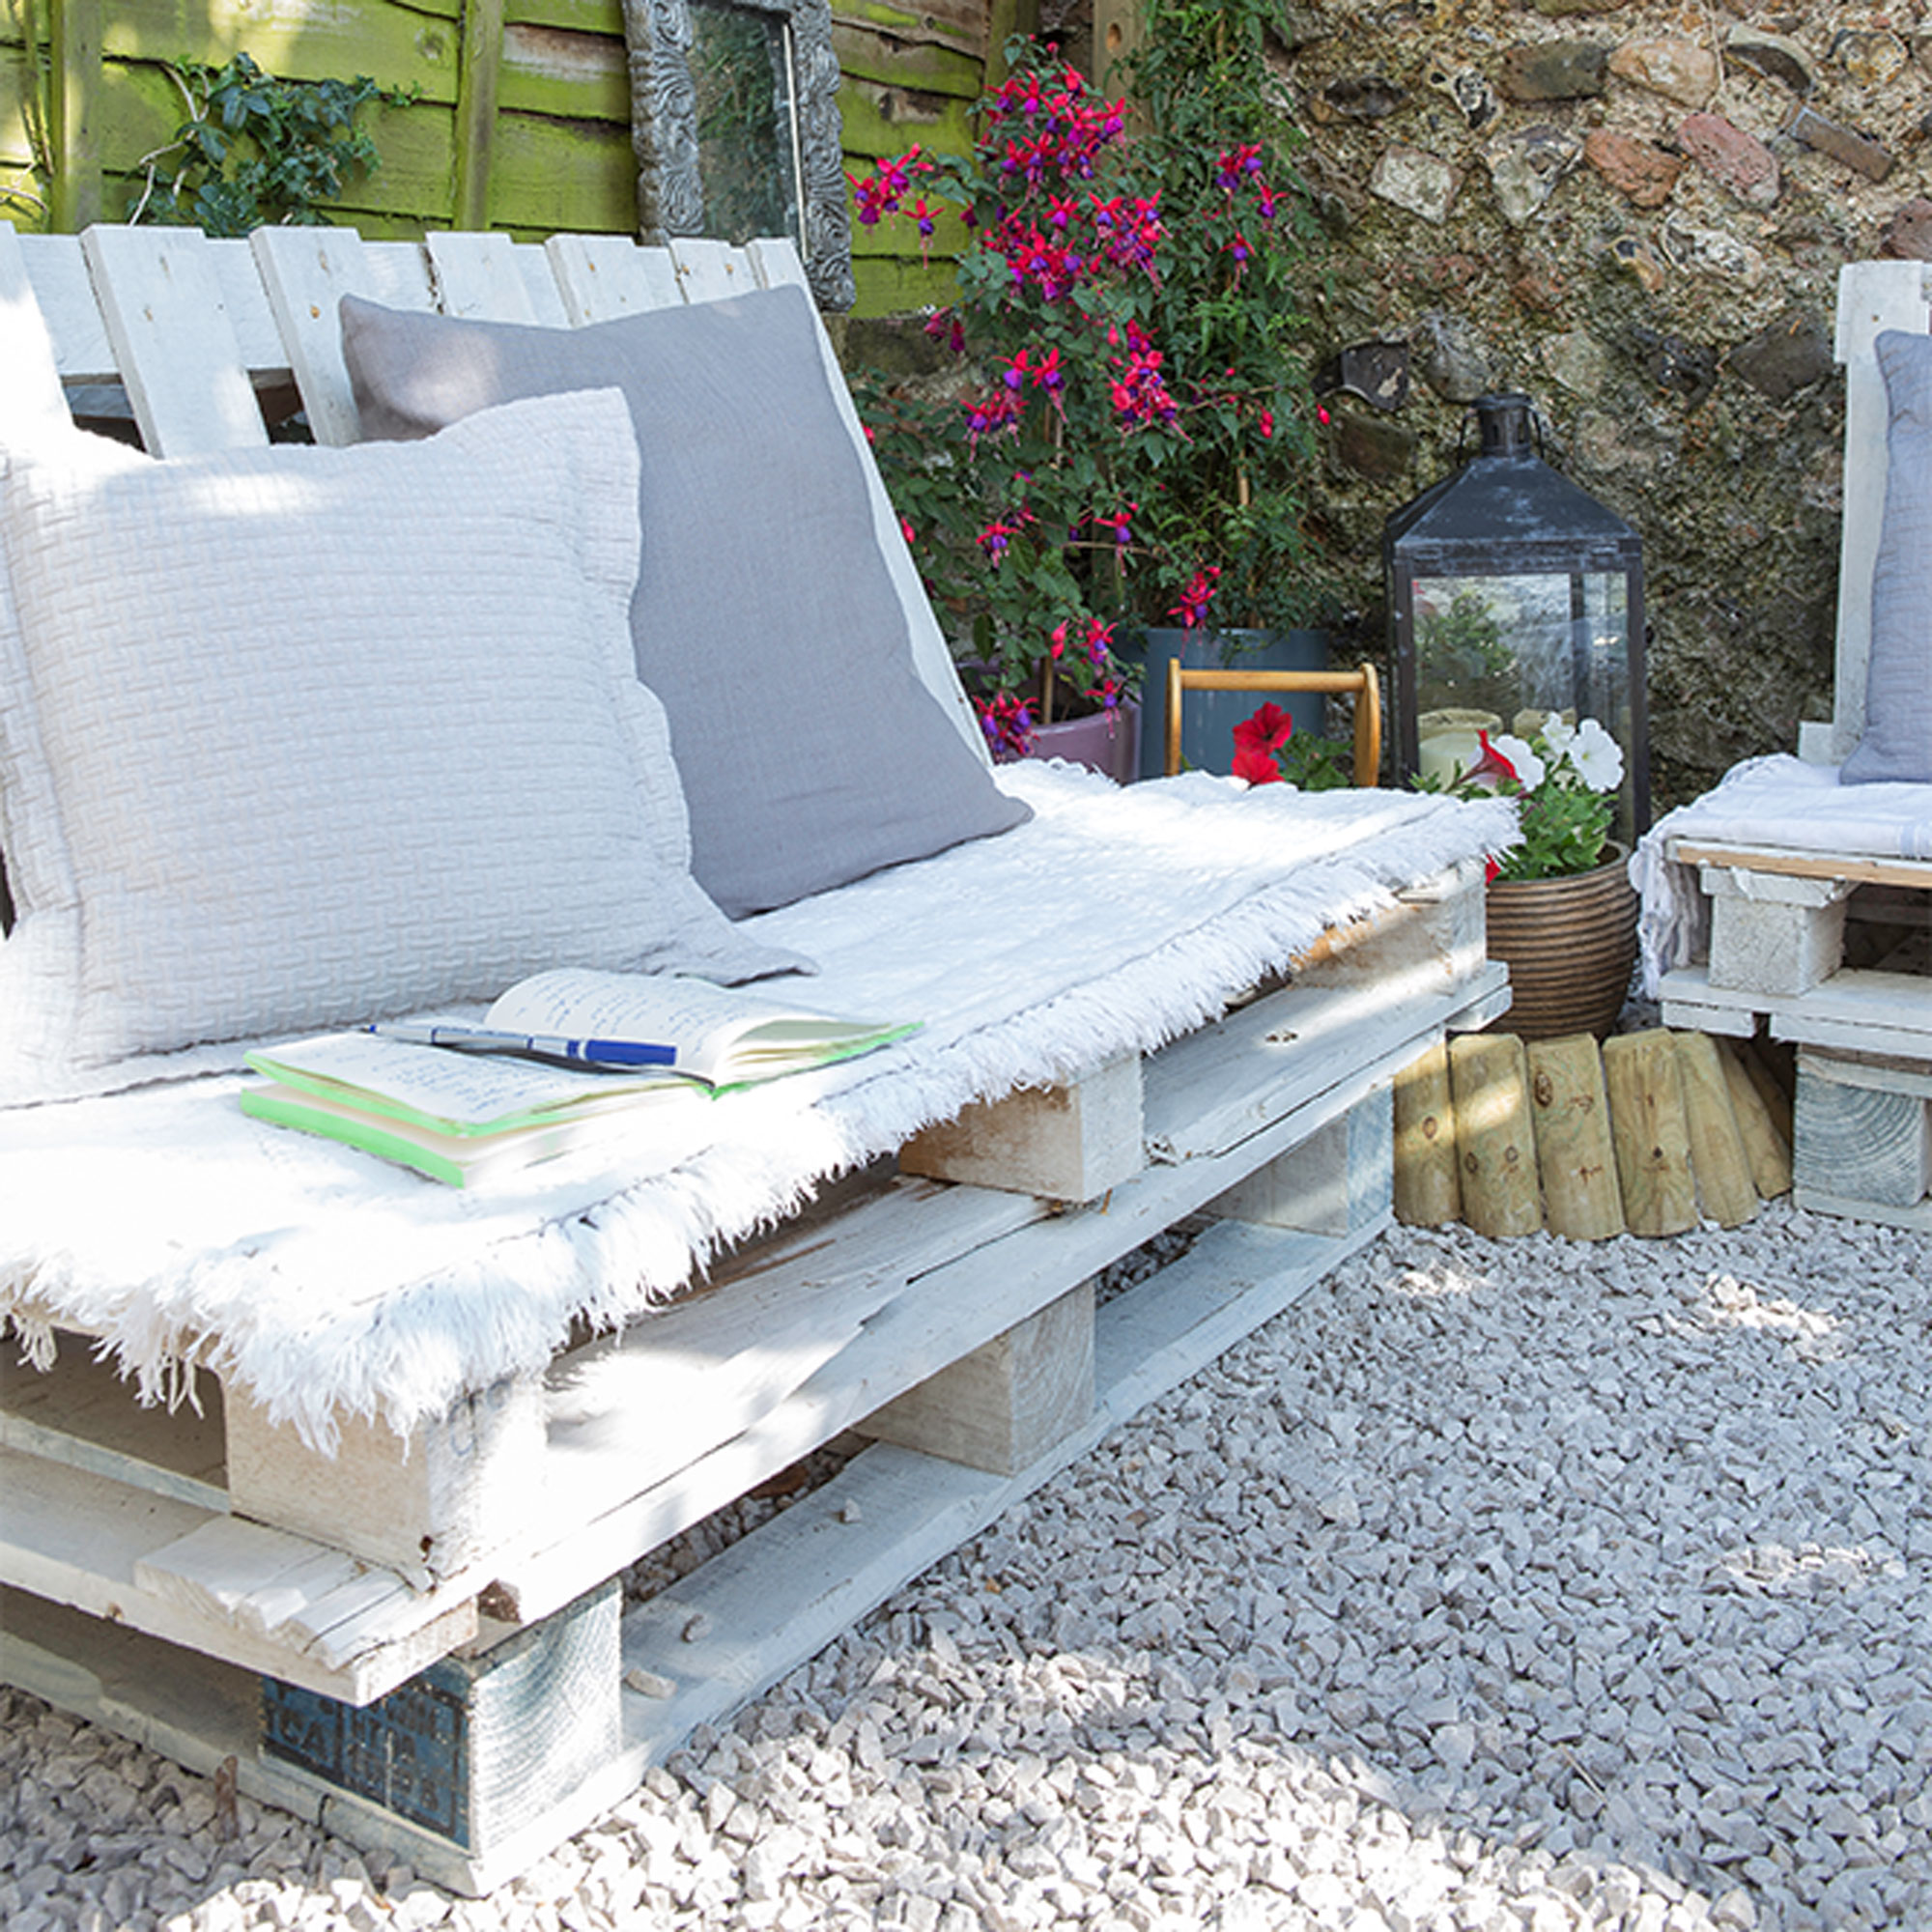
Put together a relaxed seating arrangement for a patio or deck using a salvaged wooden pallet idea. As with any project that uses salvaged wood, check the wood thoroughly first to make sure that there are no protruding nails or staples and give the surface a light sanding over to get rid of any rough edges and wood splinters.
Creating a simple outdoor bench like this one is super-easy to do. You’ll need three pallets of roughly the same size. Start by stacking two pallets, one on top of the other, to form your base and use a drill and screws to secure them together. Use the third pallet, propped in a vertical position to create the back of your bench, securing it in place with the drill and screws.
Style your pallet seating by painting it with a colourful wood finish or try a natural wood stain for a more rustic look. Then simply add cushions and throws to make it super-comfy.
Get the Ideal Home Newsletter
Sign up to our newsletter for style and decor inspiration, house makeovers, project advice and more.
2. Tackle an easy garden coffee table
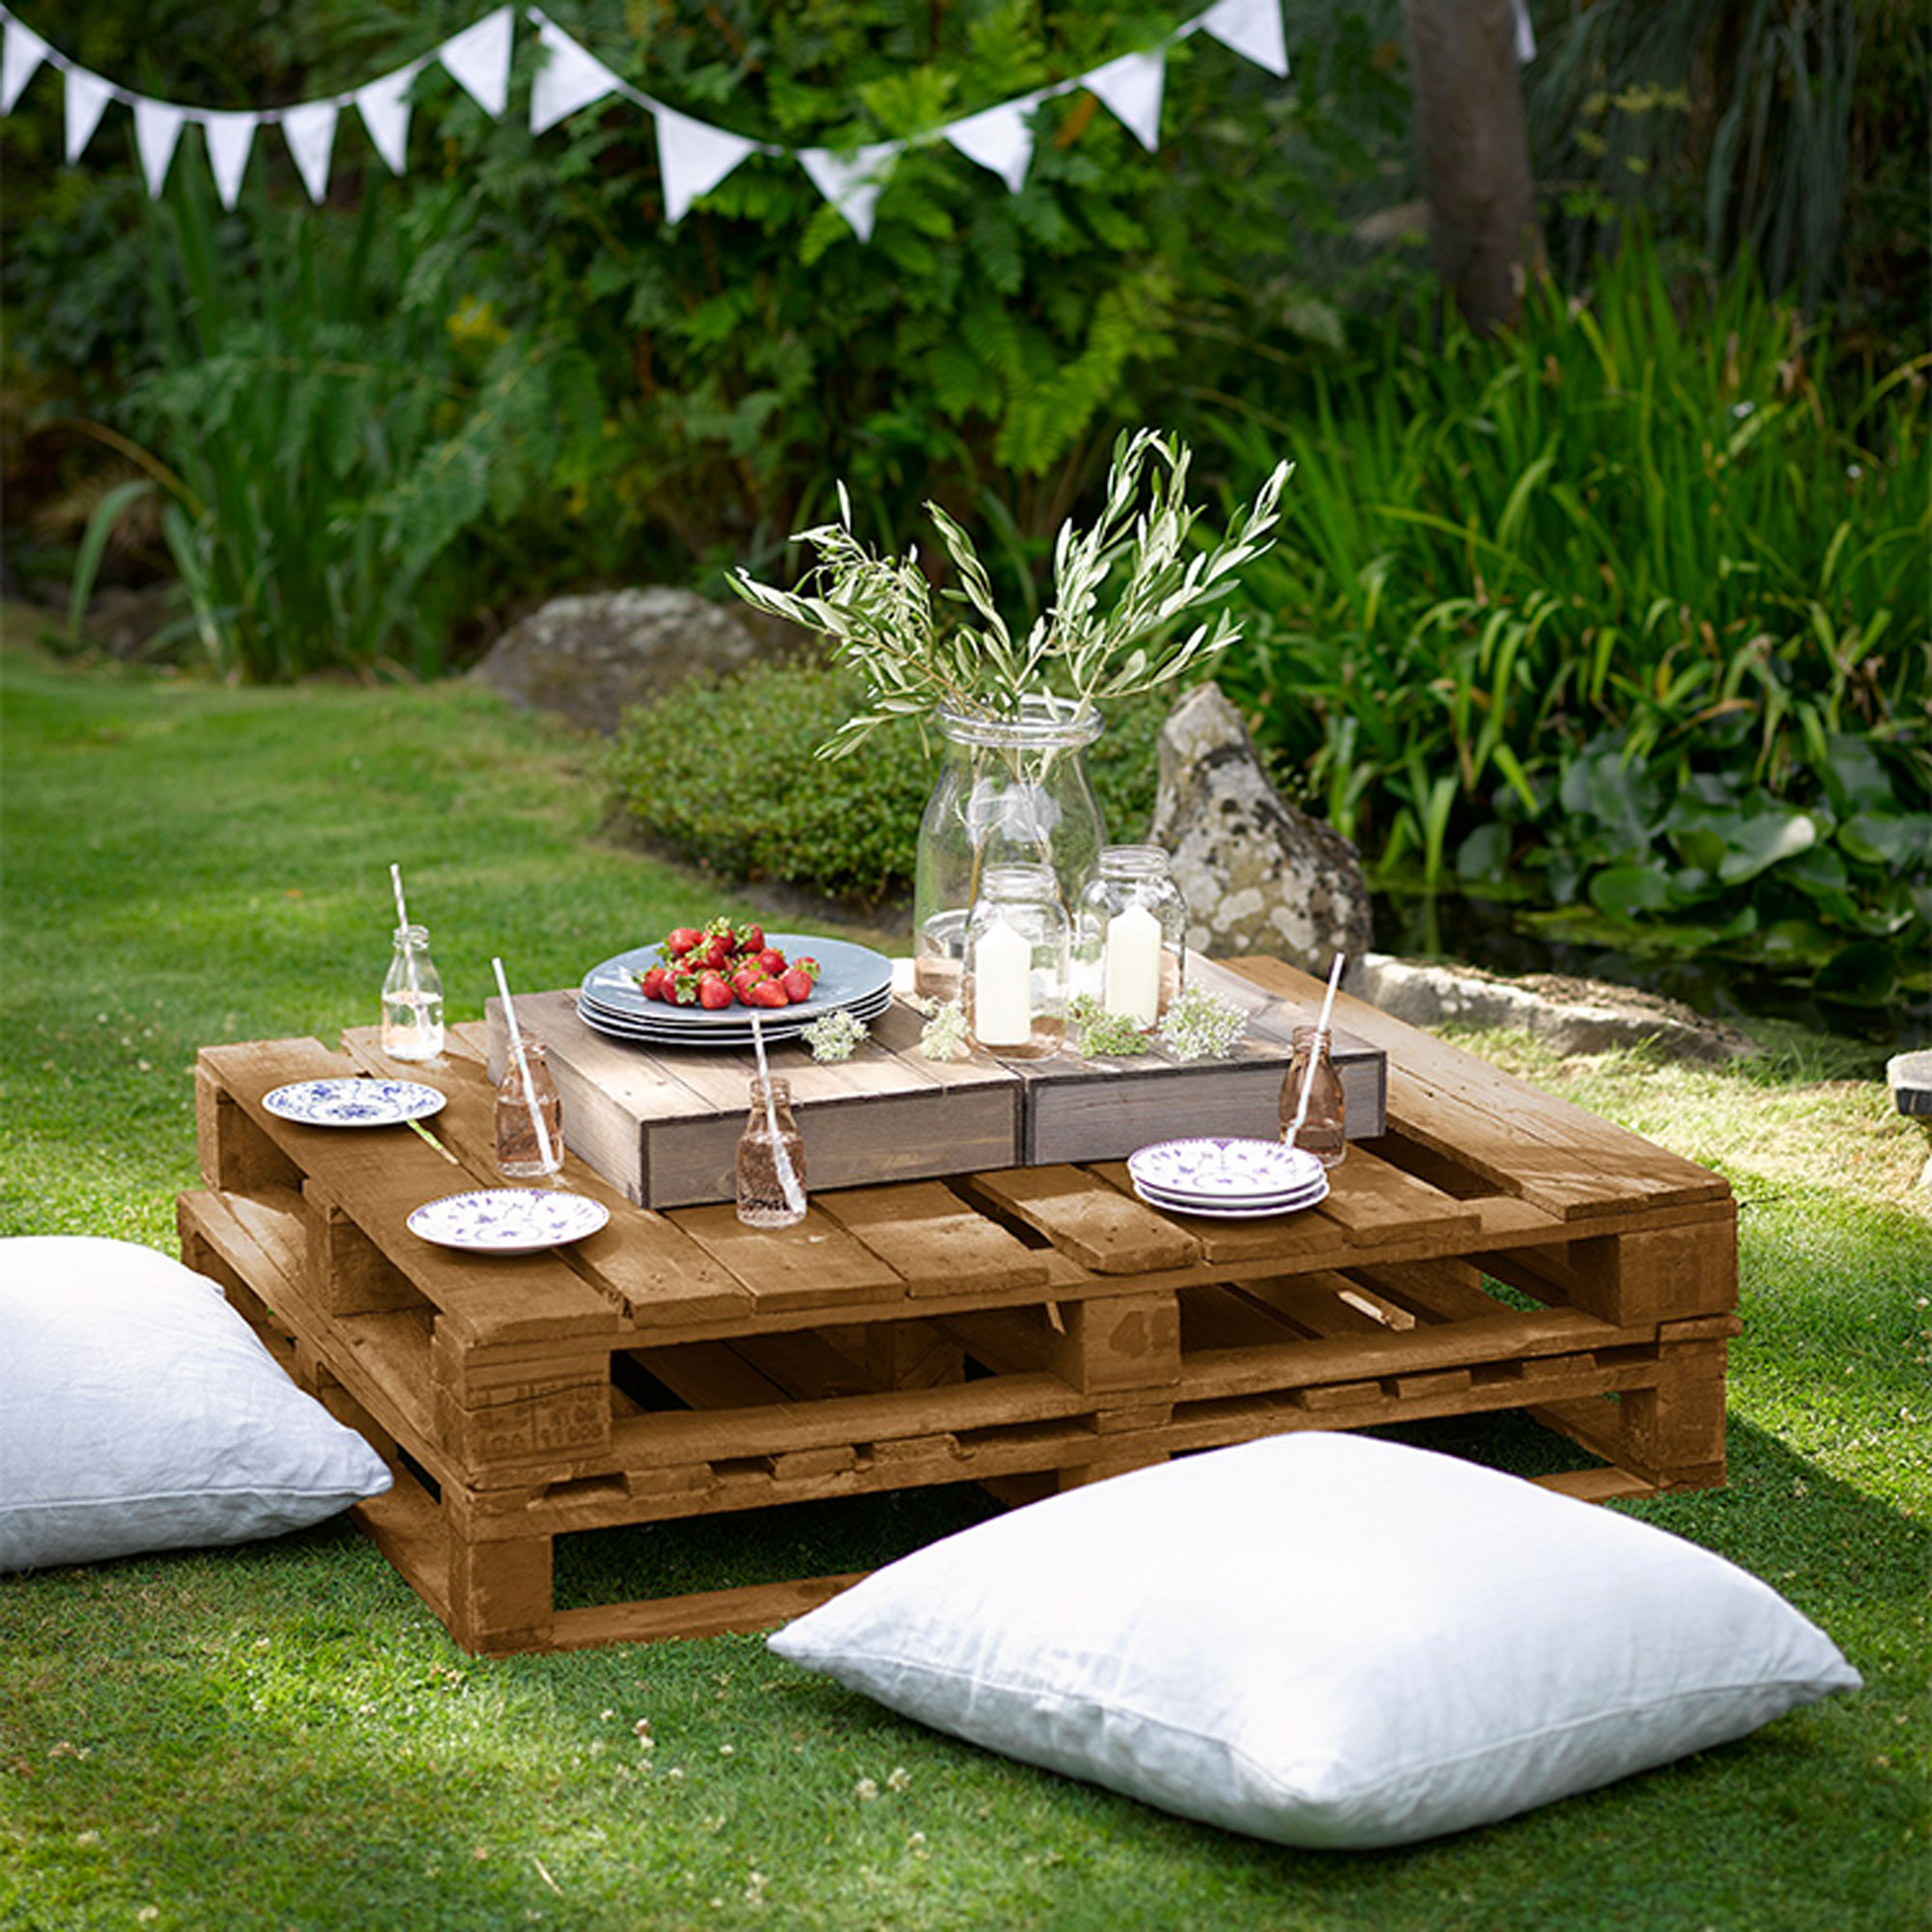
Requiring the minimum of DIY skills, this outdoor coffee table is pretty simple to put together using a couple of old wooden pallets. Perfect for a grassy area, its low level makes it ideal for a picnic table with the addition of a couple of comfy floor cushions.
Use two wooden pallets to give this coffee table set-up a little extra height. Simply secure the two pallets with a couple of screws on each of the four sides. To give the coffee table more moveability, consider adding castors underneath. You’ll need to attach a castor on to each corner, but it’s well worth doing as it will allow you to shift the table around more easily.
3. Build your own corner seating set-up
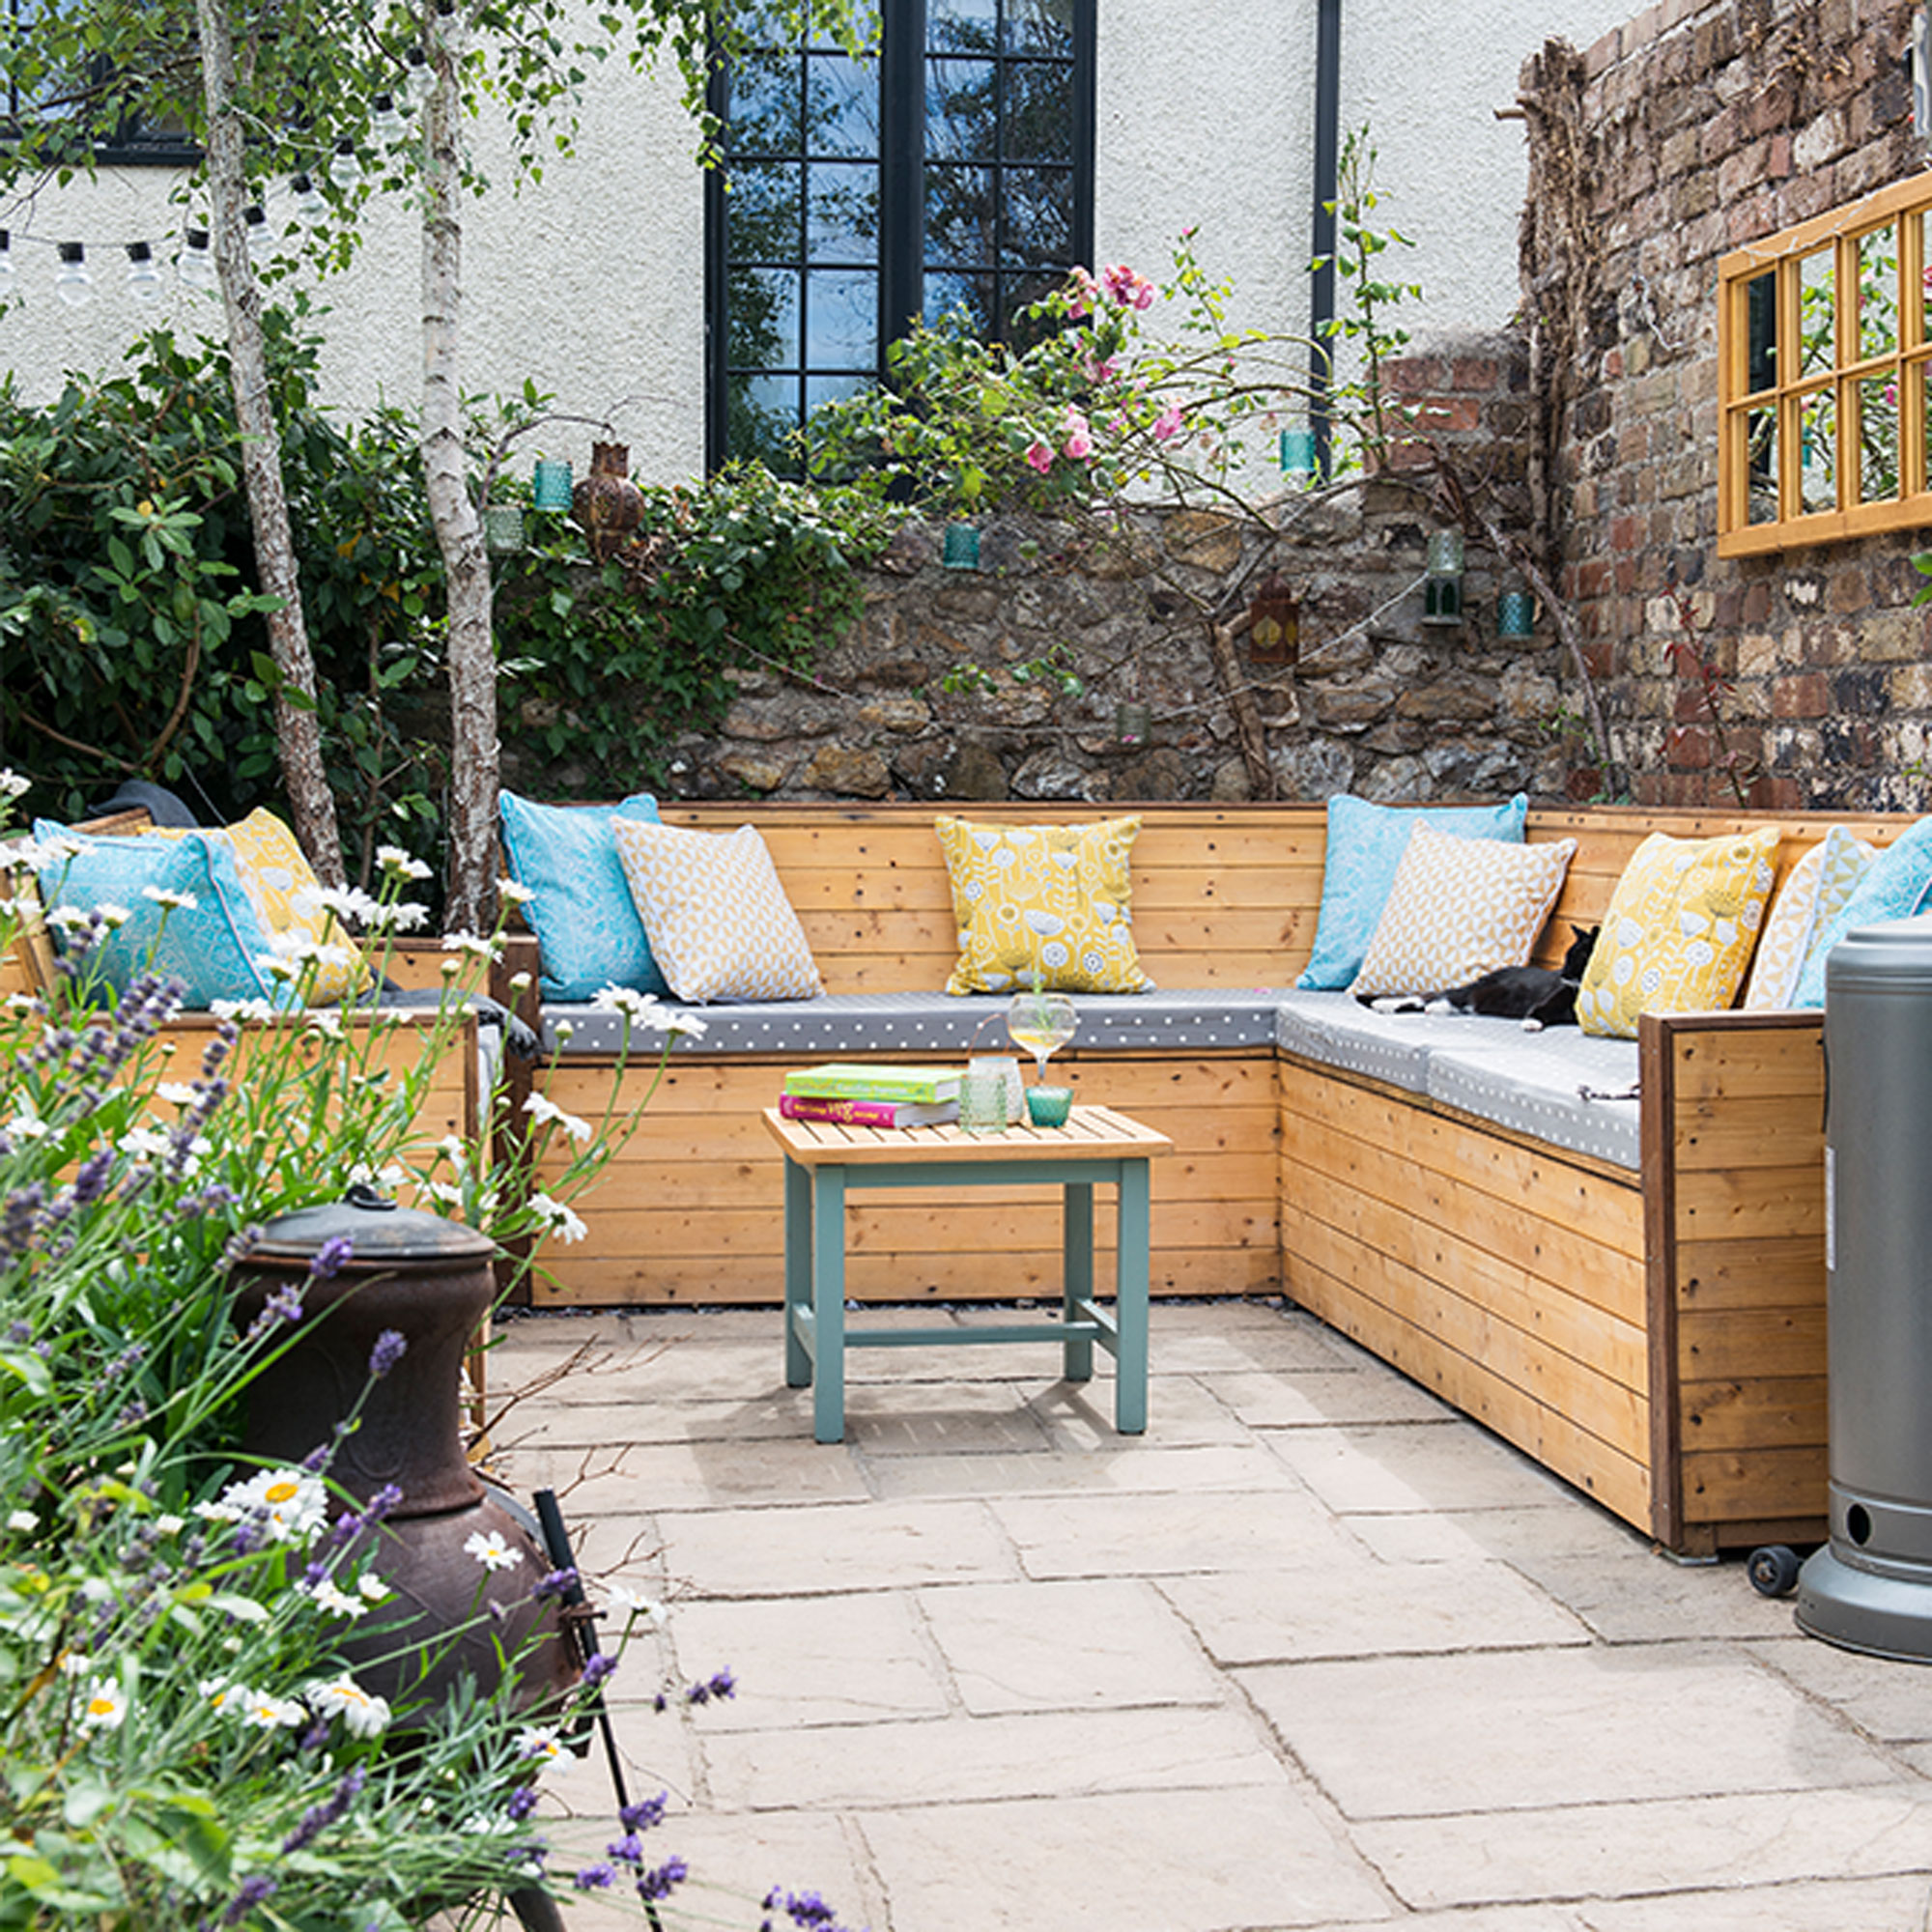
Building your own outdoor seating using reclaimed timber is a great way of cutting costs and also allows you to tailor the arrangement perfectly to suit the size and layout of your outdoor space. While it’s not a project for a novice, it should be a fairly simple build for a competent DIYer to put together.
A corner arrangement like this makes great use of space in a small garden and creates a sociable layout positioned around a coffee table or fire pit. Including lift-up seats with space underneath for storage will also give somewhere to stash garden cushions and throws when they’re not in use.
4. Make colourful garden cubbies from old crates
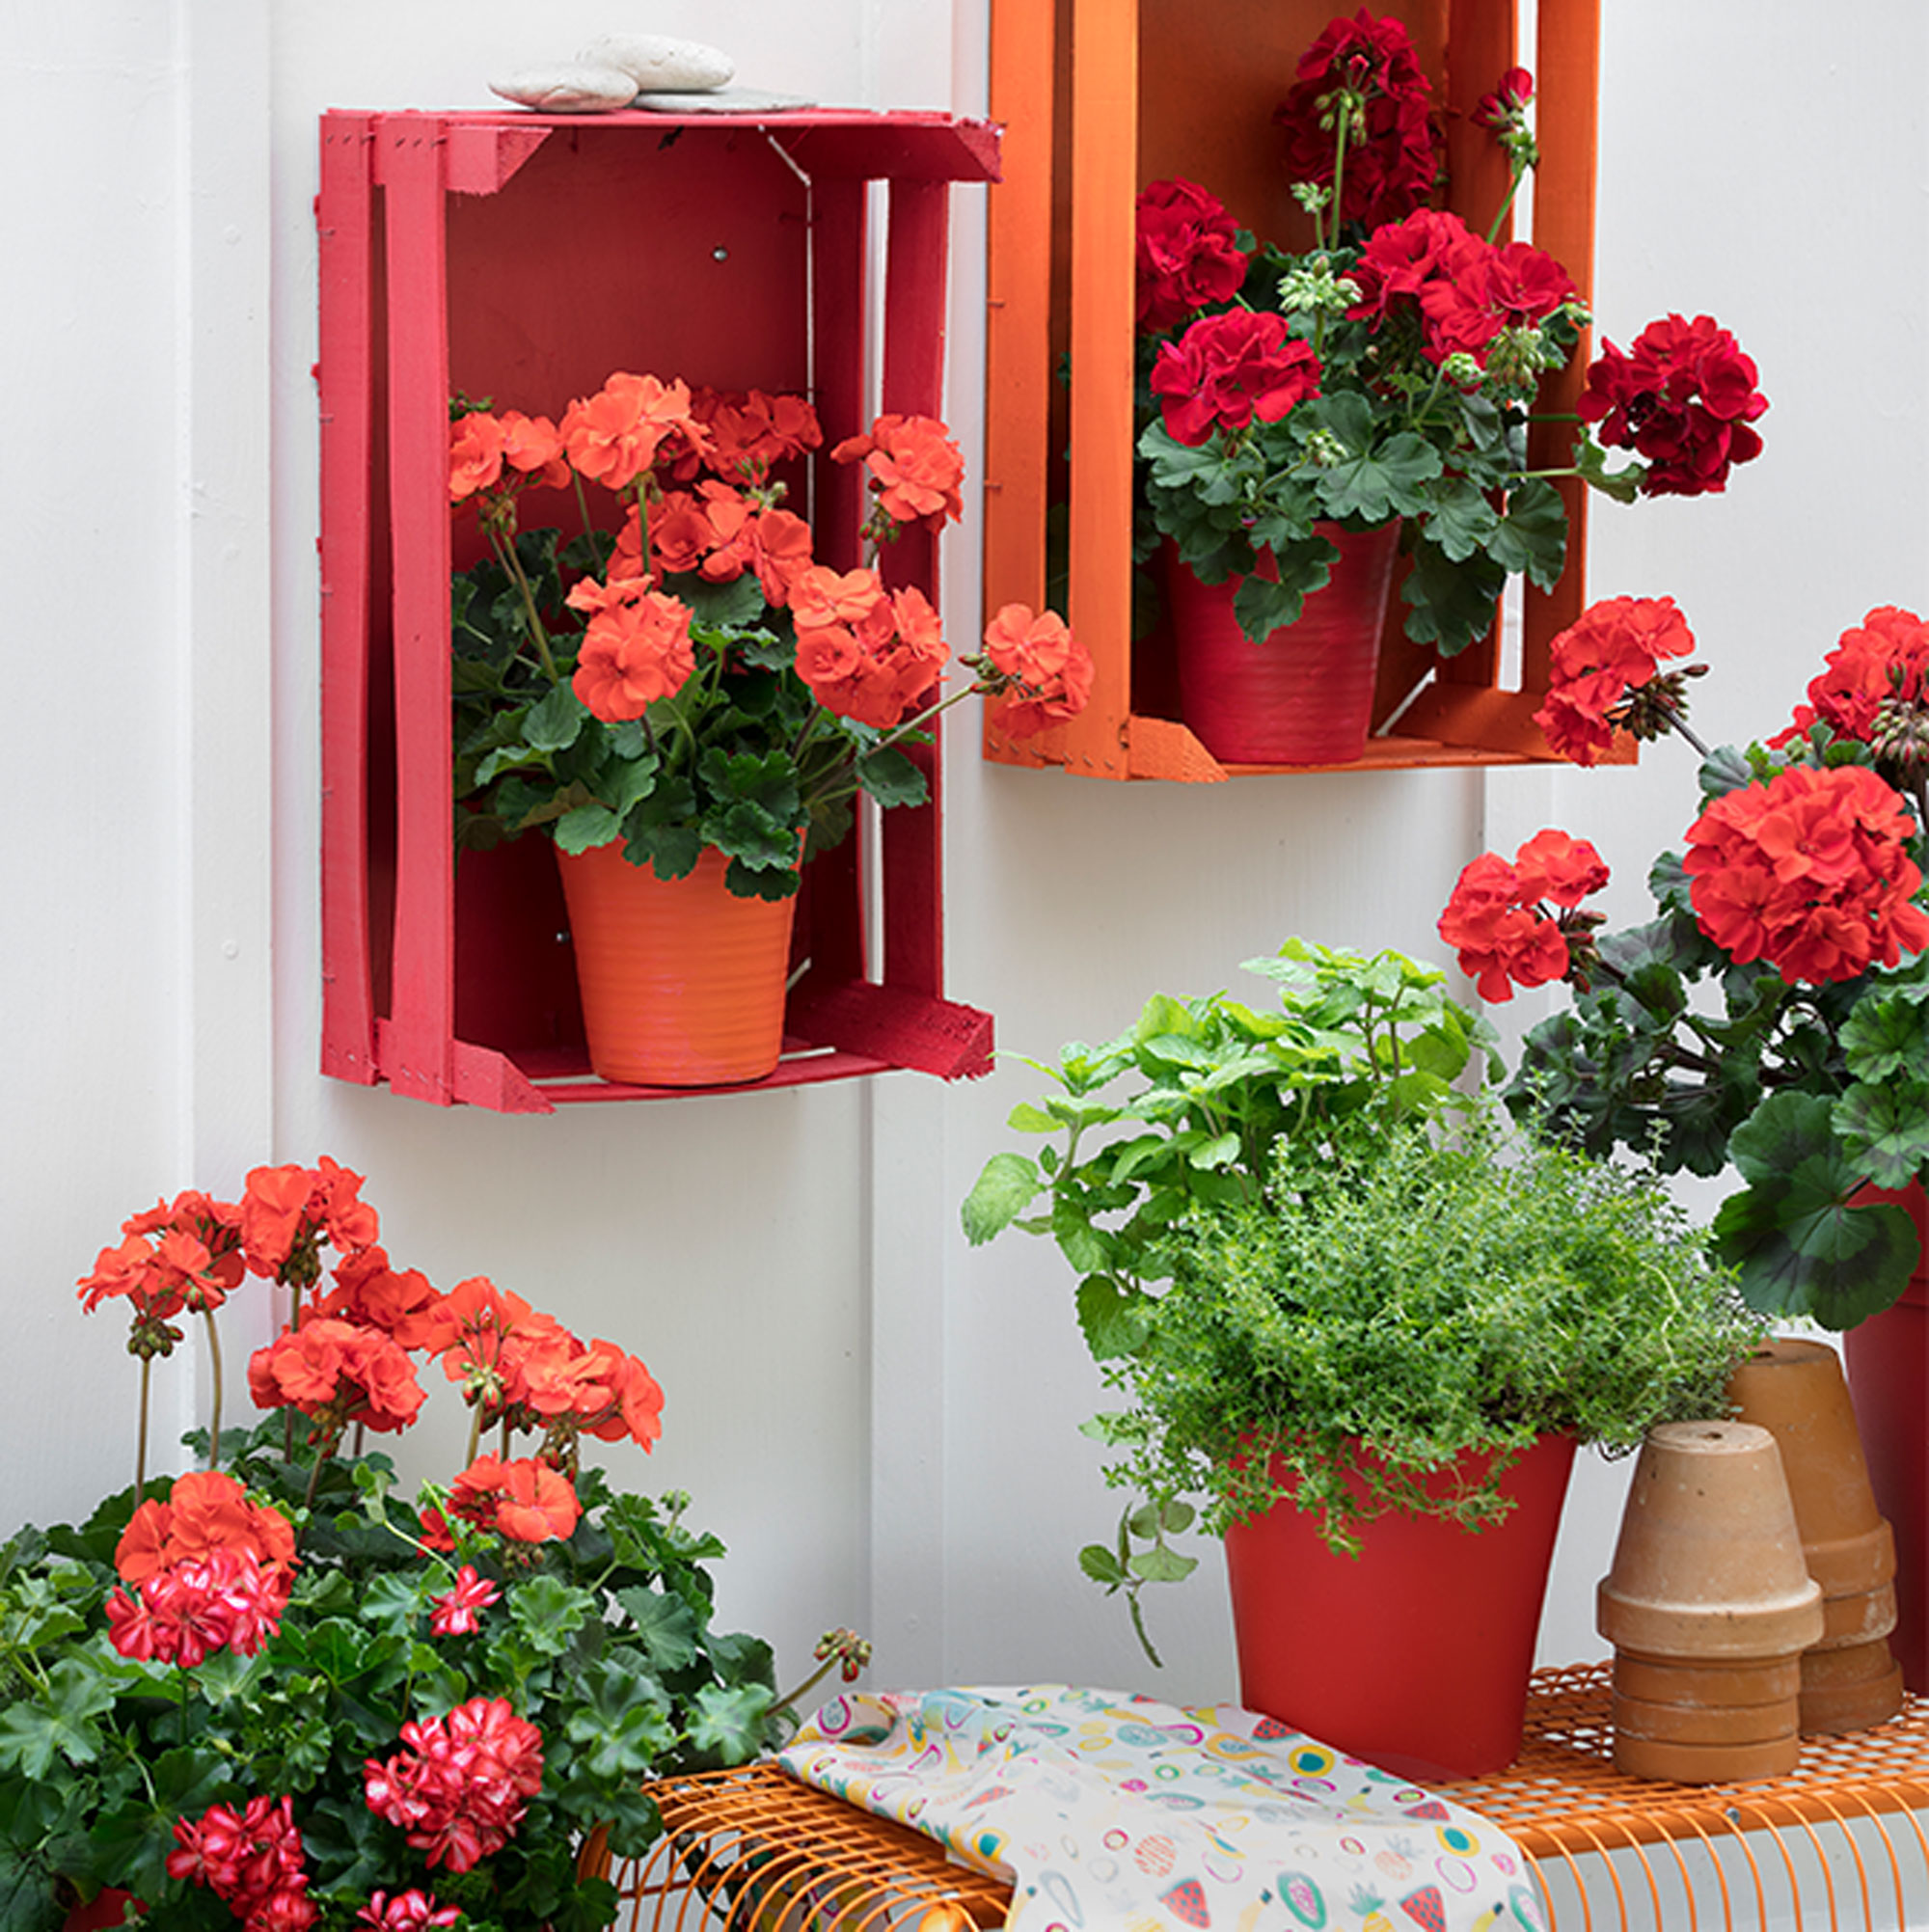
Find a new use for old wooden fruit crates by making mini wall shelves for a patio area or inside a potting shed. Paint crates in cheery colours, using exterior garden paint to give a weatherproof finish. Secure crates to the wall using wooden battens on the reverse, or add a couple of wall brackets if you intend to stow weightier items inside.
Smaller-sized crates like these are great for displaying planters or garden bric-a-brac and look effective in mini groupings on a wall. Alternatively for something more robust, use large wooden wine crates to create a bigger arrangement, securing them onto wall brackets for extra stability.
5. Spruce up a shabby table with smart stripes
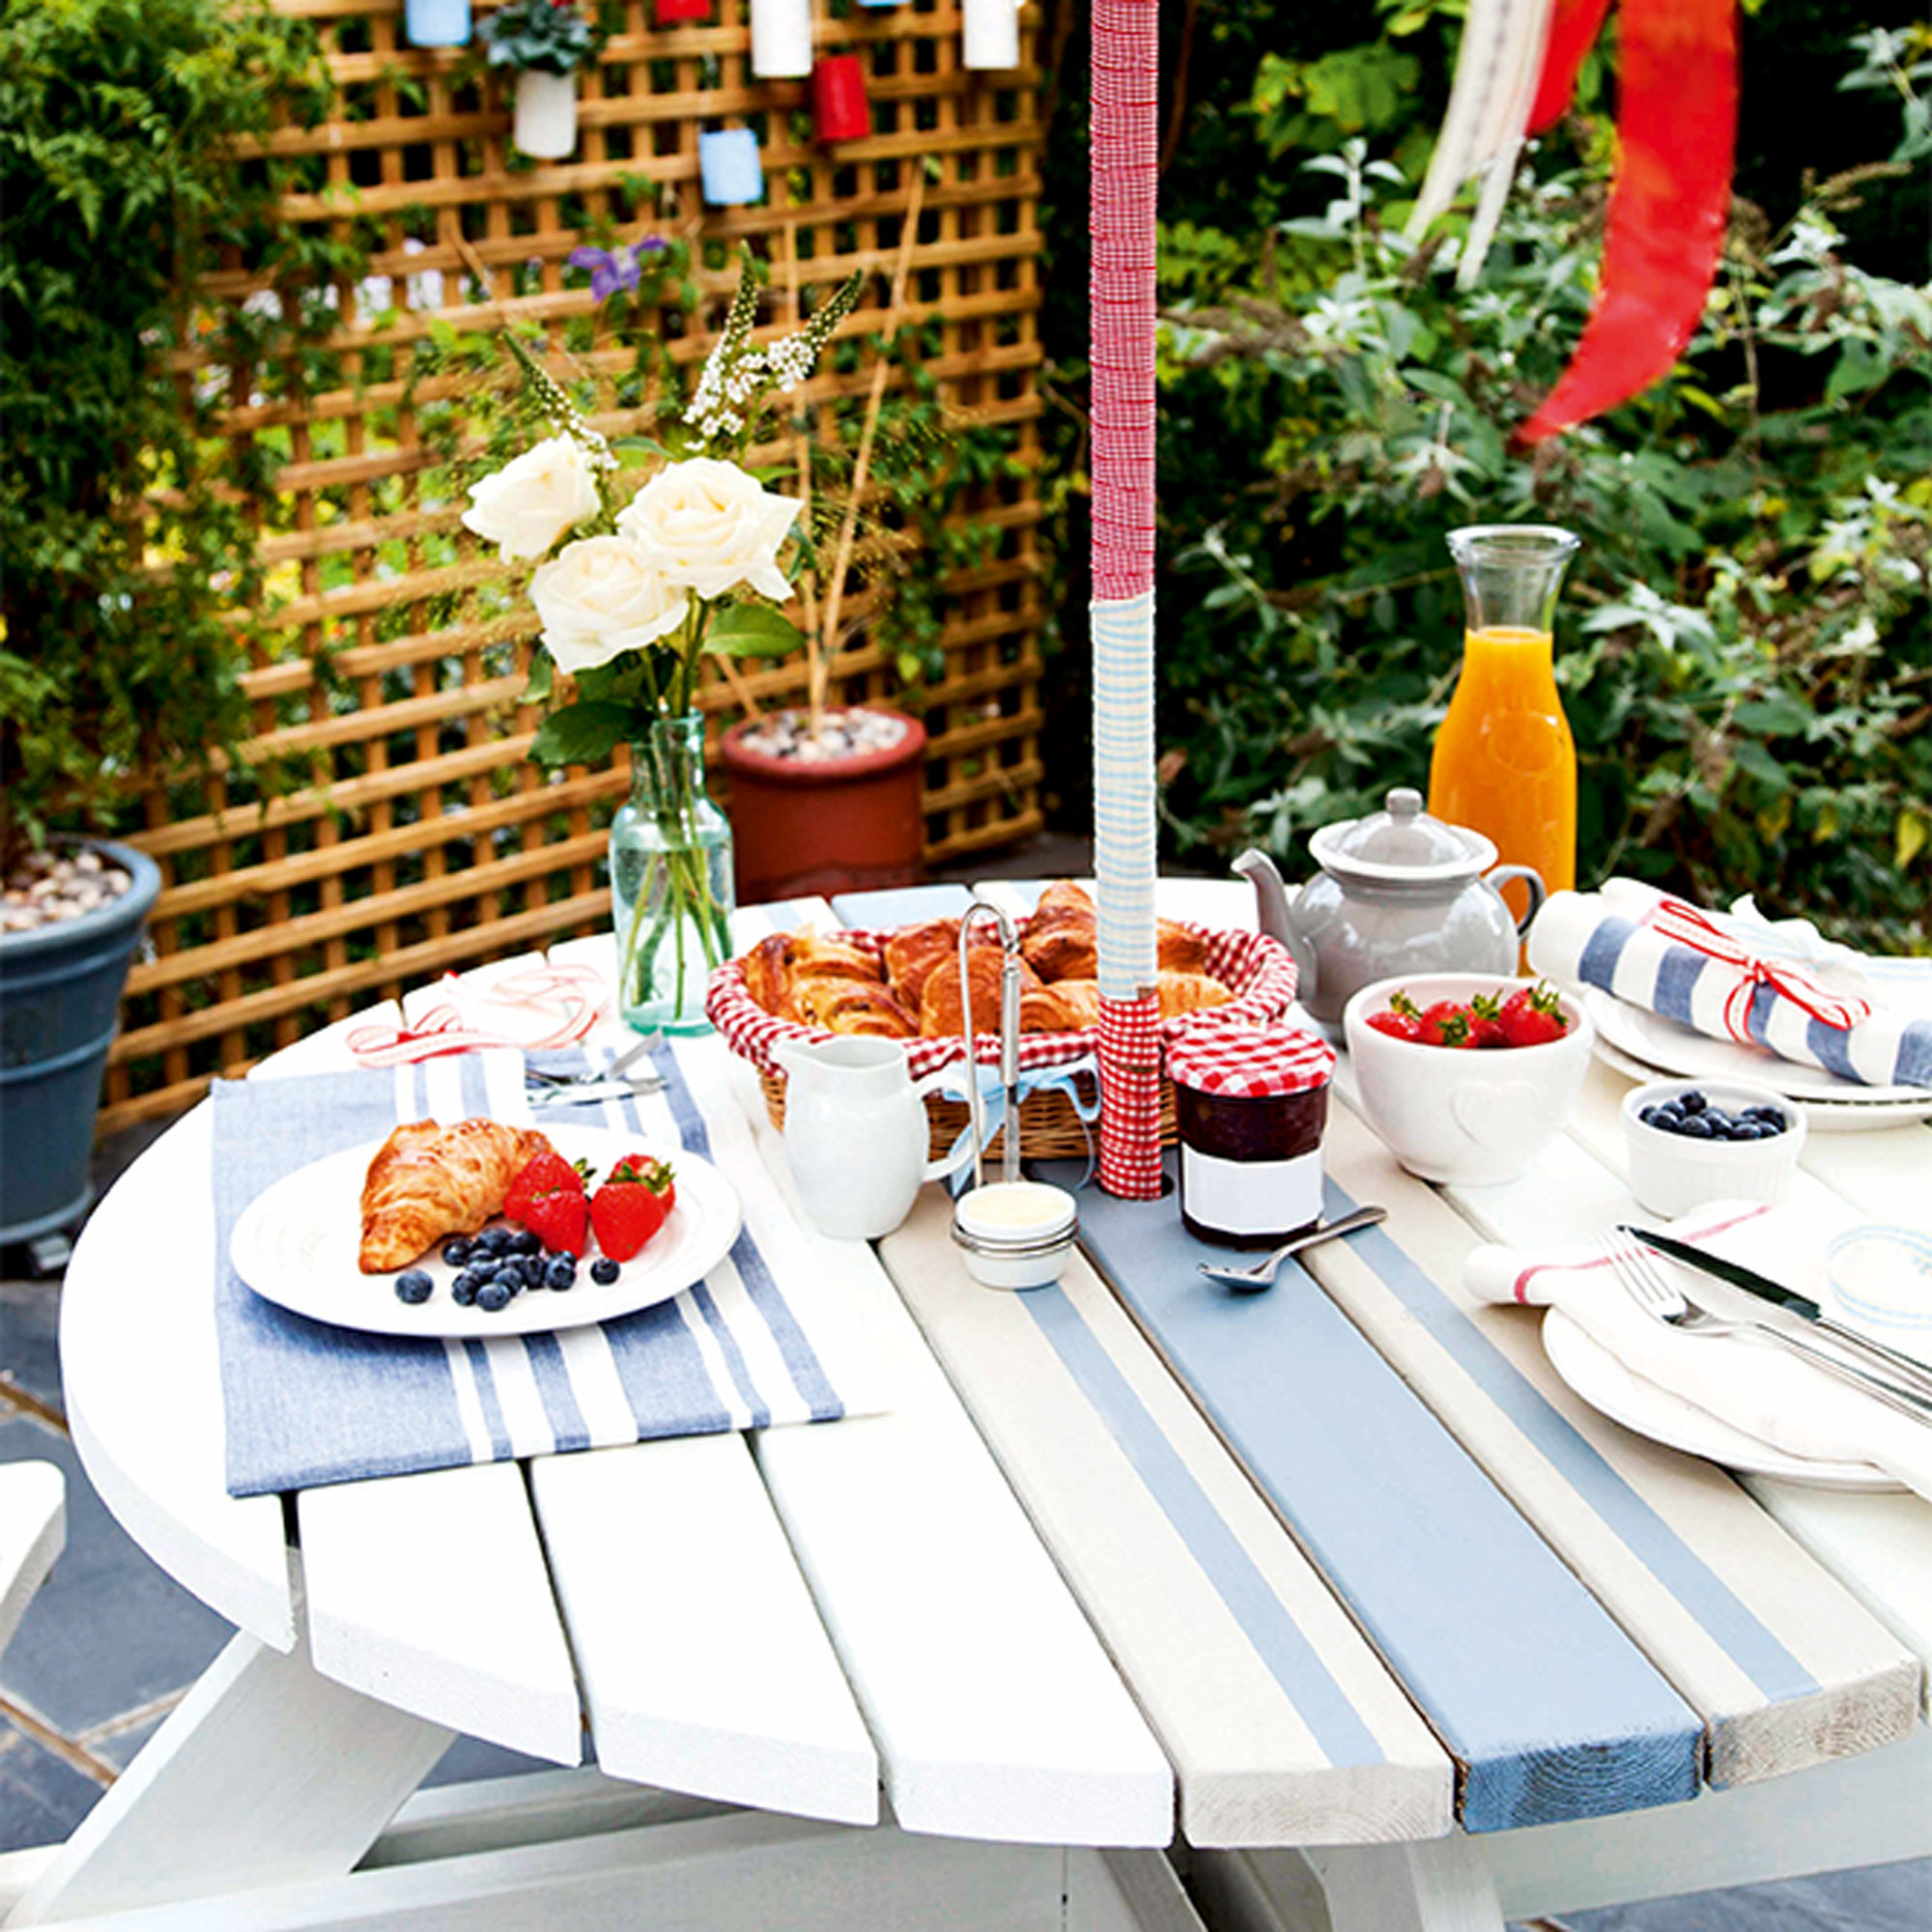
If your wooden garden table has seen better days, instead of replacing it, try an easy pick-me-up and give it a fresh lick of paint. Painting a panel of contrast stripes to run along the centre will create the look of a table runner and is an easy way of adding more of a decorative twist.
Give the table’s surface a light sanding and wipe down before you start painting. Then give the whole table a couple of coats of white paint, using an exterior paint for a weatherproof finish. Once dry, use small tester pots of paint in contrast colours to create the striped runner effect. Use masking tape to help create the stripes and give a neater edge.
6. Create outdoor shelving using recycled timber
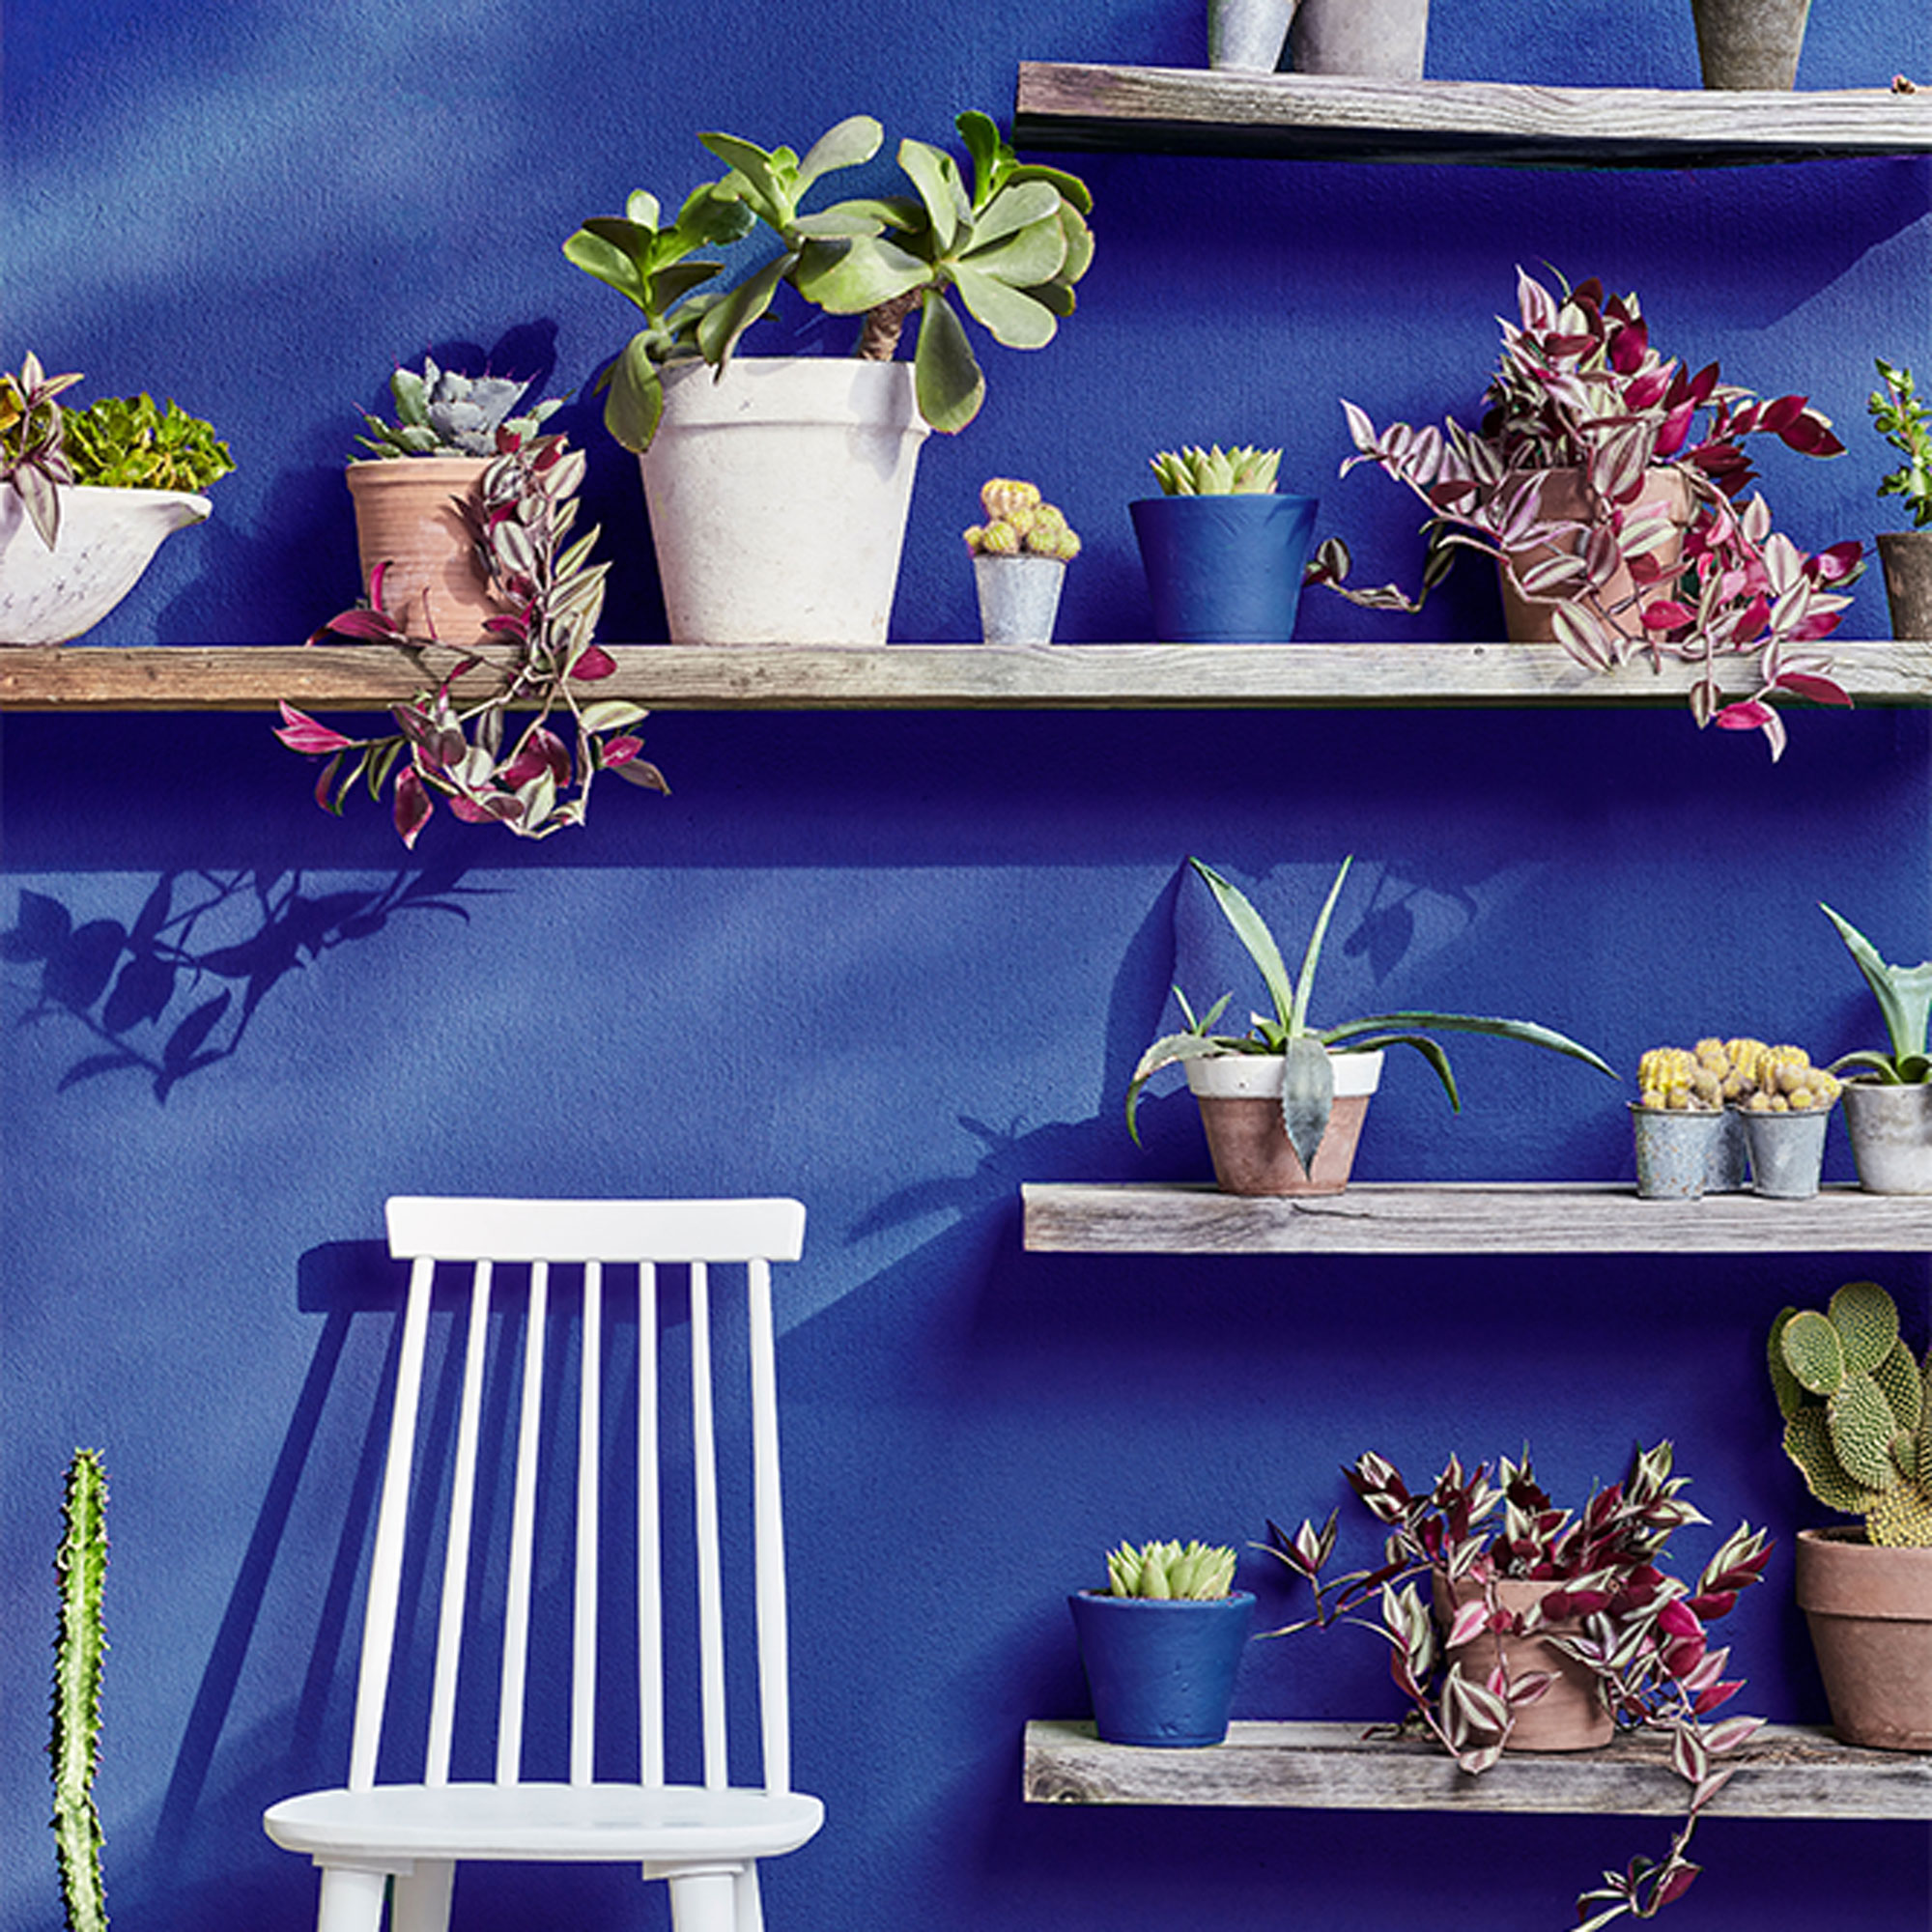
Brighten up a dreary exterior wall by creating a display area for plants and garden ornaments. Reclaimed scaffold boards are a sturdy, all-weather option for an outdoor space and will add a rustic look to a patio dining or seating area.
Add extra wow to your wall with a creative garden paint idea by painting it a bold, standout colour. Greenery and shelving will pop against vibrant shades of blue or dark green and will bring the whole space to life. Arrange scaffold-board shelving at staggered heights and fill the space with a mix of plants and planters in assorted shapes and sizes.
7. Make your own garden cocktail bar
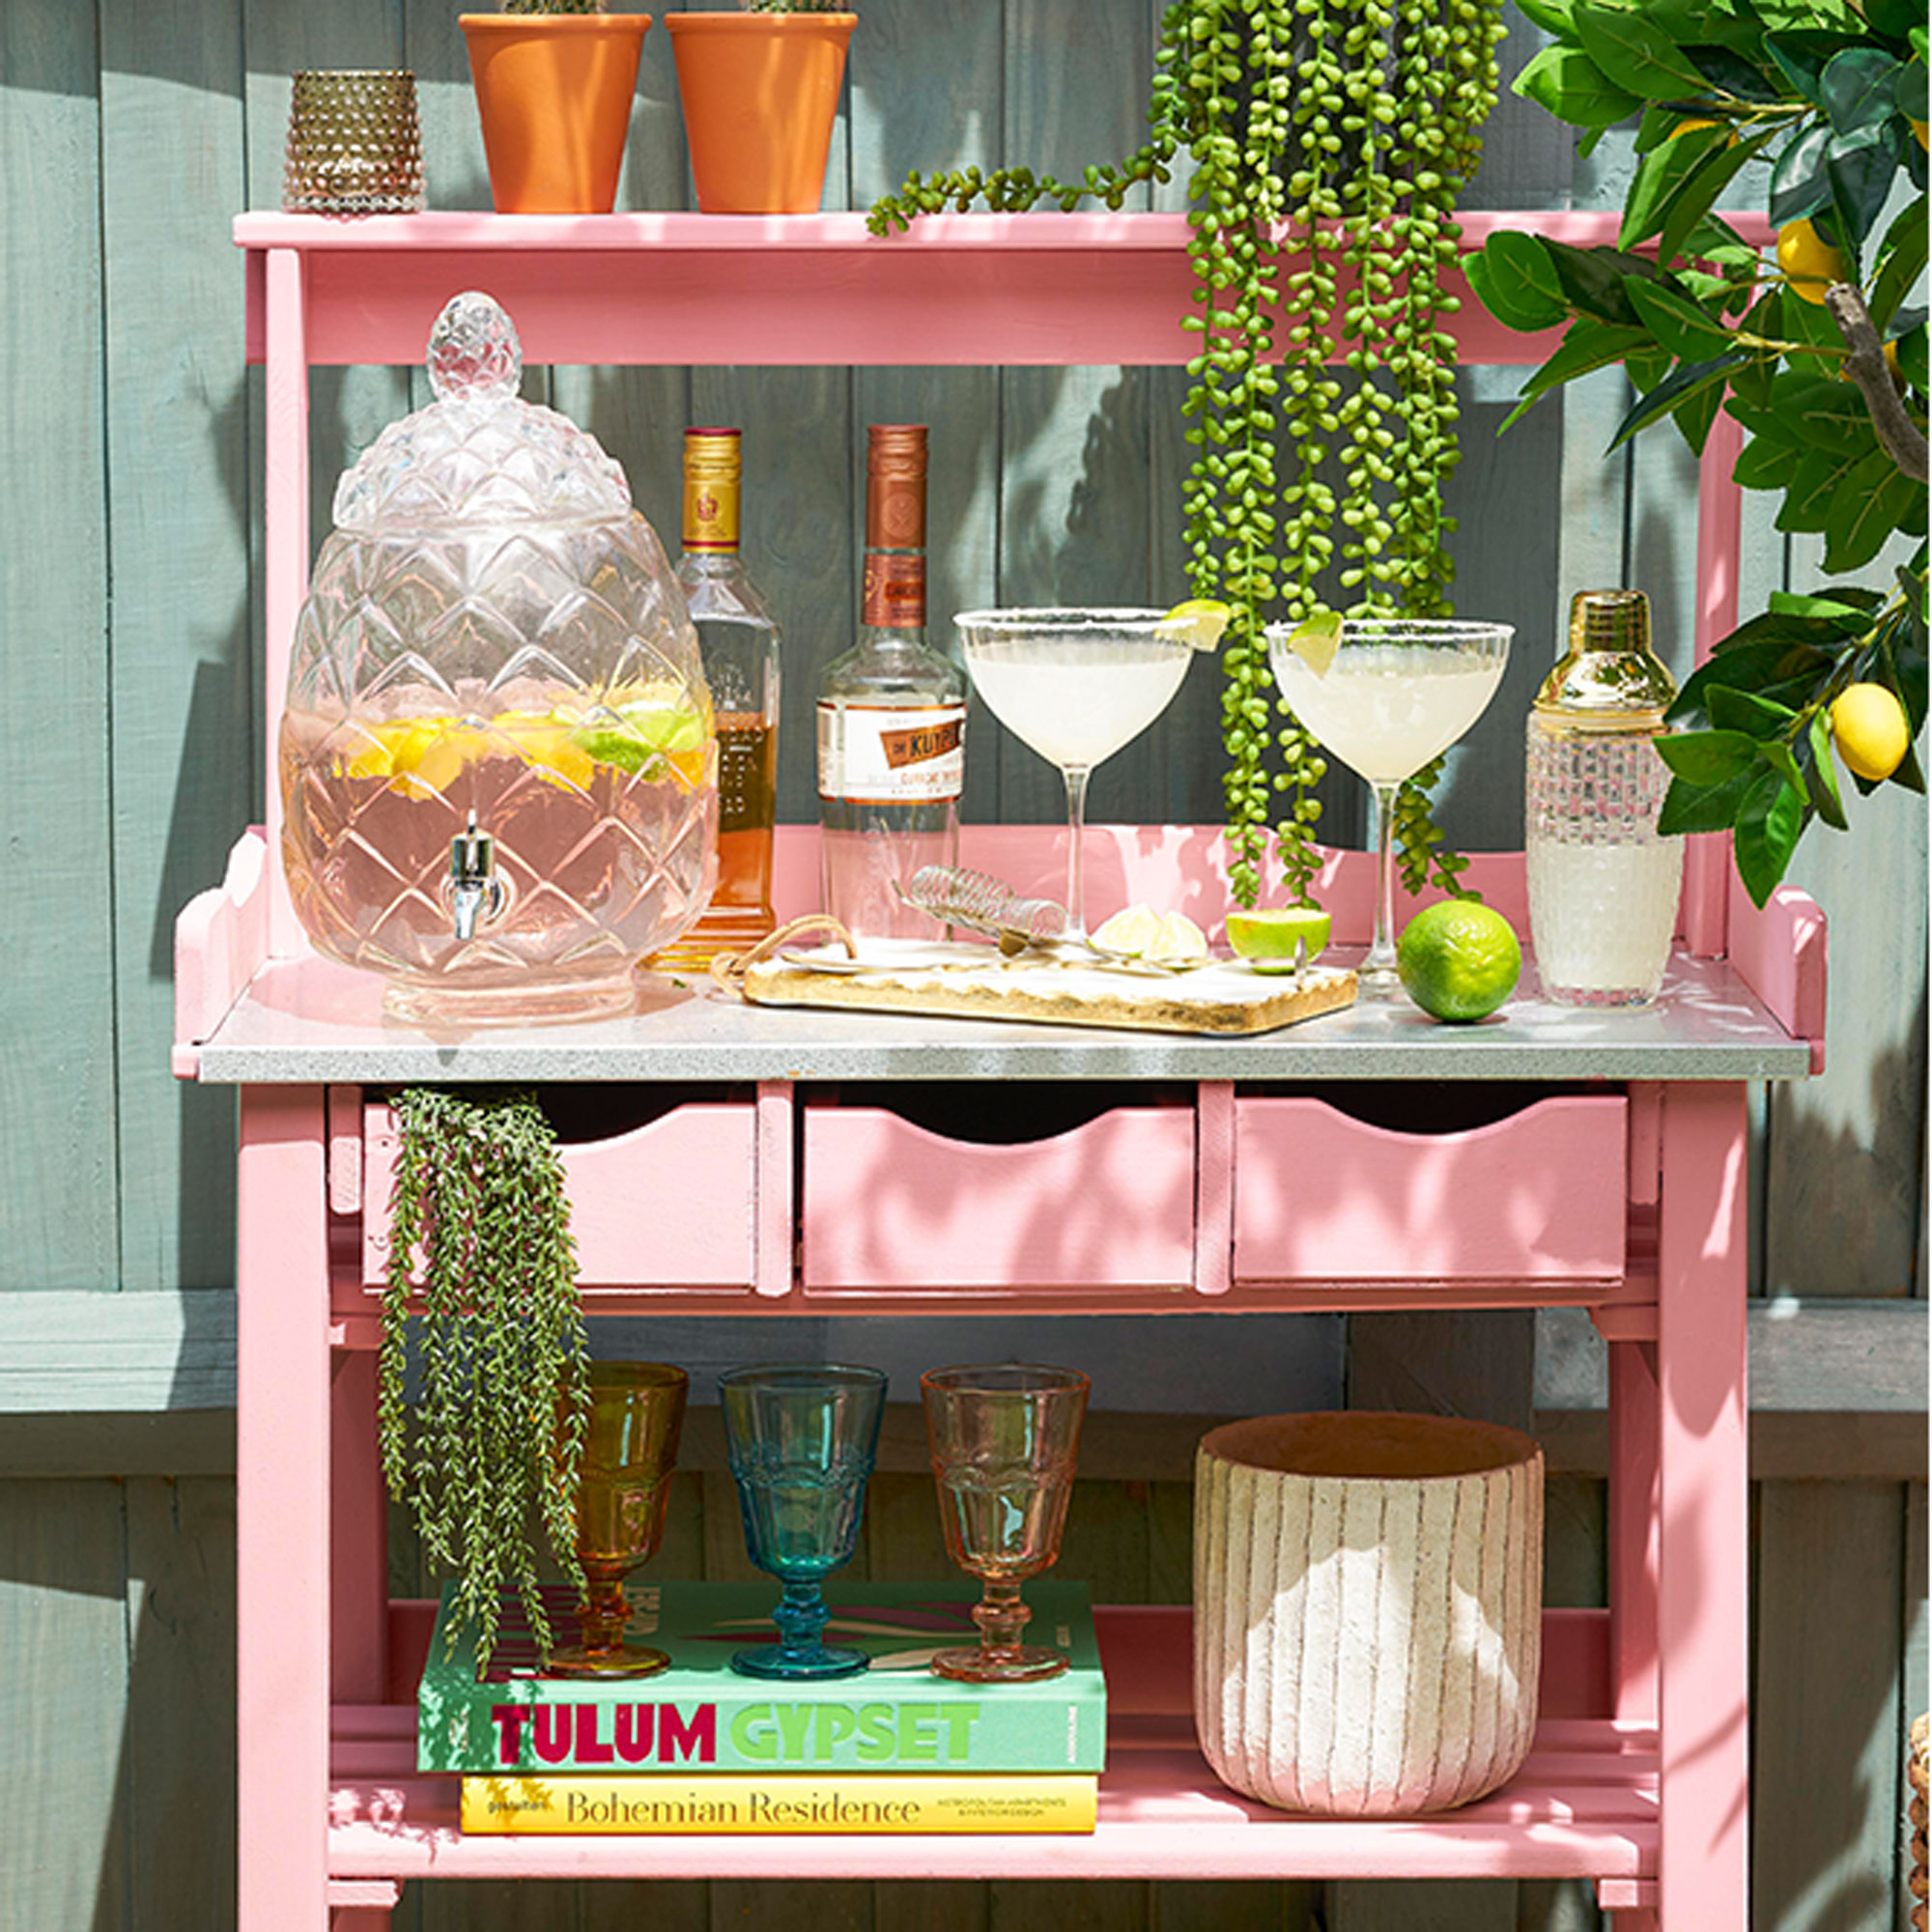
Opt for a garden bar on a budget by upcycling an old potting bench to create a fun outdoor drinks station. Shelves underneath give plentiful storage for drinks supplies and glasses, while a row of drawers gives a handy place to stash utensils and cocktail making kit.
Use exterior paint in a bright, cheery shade to give your bar a touch of the tropics. Try tiling the work surface or cladding it in a sheet of stainless steel to give a practical, wipe-clean prep space for cocktail-making duties.
8. Repurpose an old step ladder
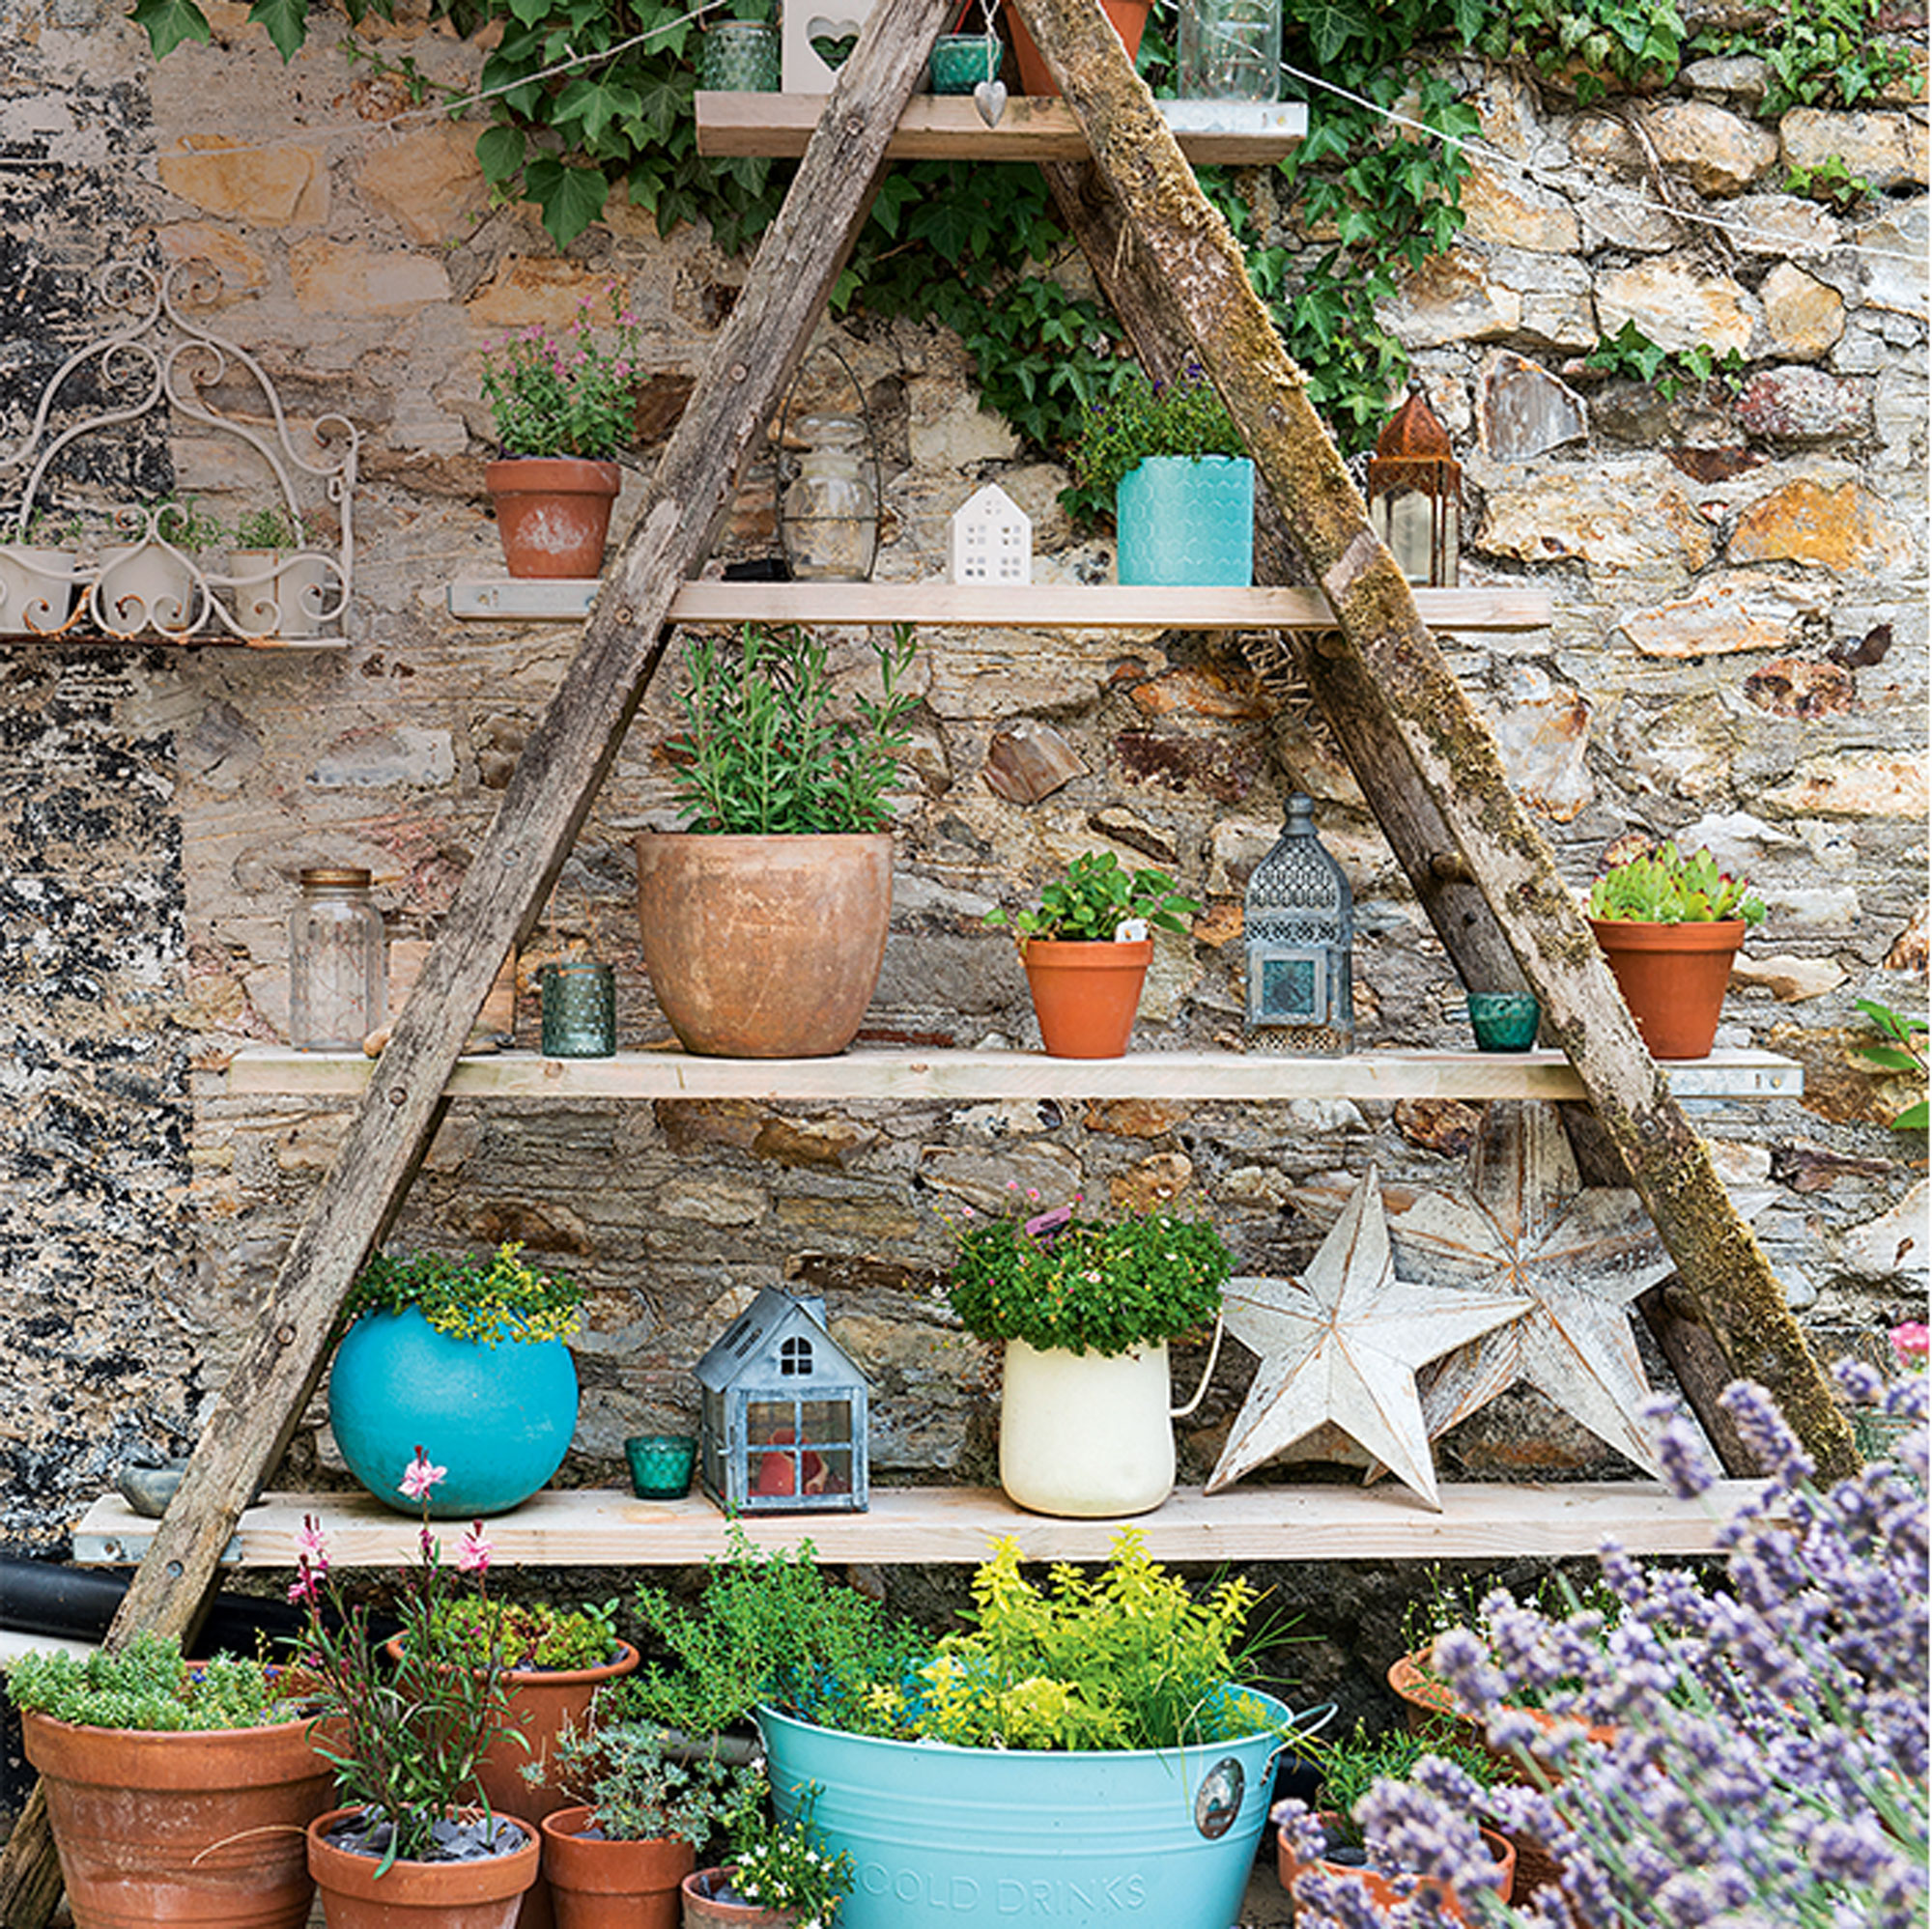
Make a vintage-style display stand for the patio by upcycling an old wooden step ladder. Use assorted lengths of timber scaffold boards to create the shelves and you’ll have a lovely, rustic showcase for displaying garden plants and flowers.
Start by giving your ladder a quick scrub and sanding it down to remove any rough edges and splinters. Then add shelves, using different lengths of board in increasing sizes, screwing them onto the ladder’s rungs to secure. Leave the wood in its natural state for a worn, weathered vibe or add some colour by painting the ladder and shelves in a bright outdoor paint if you’d prefer something livelier.
9. Make an easy outdoor mirror
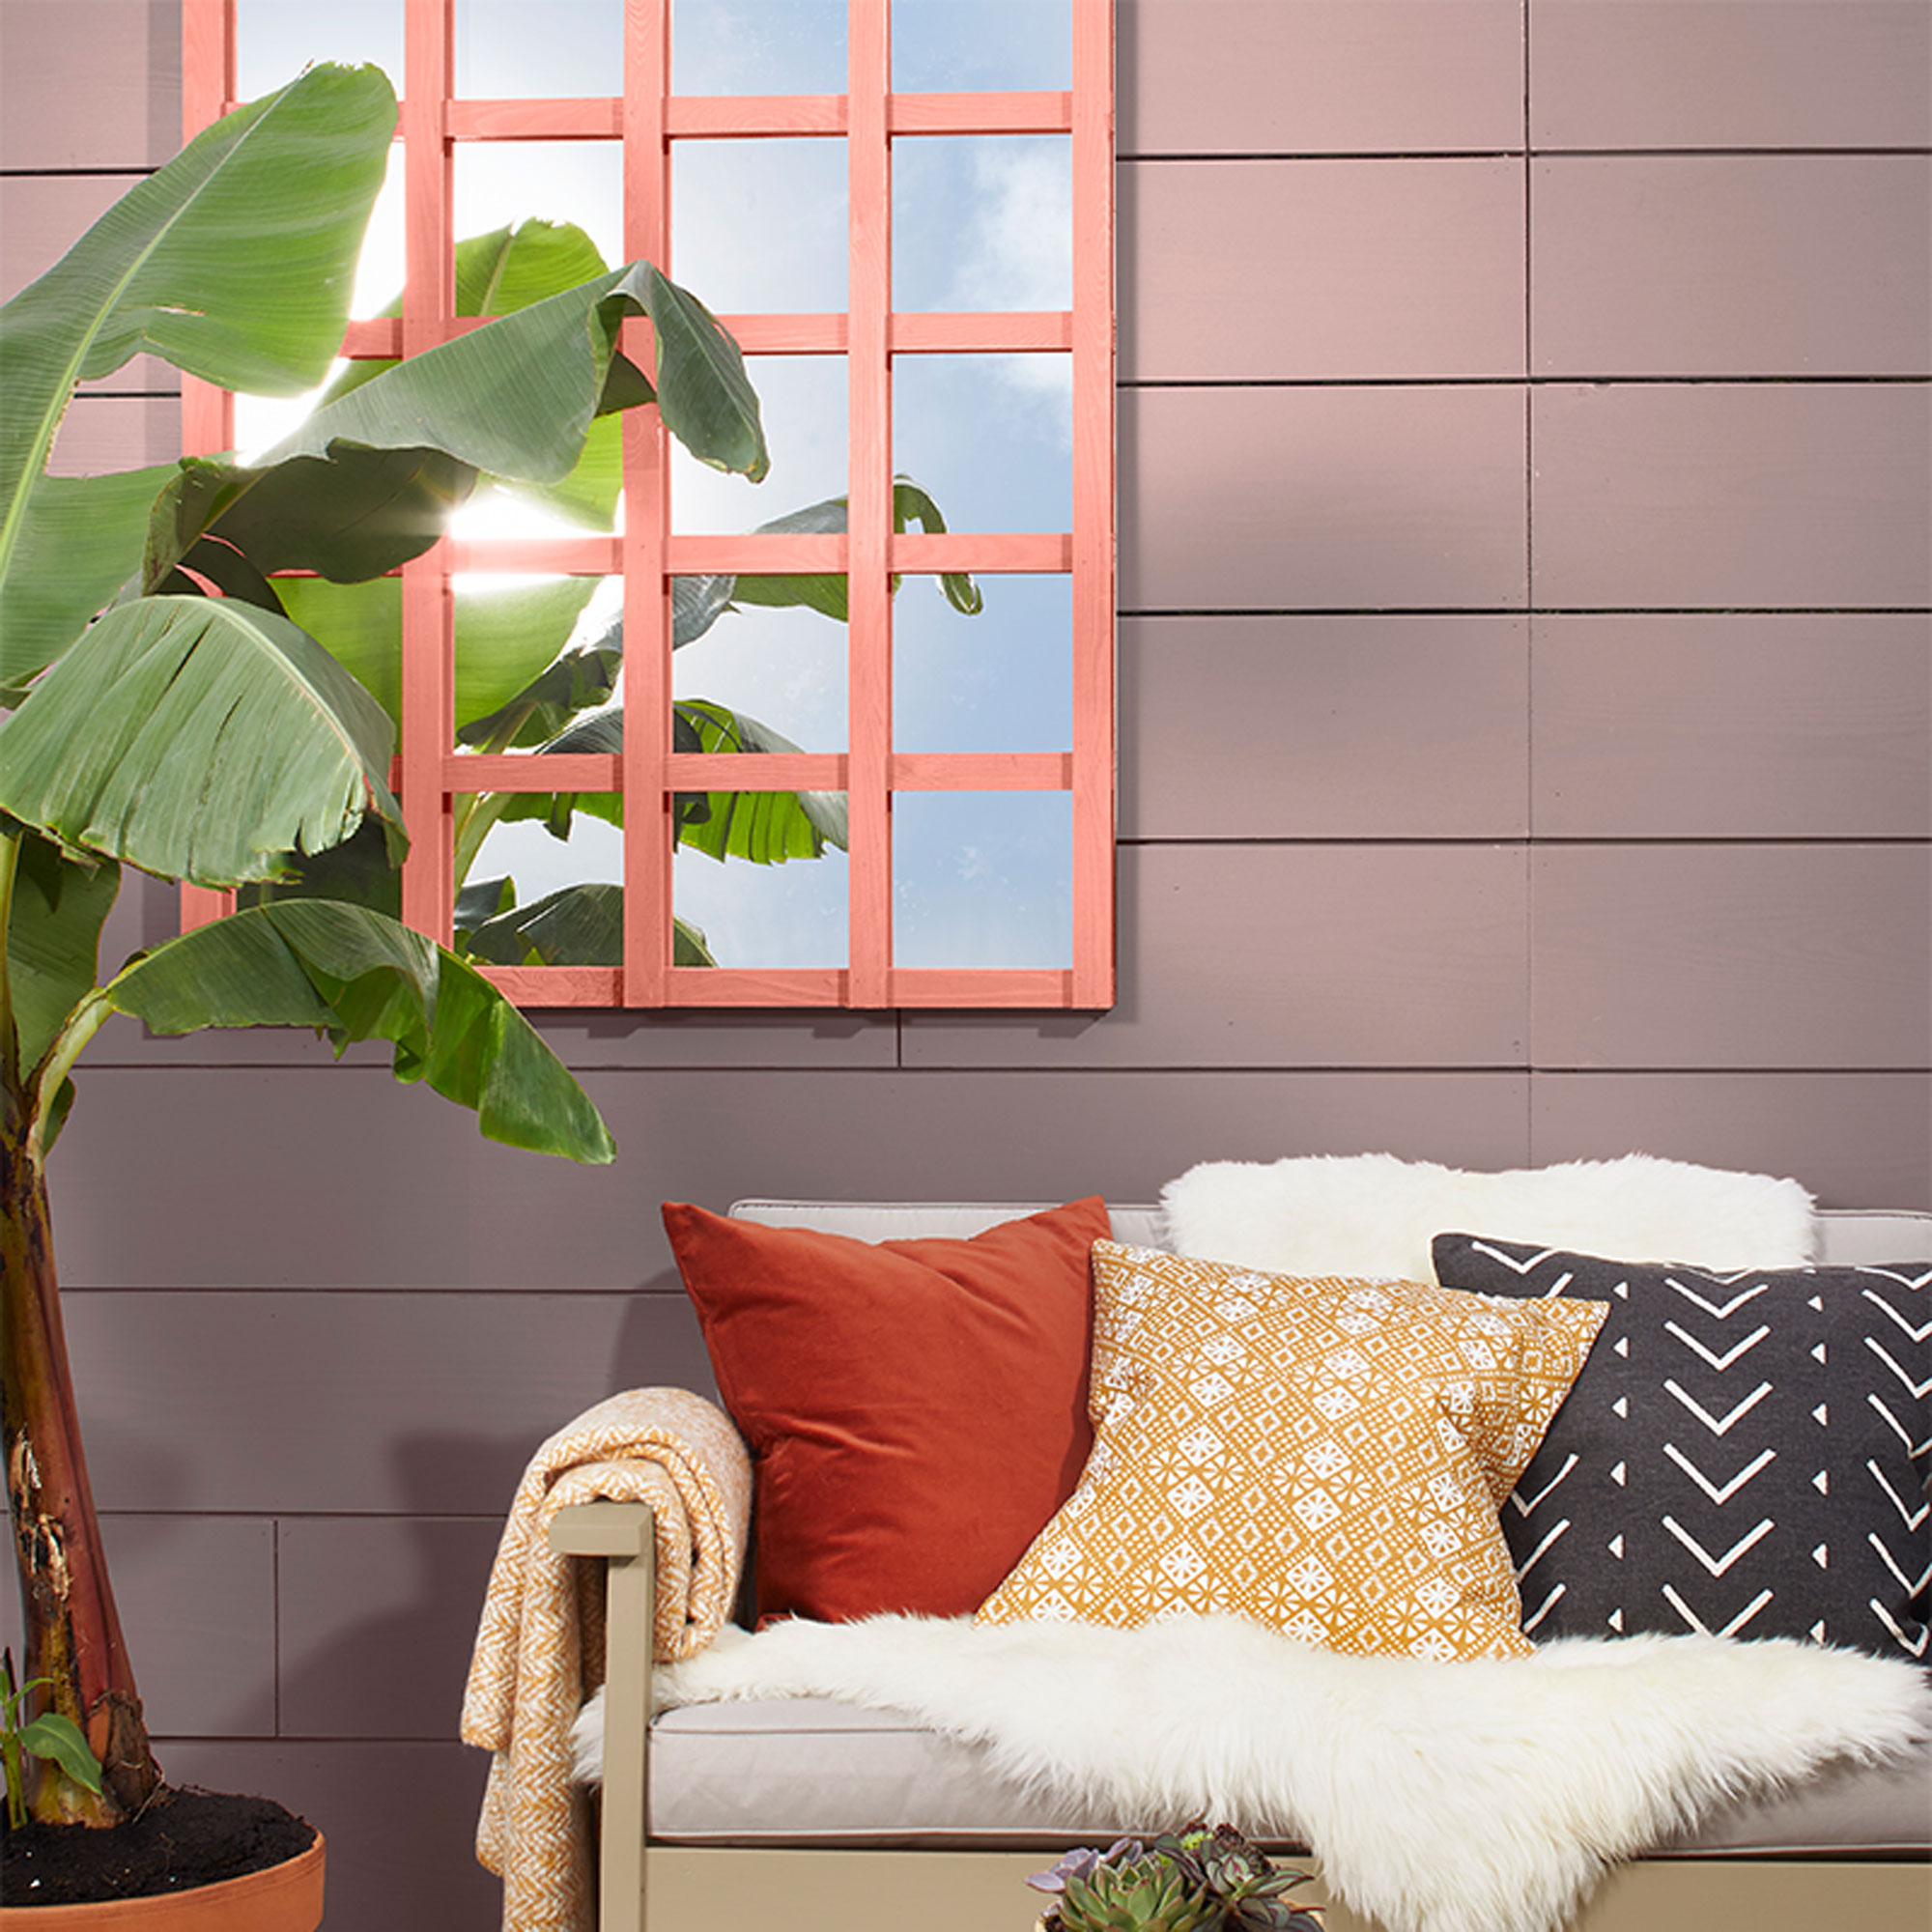
Adding a garden mirror idea is an easy way of brightening up a small outside space or enclosed area. A mirror will help to bounce incoming light around and make the space feel sunnier and more spacious.
Try making your own window-pane style mirror using a simple frameless mirror and a piece of garden trellis. Start by cutting your trellis to size using a small hand saw. Then use a paintbrush or small roller to paint trellis with a couple of coats of exterior paint. Once dry, use grab adhesive to stick the trellis onto the front of your mirror. Leave to dry and then secure to an outdoor wall or fence panel.
10. Make a display stand out of an old drawer
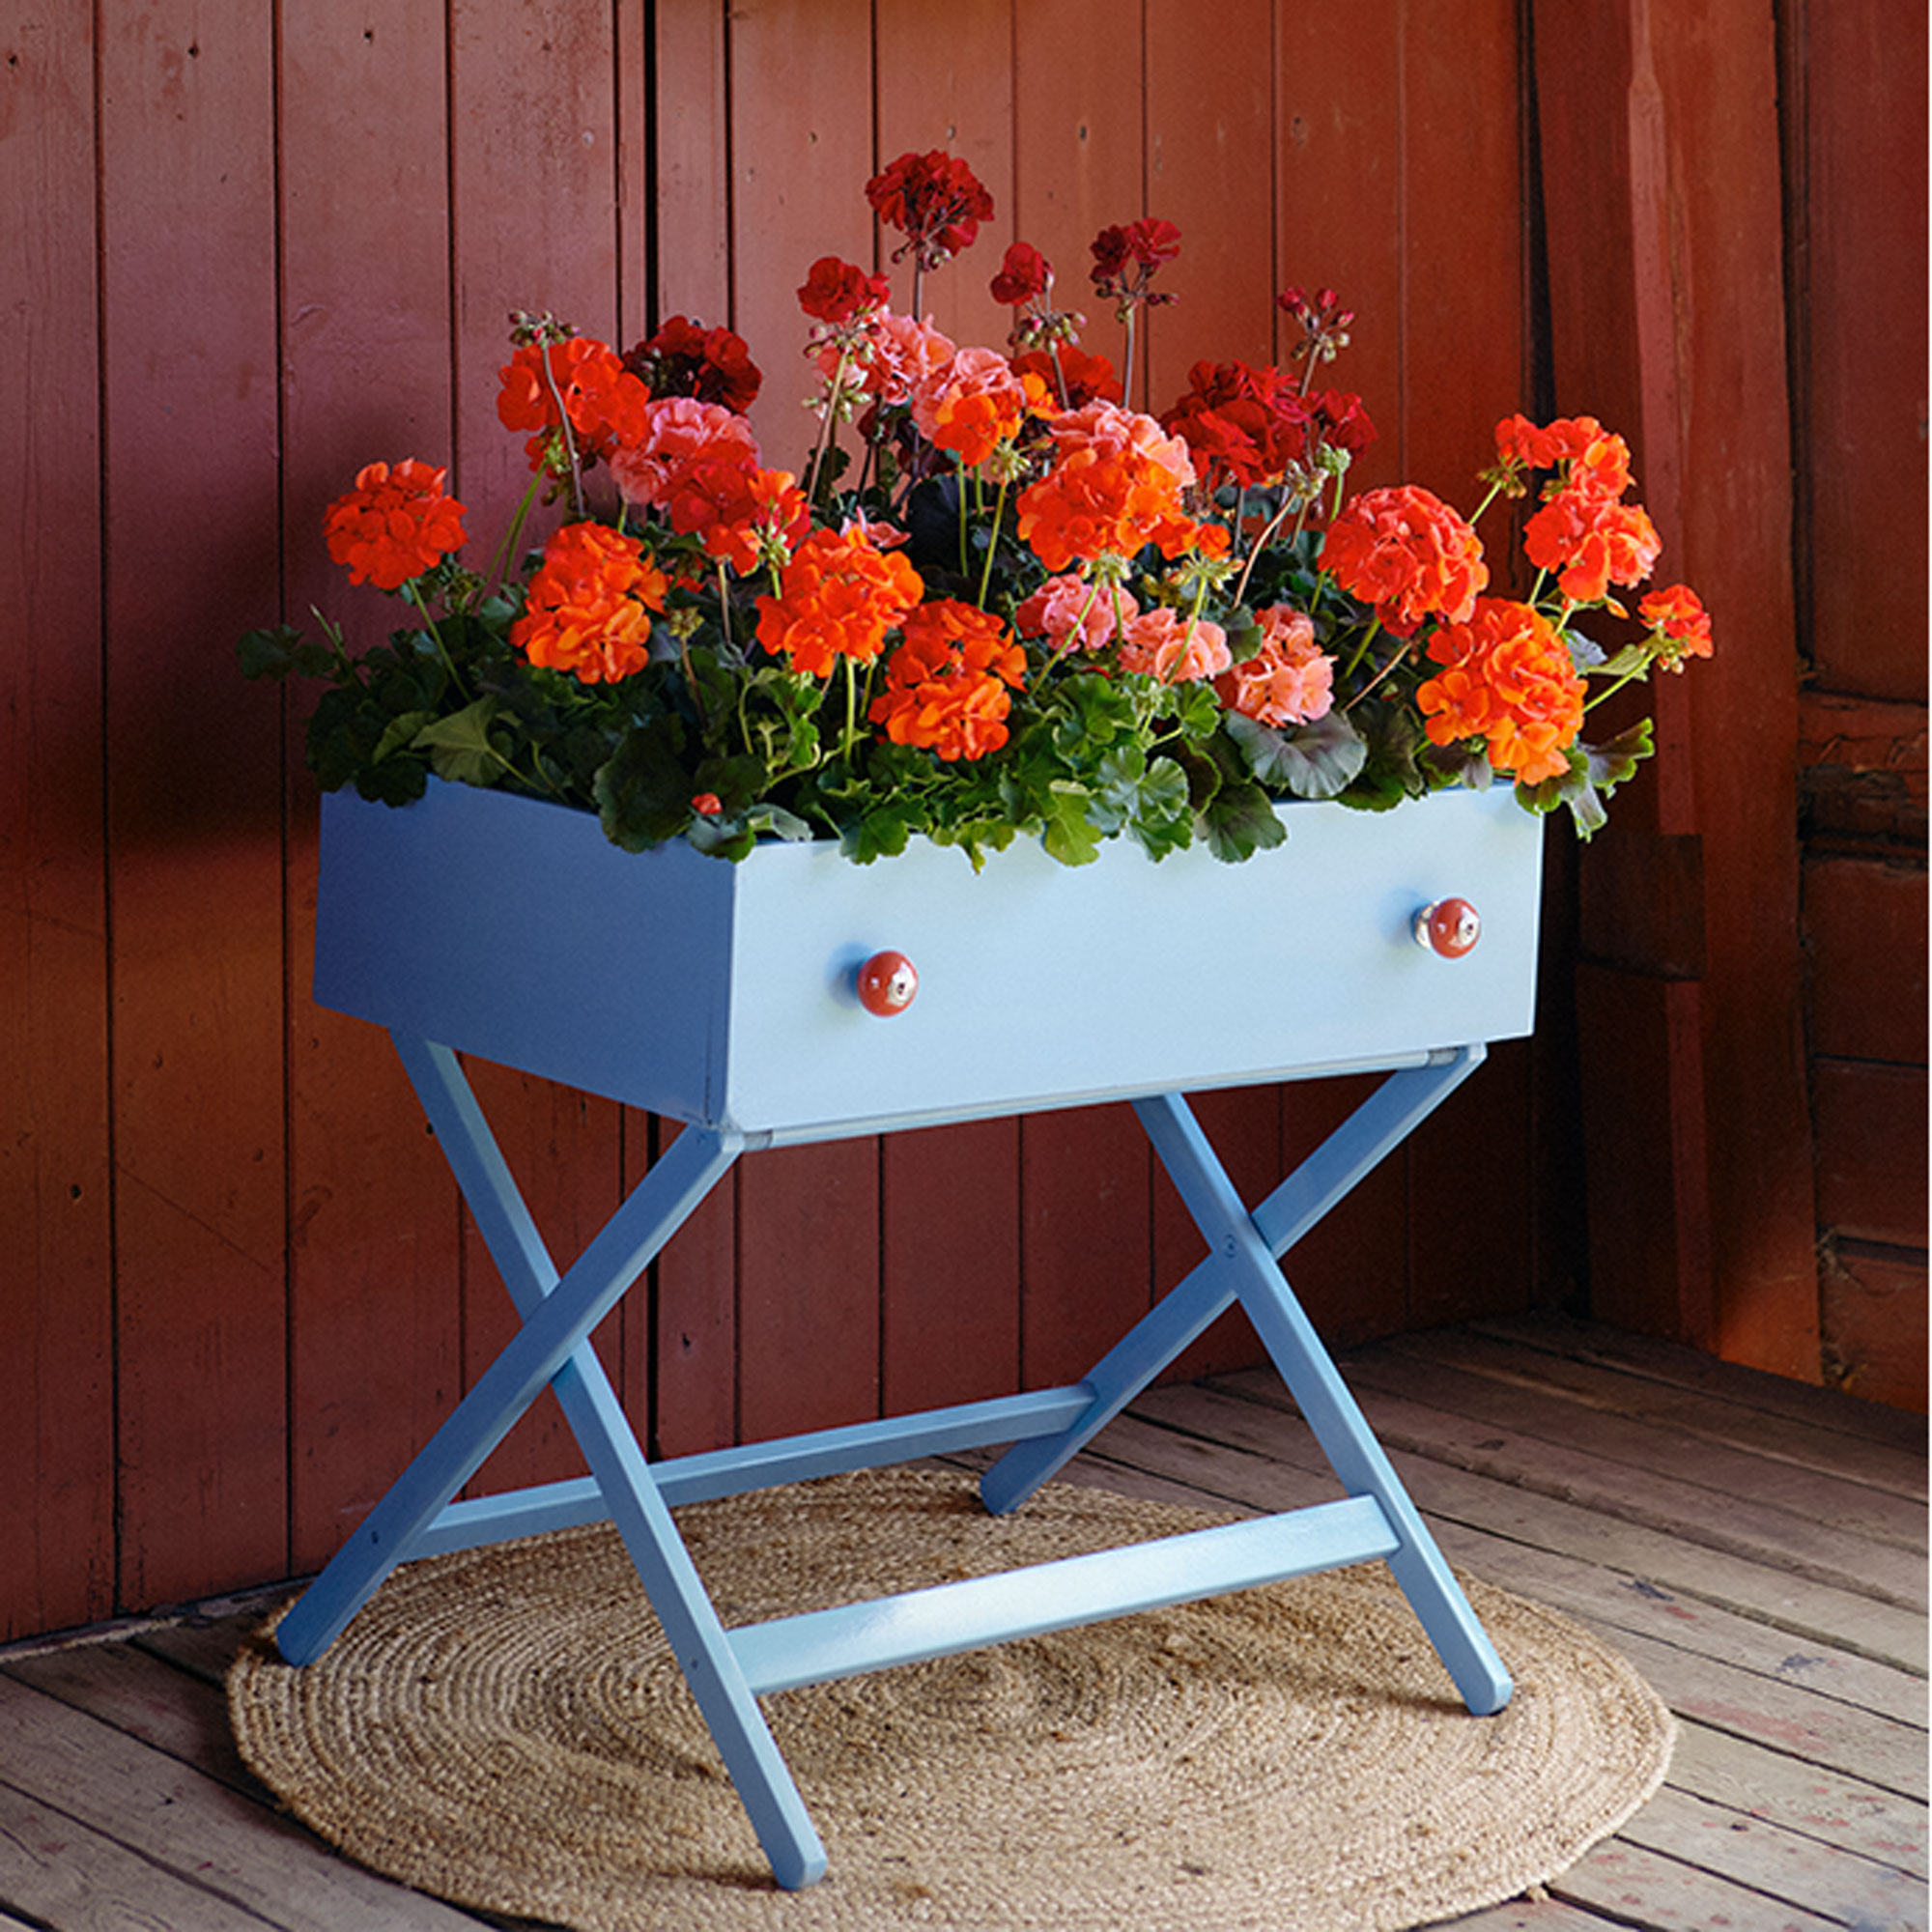
Find a new use for an out-of-action chest of drawers by using individual drawers to make colourful wooden planters. Try mounting a slimline drawer on brackets to create a fun wall display, or alternatively use the base of an old table, chair or suitcase stand to make a quirky raised planter.
Use exterior paint to spruce up your drawers in a cheery colour. Before painting, drill a couple of holes in the base to provide drainage for plants and line drawers with plastic membrane to protect the wood from rotting.
11. Set up your own DIY outdoor kitchen
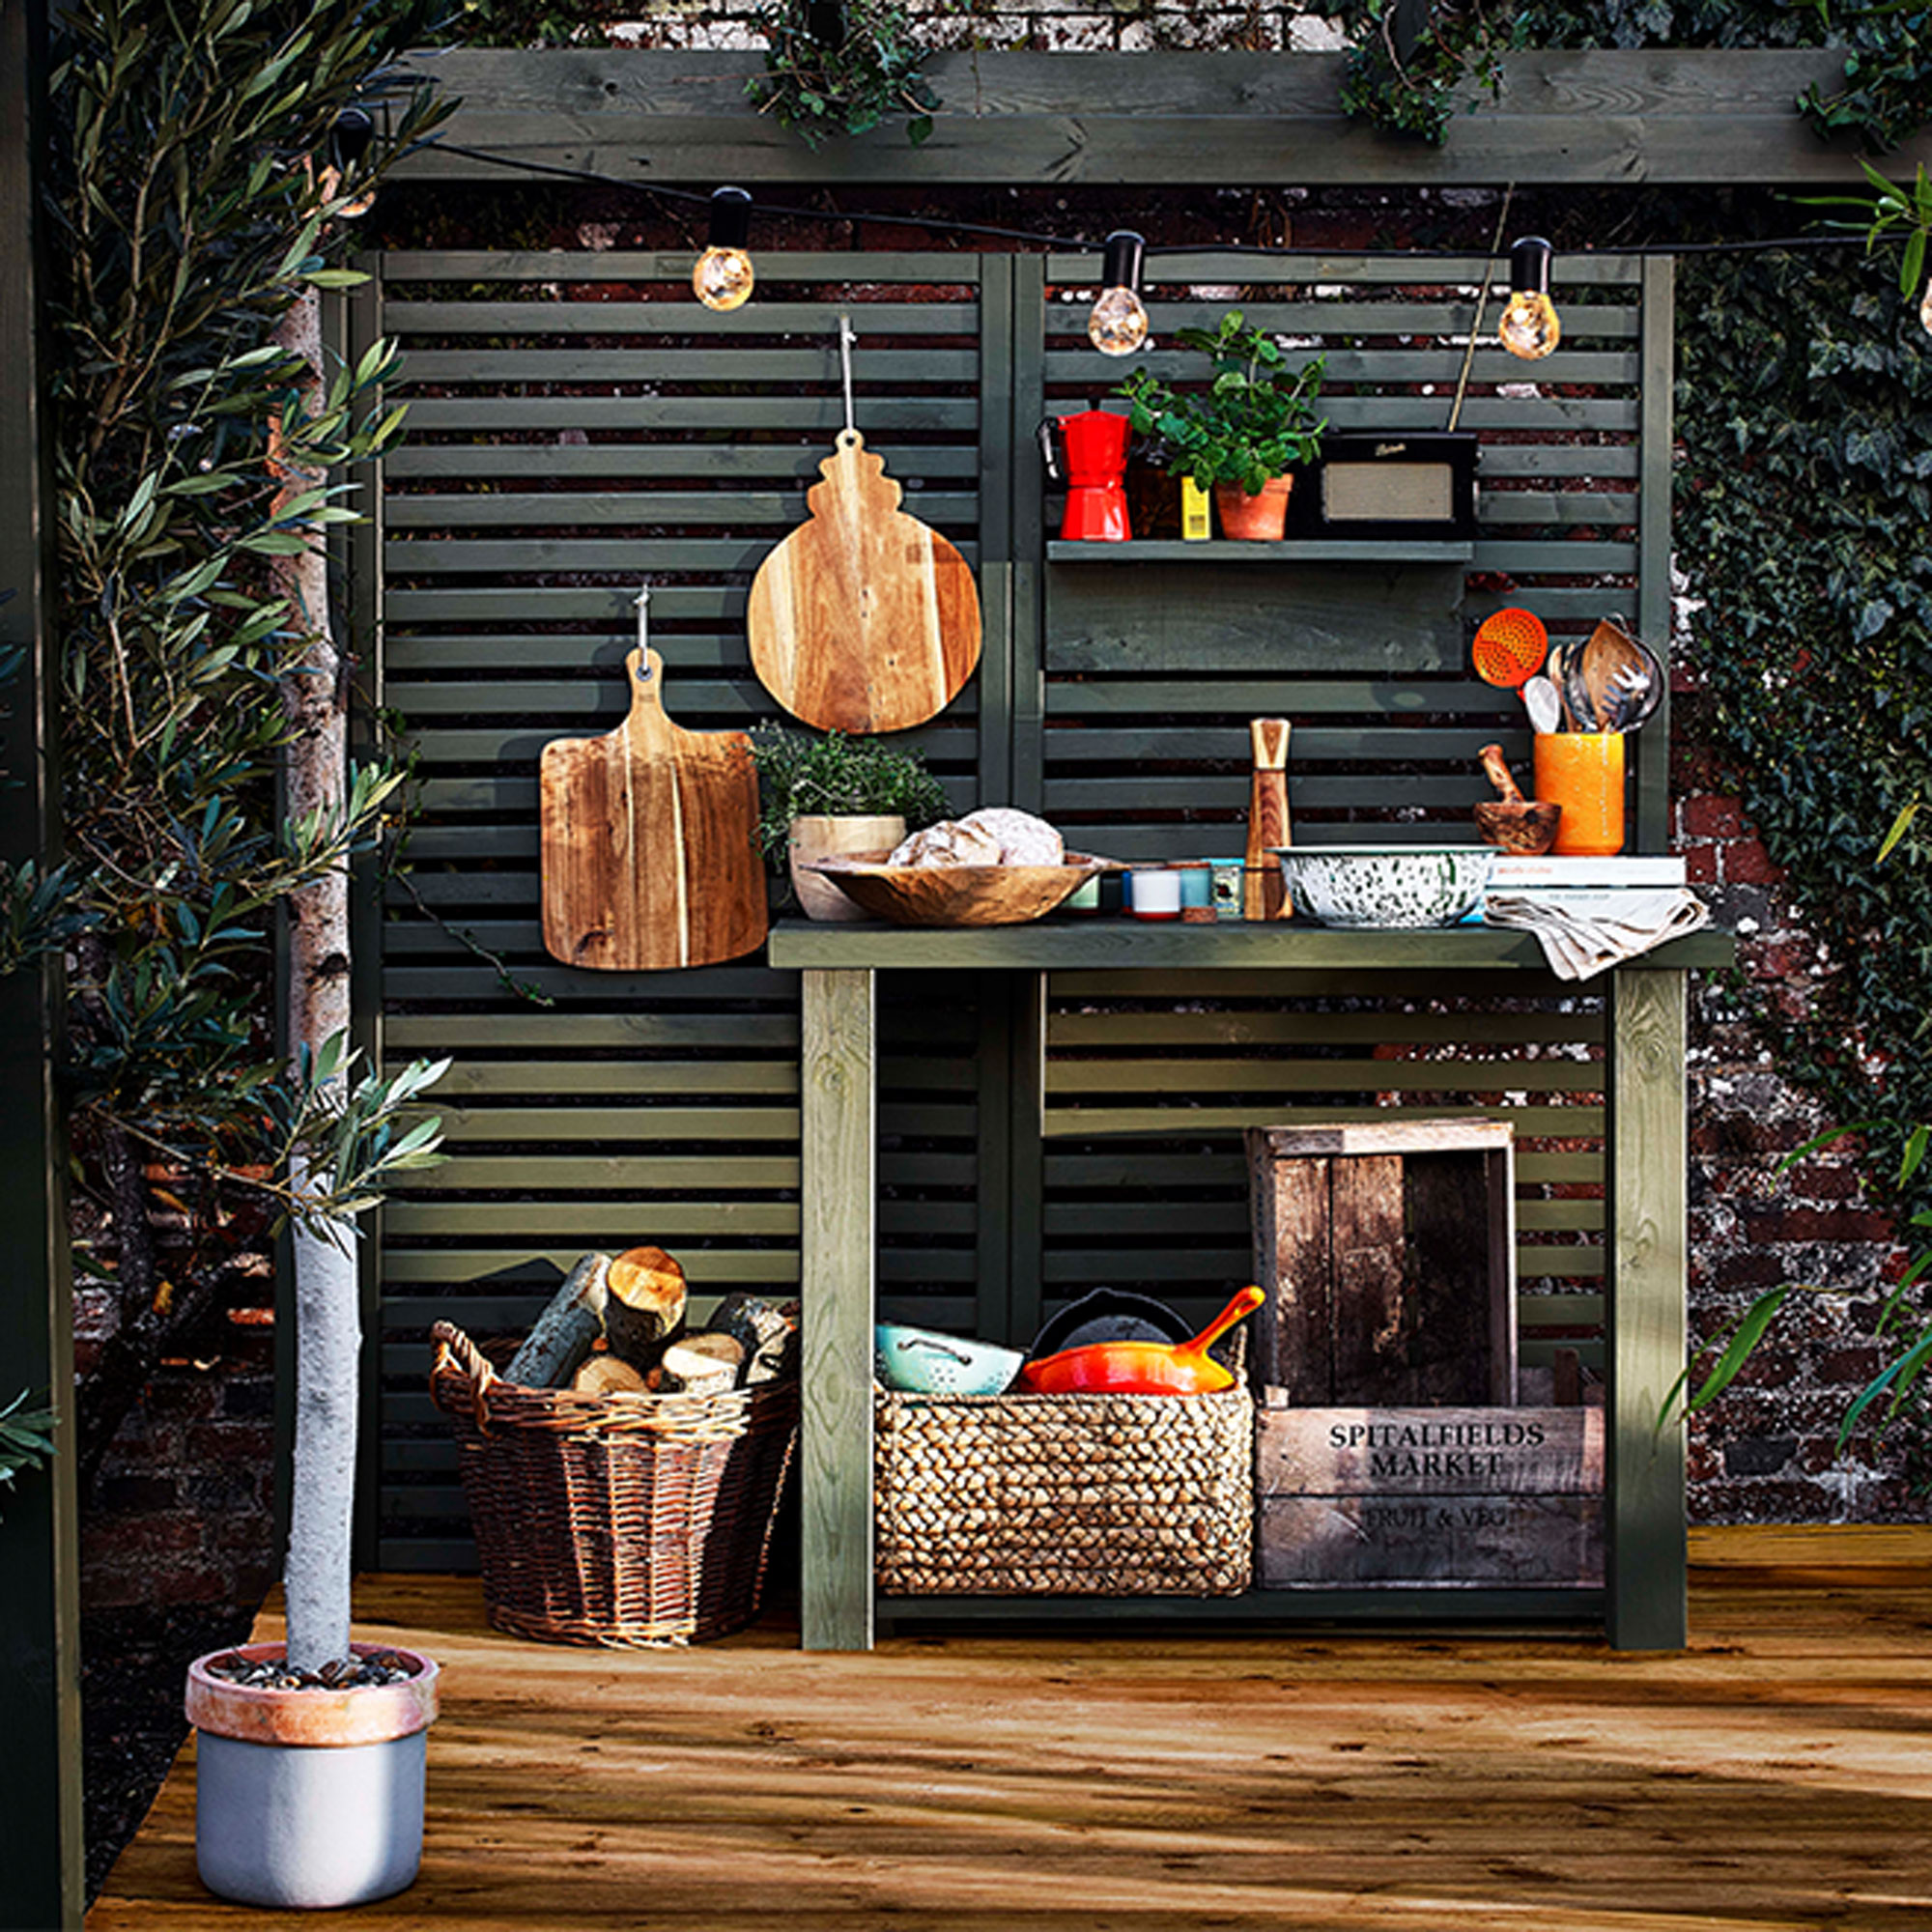
Make a kitchen work station to sit alongside your outdoor barbecue area so that all your cooking essentials are close to hand. Use a couple of slatted fence panels to act as the backdrop for your kitchen. It will help to keep the set-up contained and the slats provide a useful surface for hanging utensils and chopping boards.
Finish off your kitchen with an outdoor table or bench to act as an outdoor prep space. Fix shelves on the timber panels so you'll have storage for cooking oils and condiments and stand a couple of wooden crates and baskets underneath for bulkier cookware, pans and grills.
12. Make rustic outdoor floor lamps
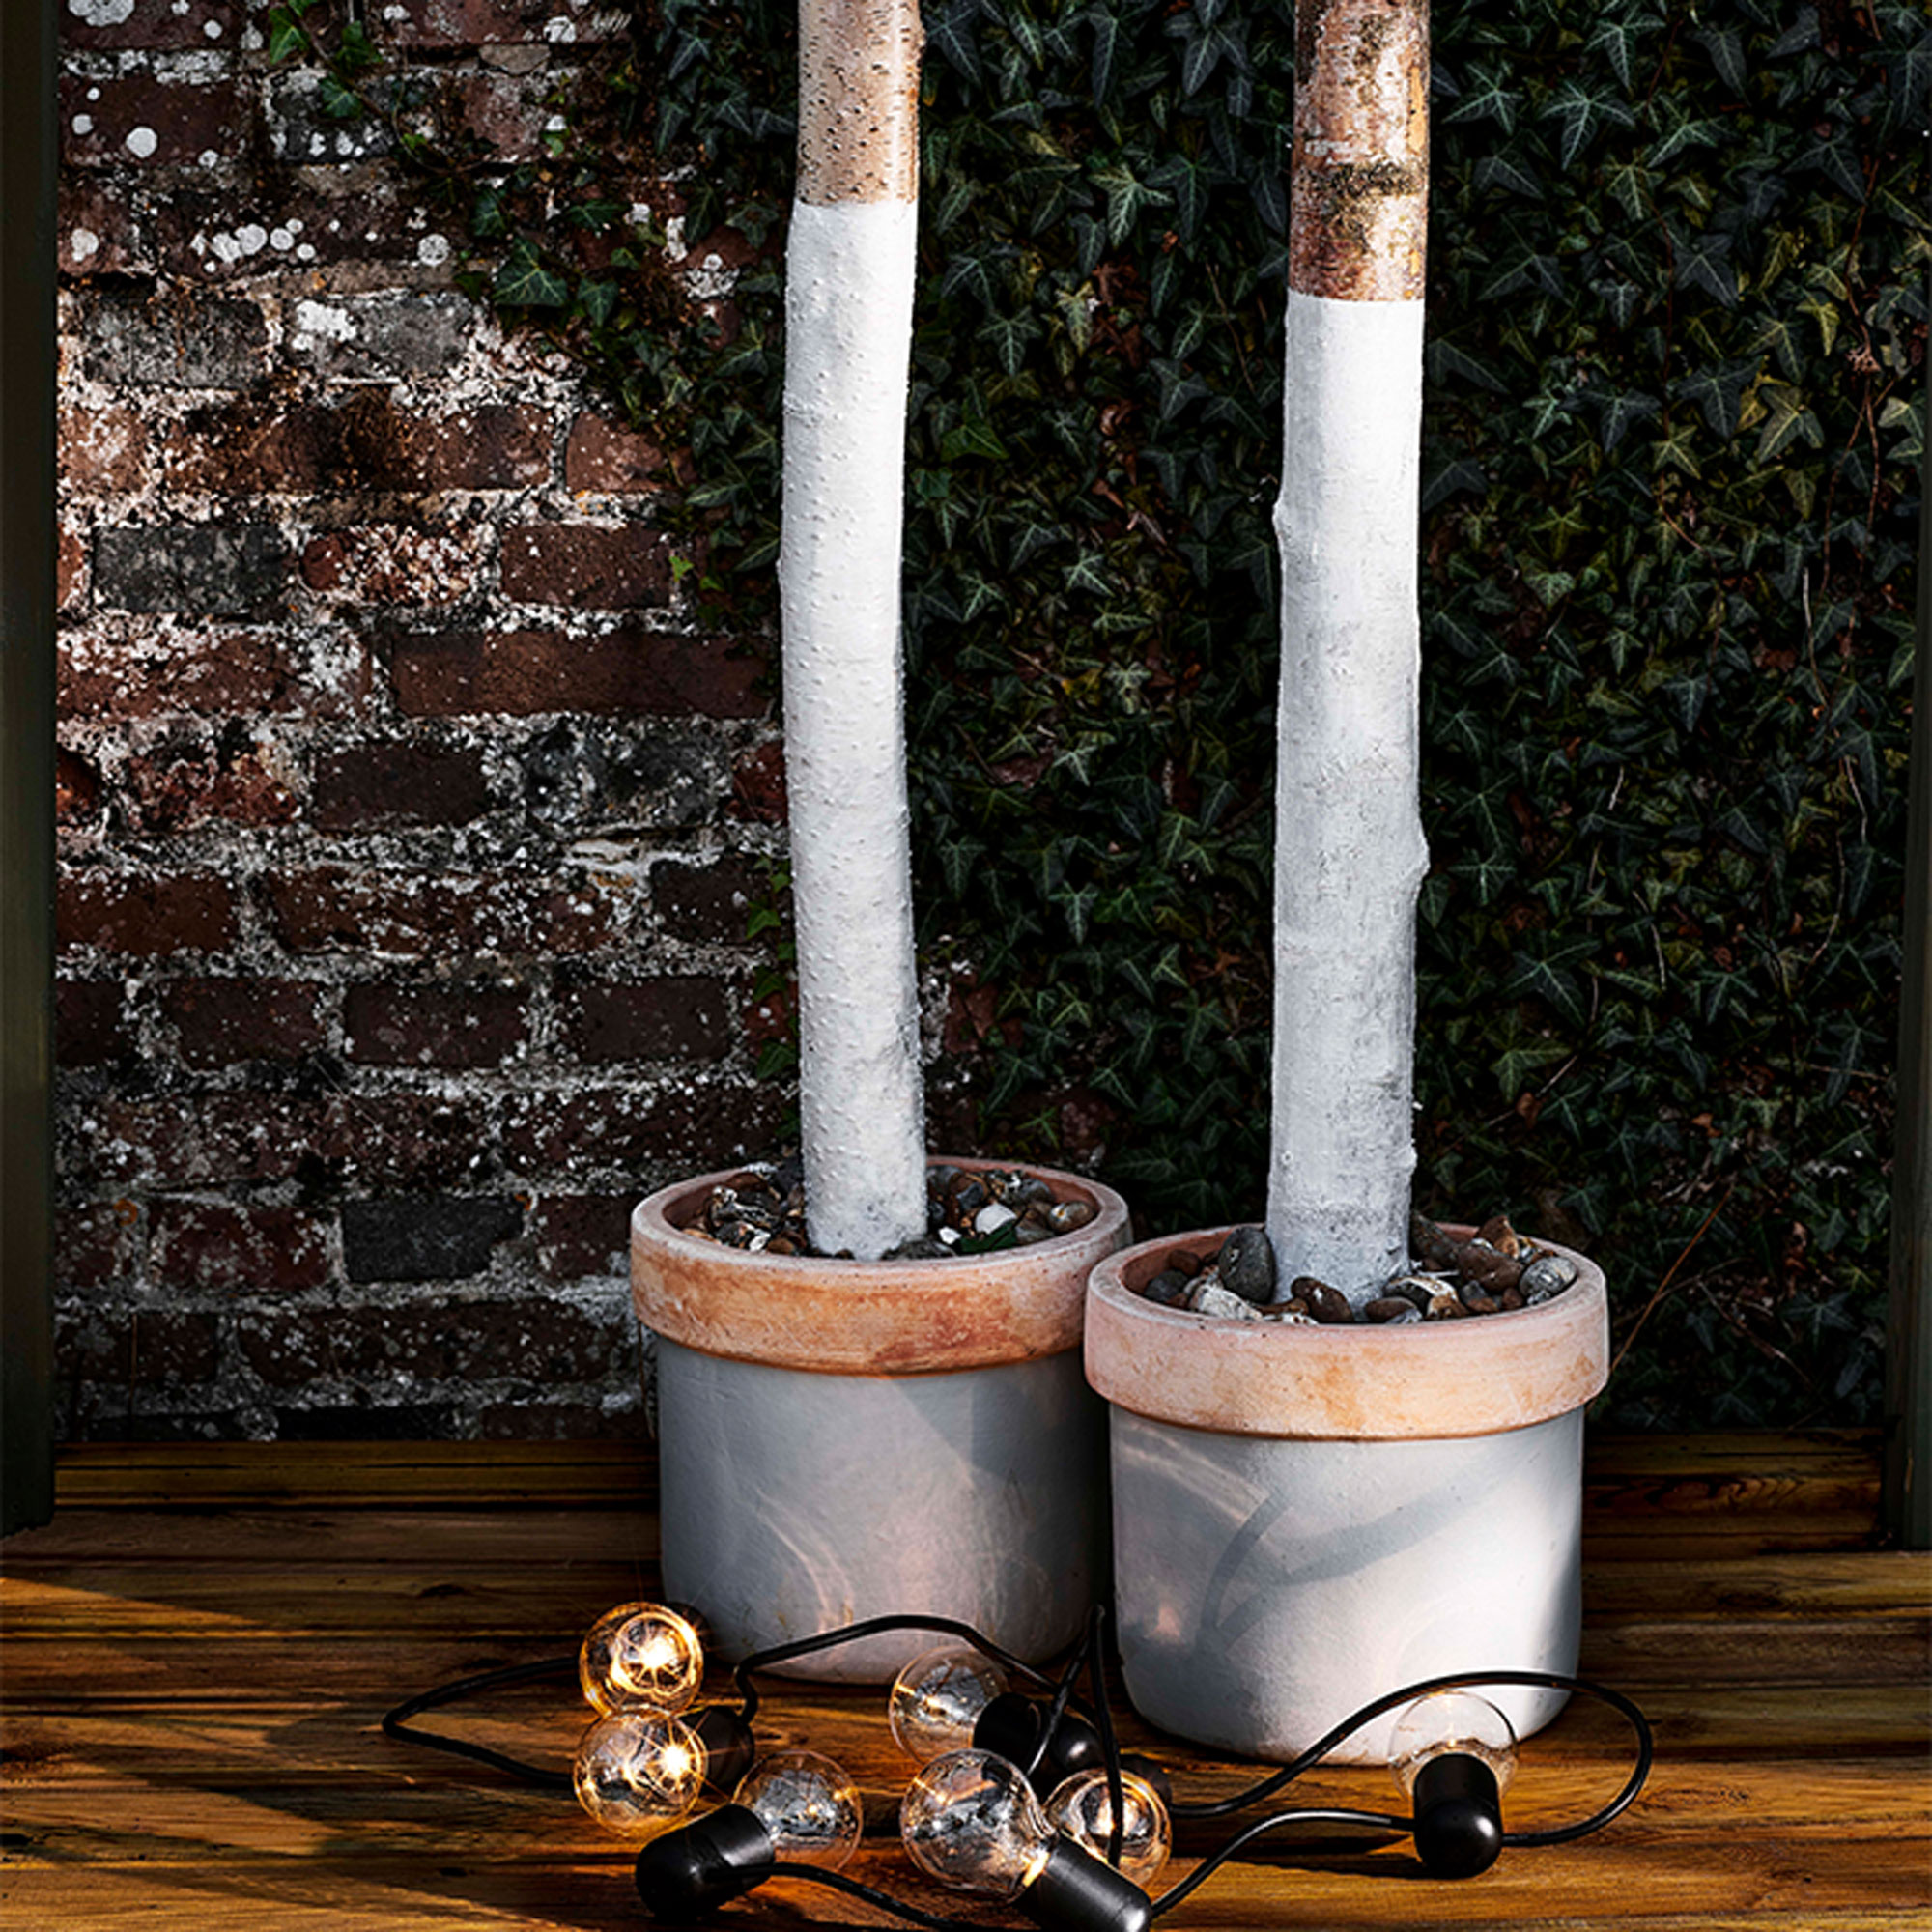
Make your own floor lamps as a quirky finishing touch to your outdoor kitchen (see them in full above). The rustic timber posts are perfect for stringing outdoor festoon lights on and are an easy way of adding extra illumination if your patio lacks a lighting source.
Start by finding a couple of sturdy wooden logs, tall enough to hang lights on. You’ll need a couple of terracotta pots to stand the logs in, filled with quick-drying cement that will keep them firmly held in place. Once the cement is dry, paint the lower section of logs to match your pots, screw in a couple of hooks at the top and use these to suspend your lights from.
What can I use for outdoor furniture?
Pallet wood has become increasingly popular for garden projects as it is often free and readily available. While wooden pallets are designed to be stored outside when in use for packaging and shipping, the wood isn’t treated for long-term outdoor exposure, so will need weather-proofing if pallet furniture is to be left outdoors all season long. Use a timber stain or varnish if you want the wood to retain its rustic look, or alternatively try exterior paint if you’d prefer a splash of bolder colour.
Pallet wood can often be dirty and stained, so should be thoroughly cleaned before use. Loose staples and protruding nails are also a problem and can be quite sharp, so check over any wood fist, removing these to make it safe. It’s also worth giving the surface a light sanding to get rid of any rough patches and splintered wood.
How do I make my patio furniture look good?
Protecting outdoor furniture from the elements is the best way of keeping it looking tip-top. While weather-proofing treatments will protect outdoor timber from rain and sun damage, it’s inevitable that after a long summer spent outdoors, furniture will end up looking past its best.
Investing in outdoor covers is an easy way of protecting outdoor seating, with covers easy to zip on or off when the weather is inclement. Removable cushions are a good idea too as they can be popped away in the shed or a storage chest when there’s a shower. Opt for zippable covers that can be machine washed or water-repellent and mildew-resistant fabrics so that they’ll stay looking good for longer.
Clean garden furniture regularly to keep it looking its best. Bring out the vacuum if you have woven furniture, which will help to remove dirt and dust that’s trapped in the weave. Use a stiff brush to clean wooden furniture and then wipe down with a damp, soapy cloth. Avoid using a jet washer on wood as it can make wood swell and loosen the joints.

Lisa is Deputy Editor of Style at Home magazine and regularly contributes to sister title Ideal Home. She has written about interiors for more than 25 years and about pretty much every area of the home, from shopping and decorating, crafts and DIY to real home transformations and kitchen and bathroom makeovers. Homes and interiors have always been a passion and she never tires of nosying around gorgeous homes, whether on TV, online, in print or in person.
-
 Zoe Ball's colourful kitchen island shows how easy it is to create a characterful cooking space - here's how she did it
Being brave with colour will reap huge rewards
By Holly Cockburn
-
 7 plants that will make your patio smell gorgeous - the top fragrant picks experts recommend potting up
From aromatic flowers to fragrant herbs
By Kayleigh Dray
-
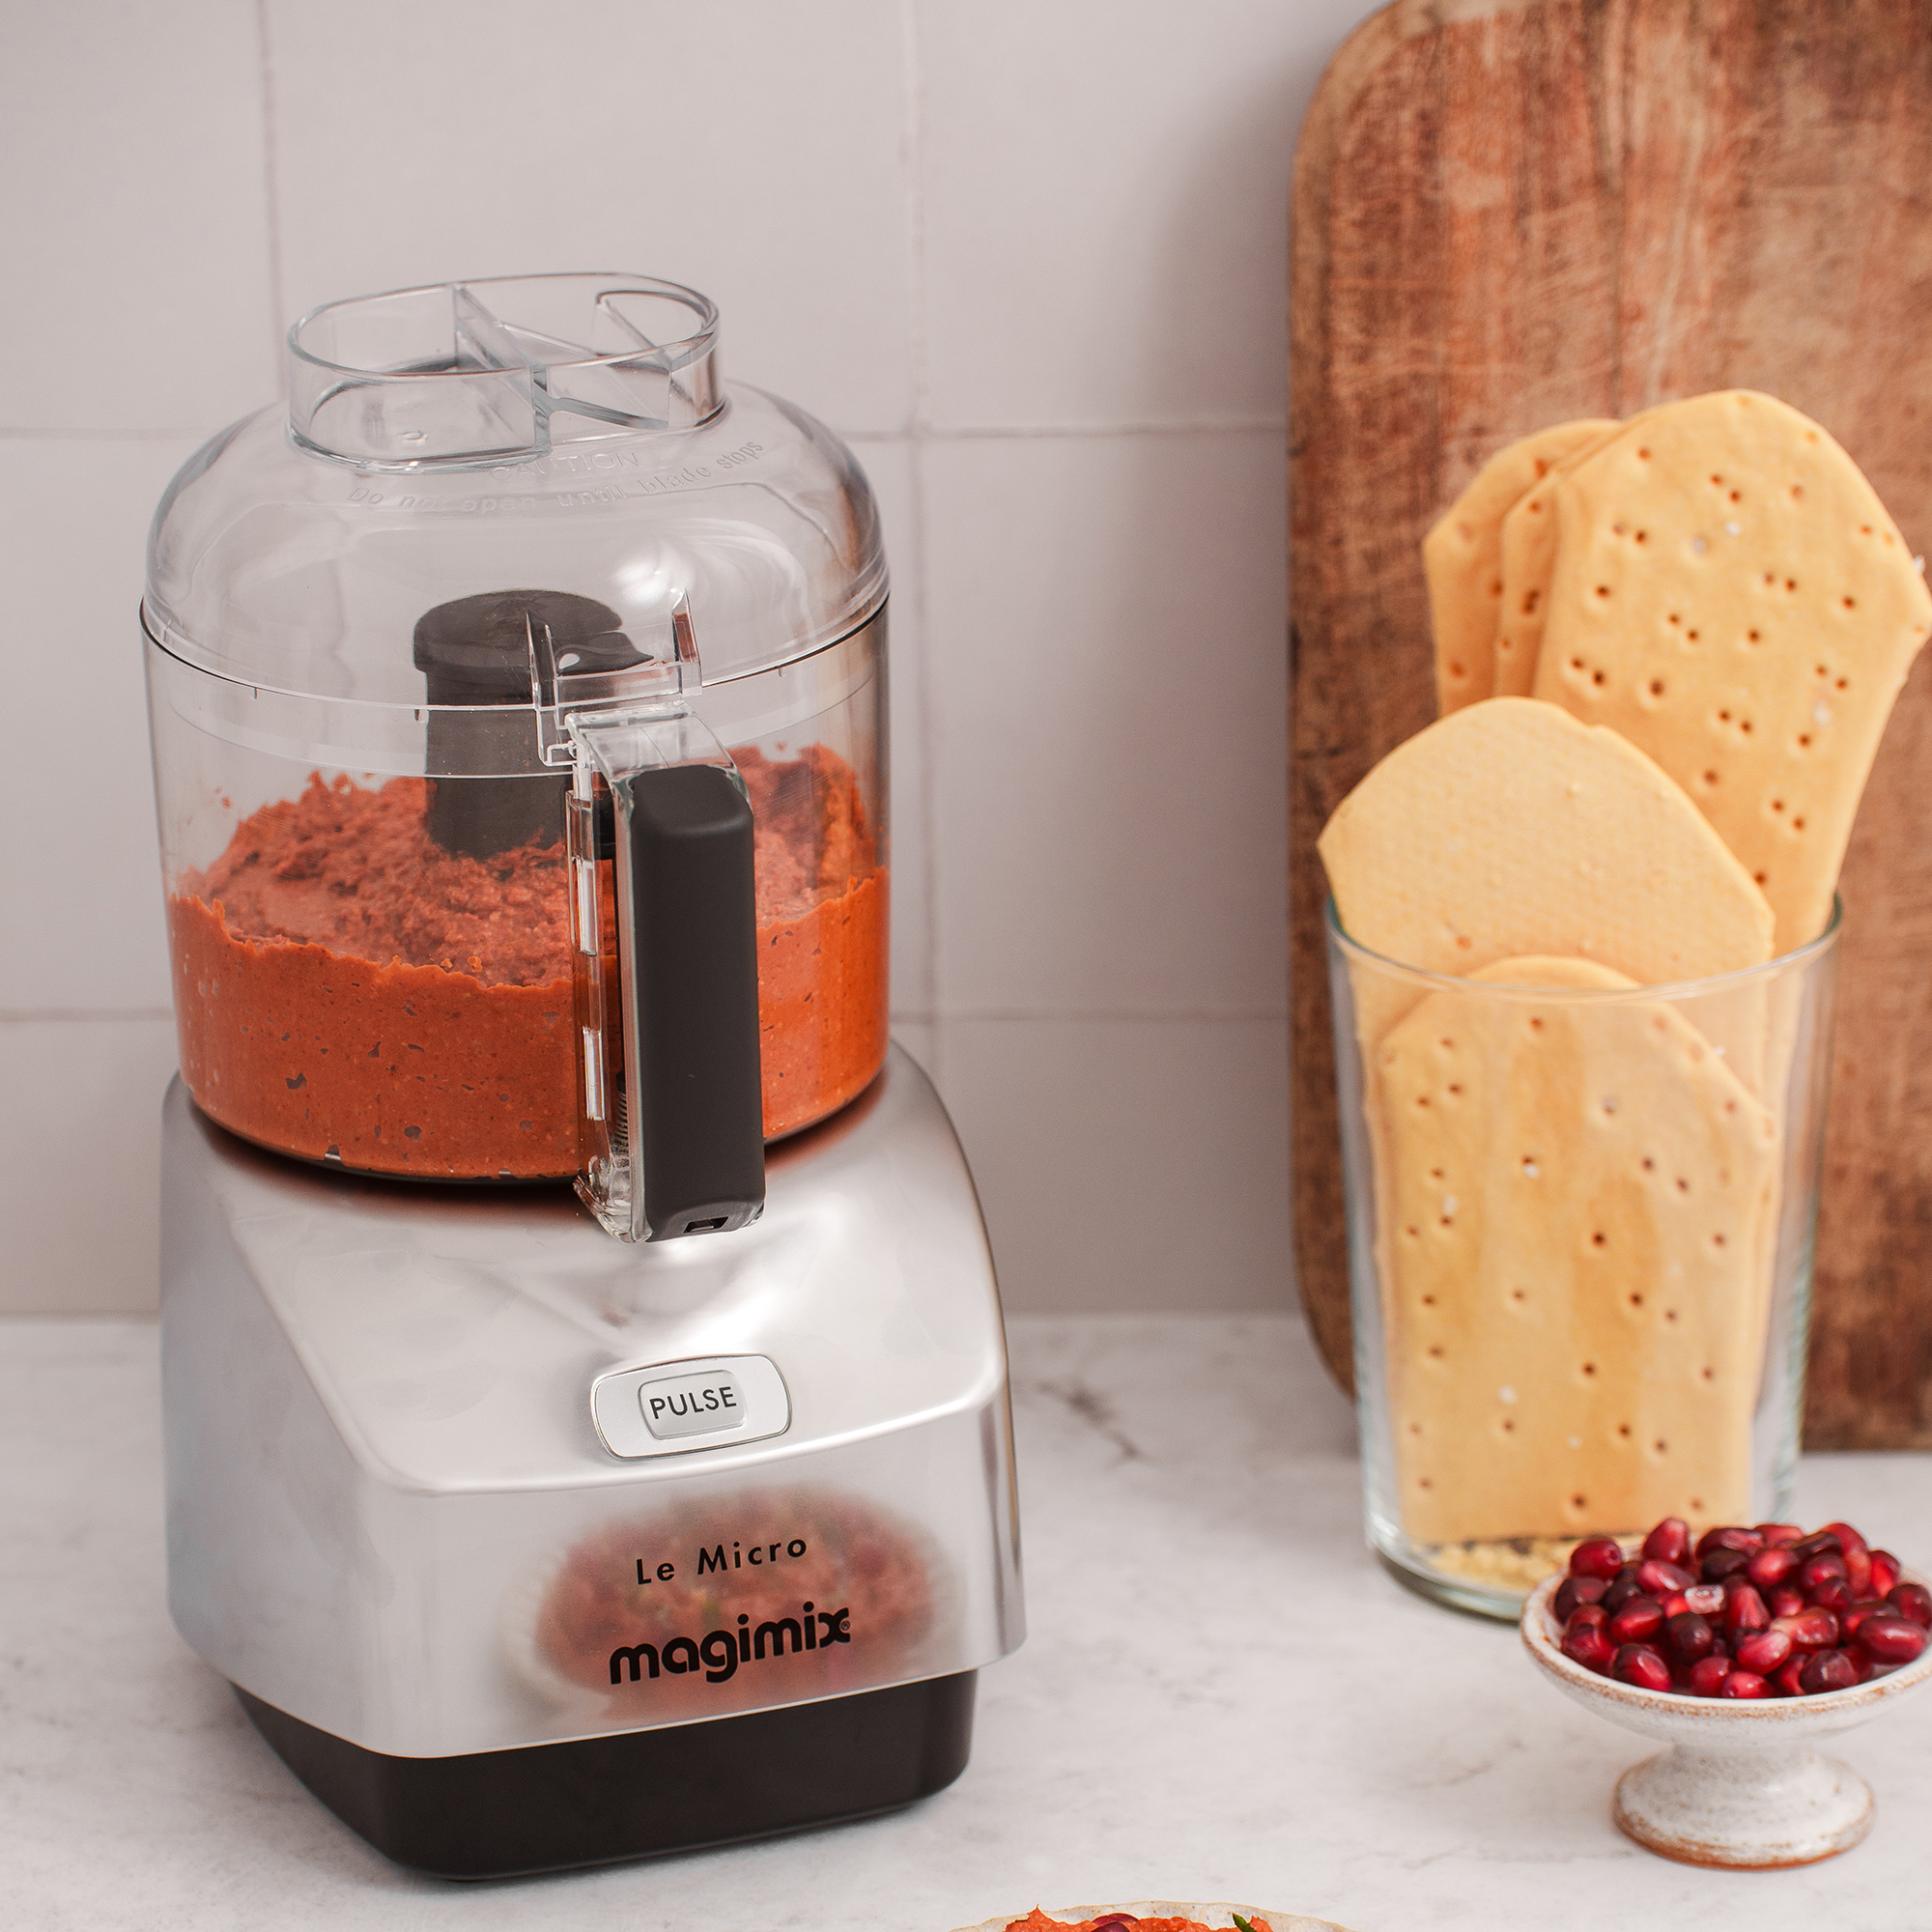 I won't gatekeep - Magimix's new small kitchen-friendly mini chopper is my secret to delicious lazy dinners
My homemade pesto pasta has never been better
By Holly Cockburn