A layout rethink gave this cramped galley kitchen a spacious dreamy makeover
Re-thinking the cramped layout and moving units around has opened up the space and made this galley kitchen feel super spacious
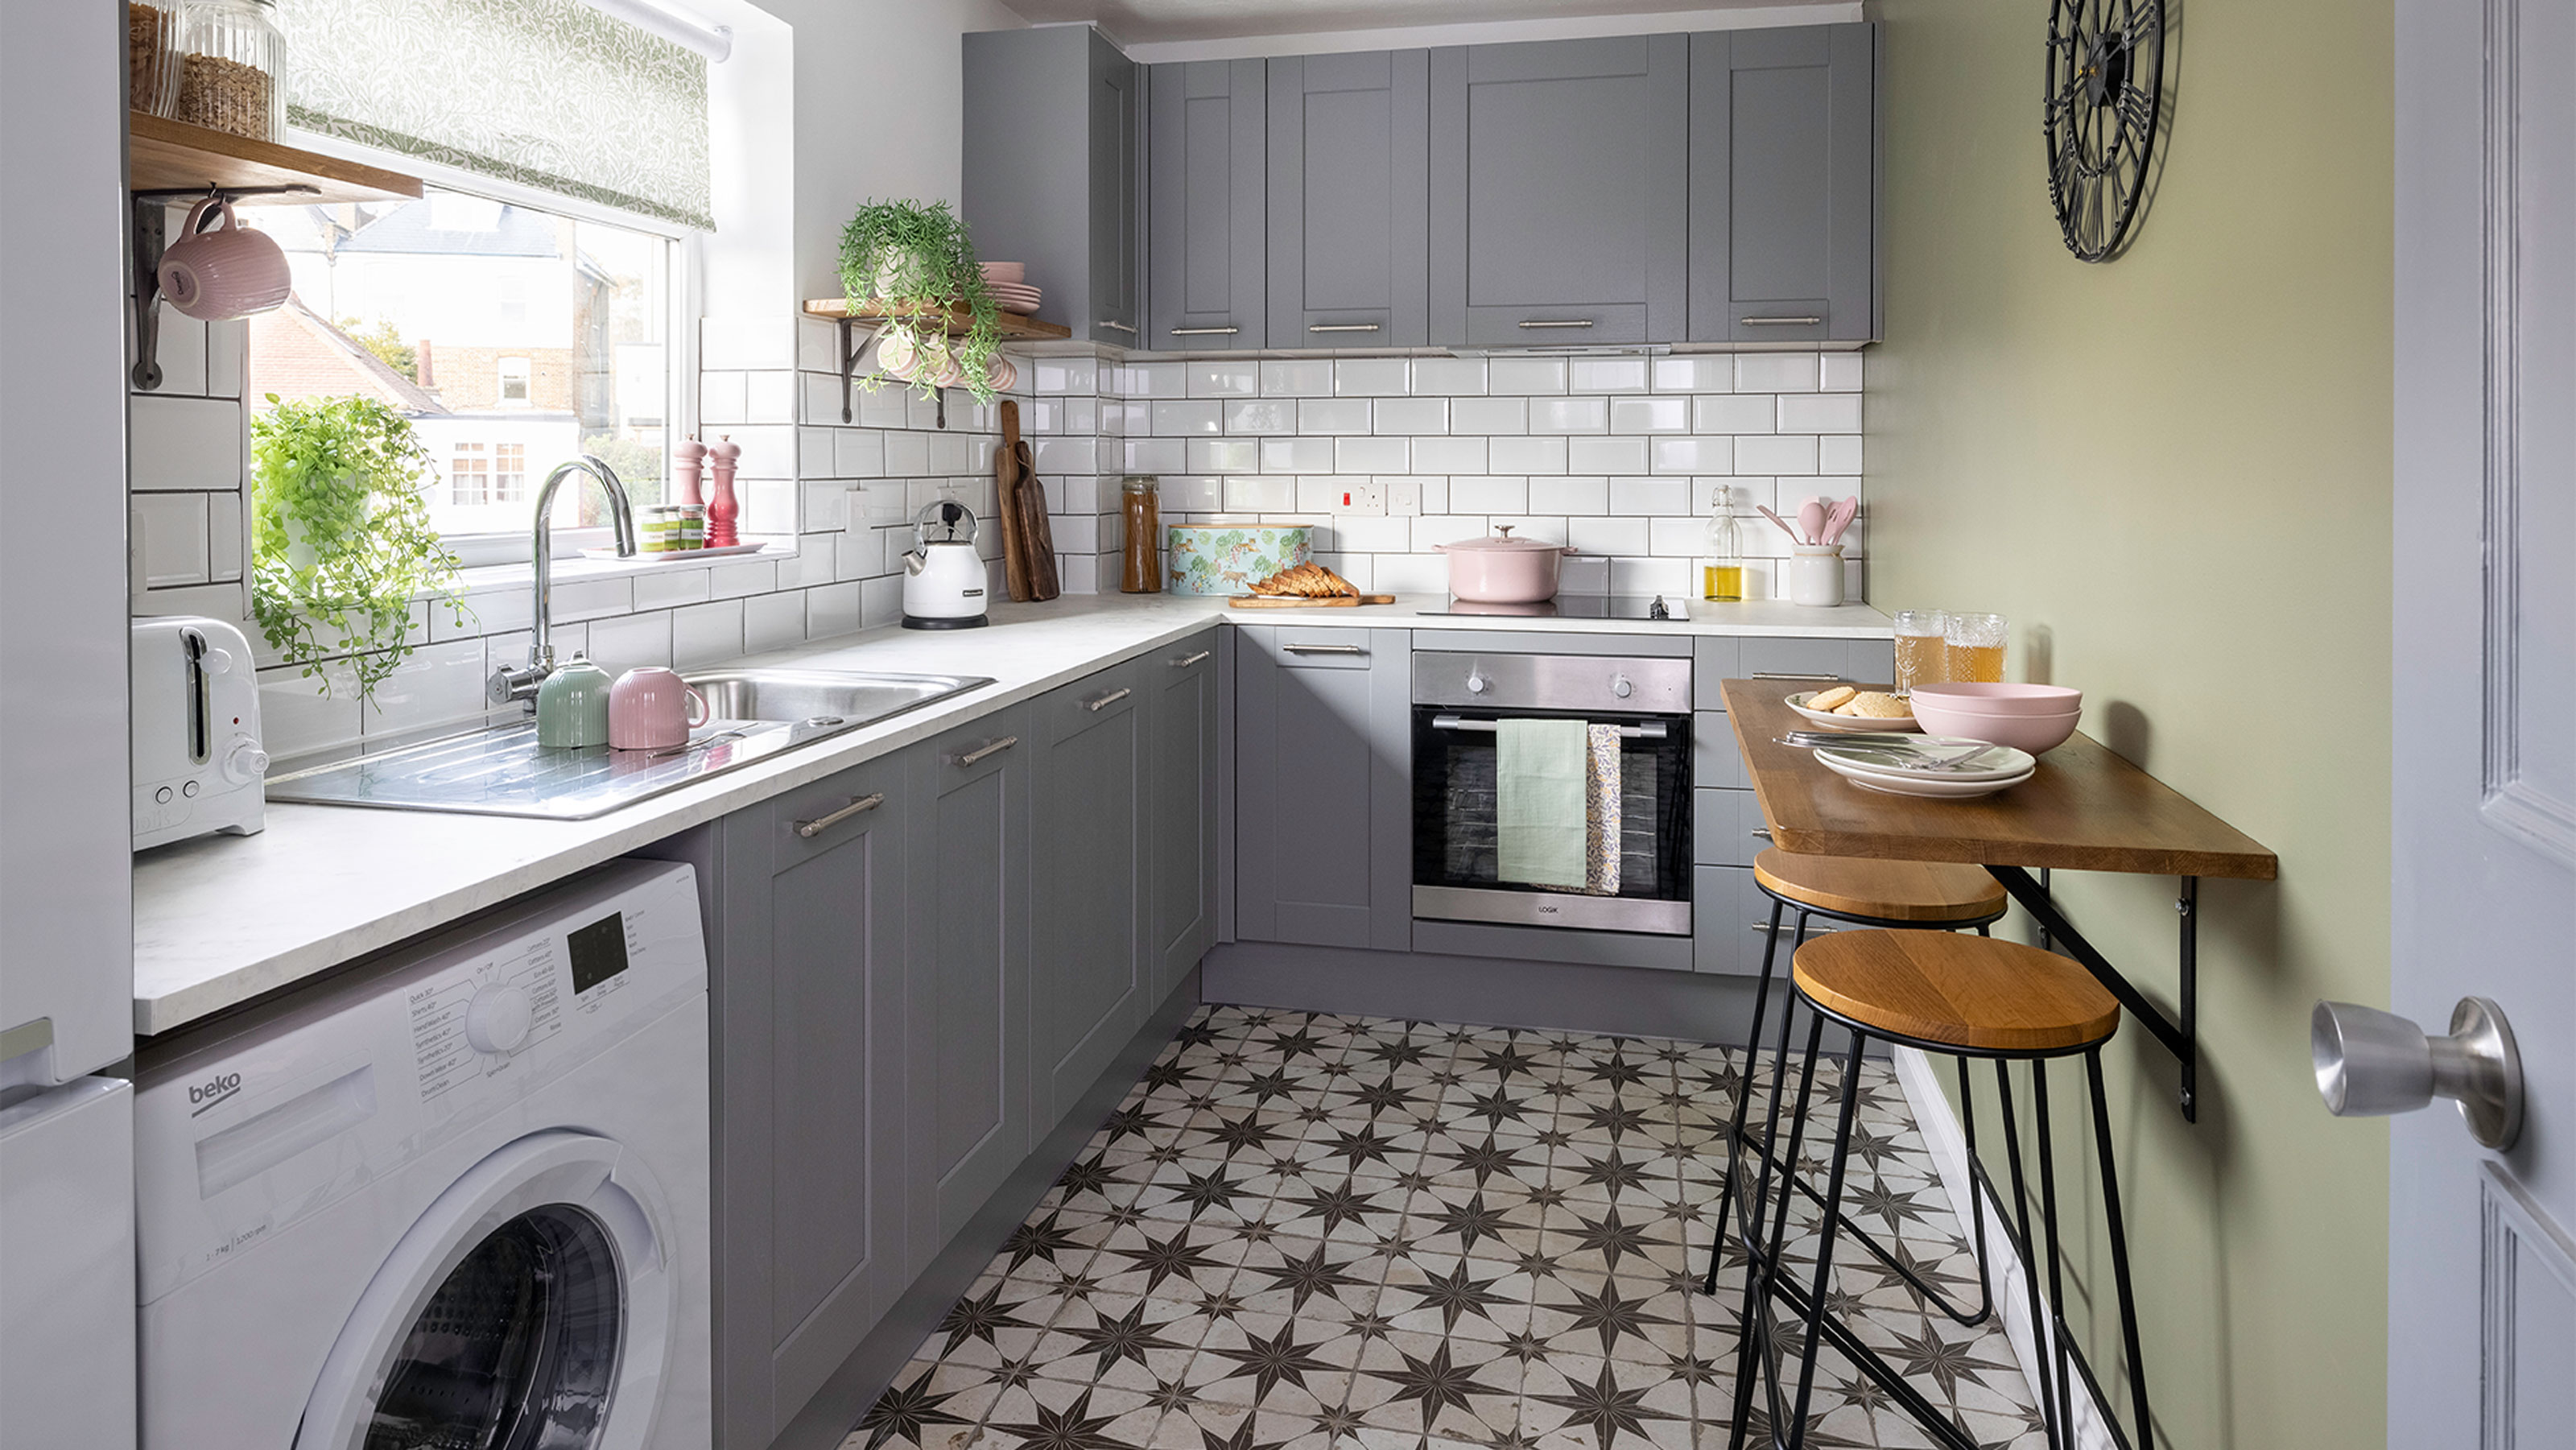

With a limited budget and no scope for structural improvements, the homeowner’s options were fairly limited when it came to planning this kitchen makeover and galley kitchen ideas.
But re-thinking the space and moving a few key units and bulky appliances around has made the world of difference and now this once-cramped galley kitchen feels miles more spacious.
Before
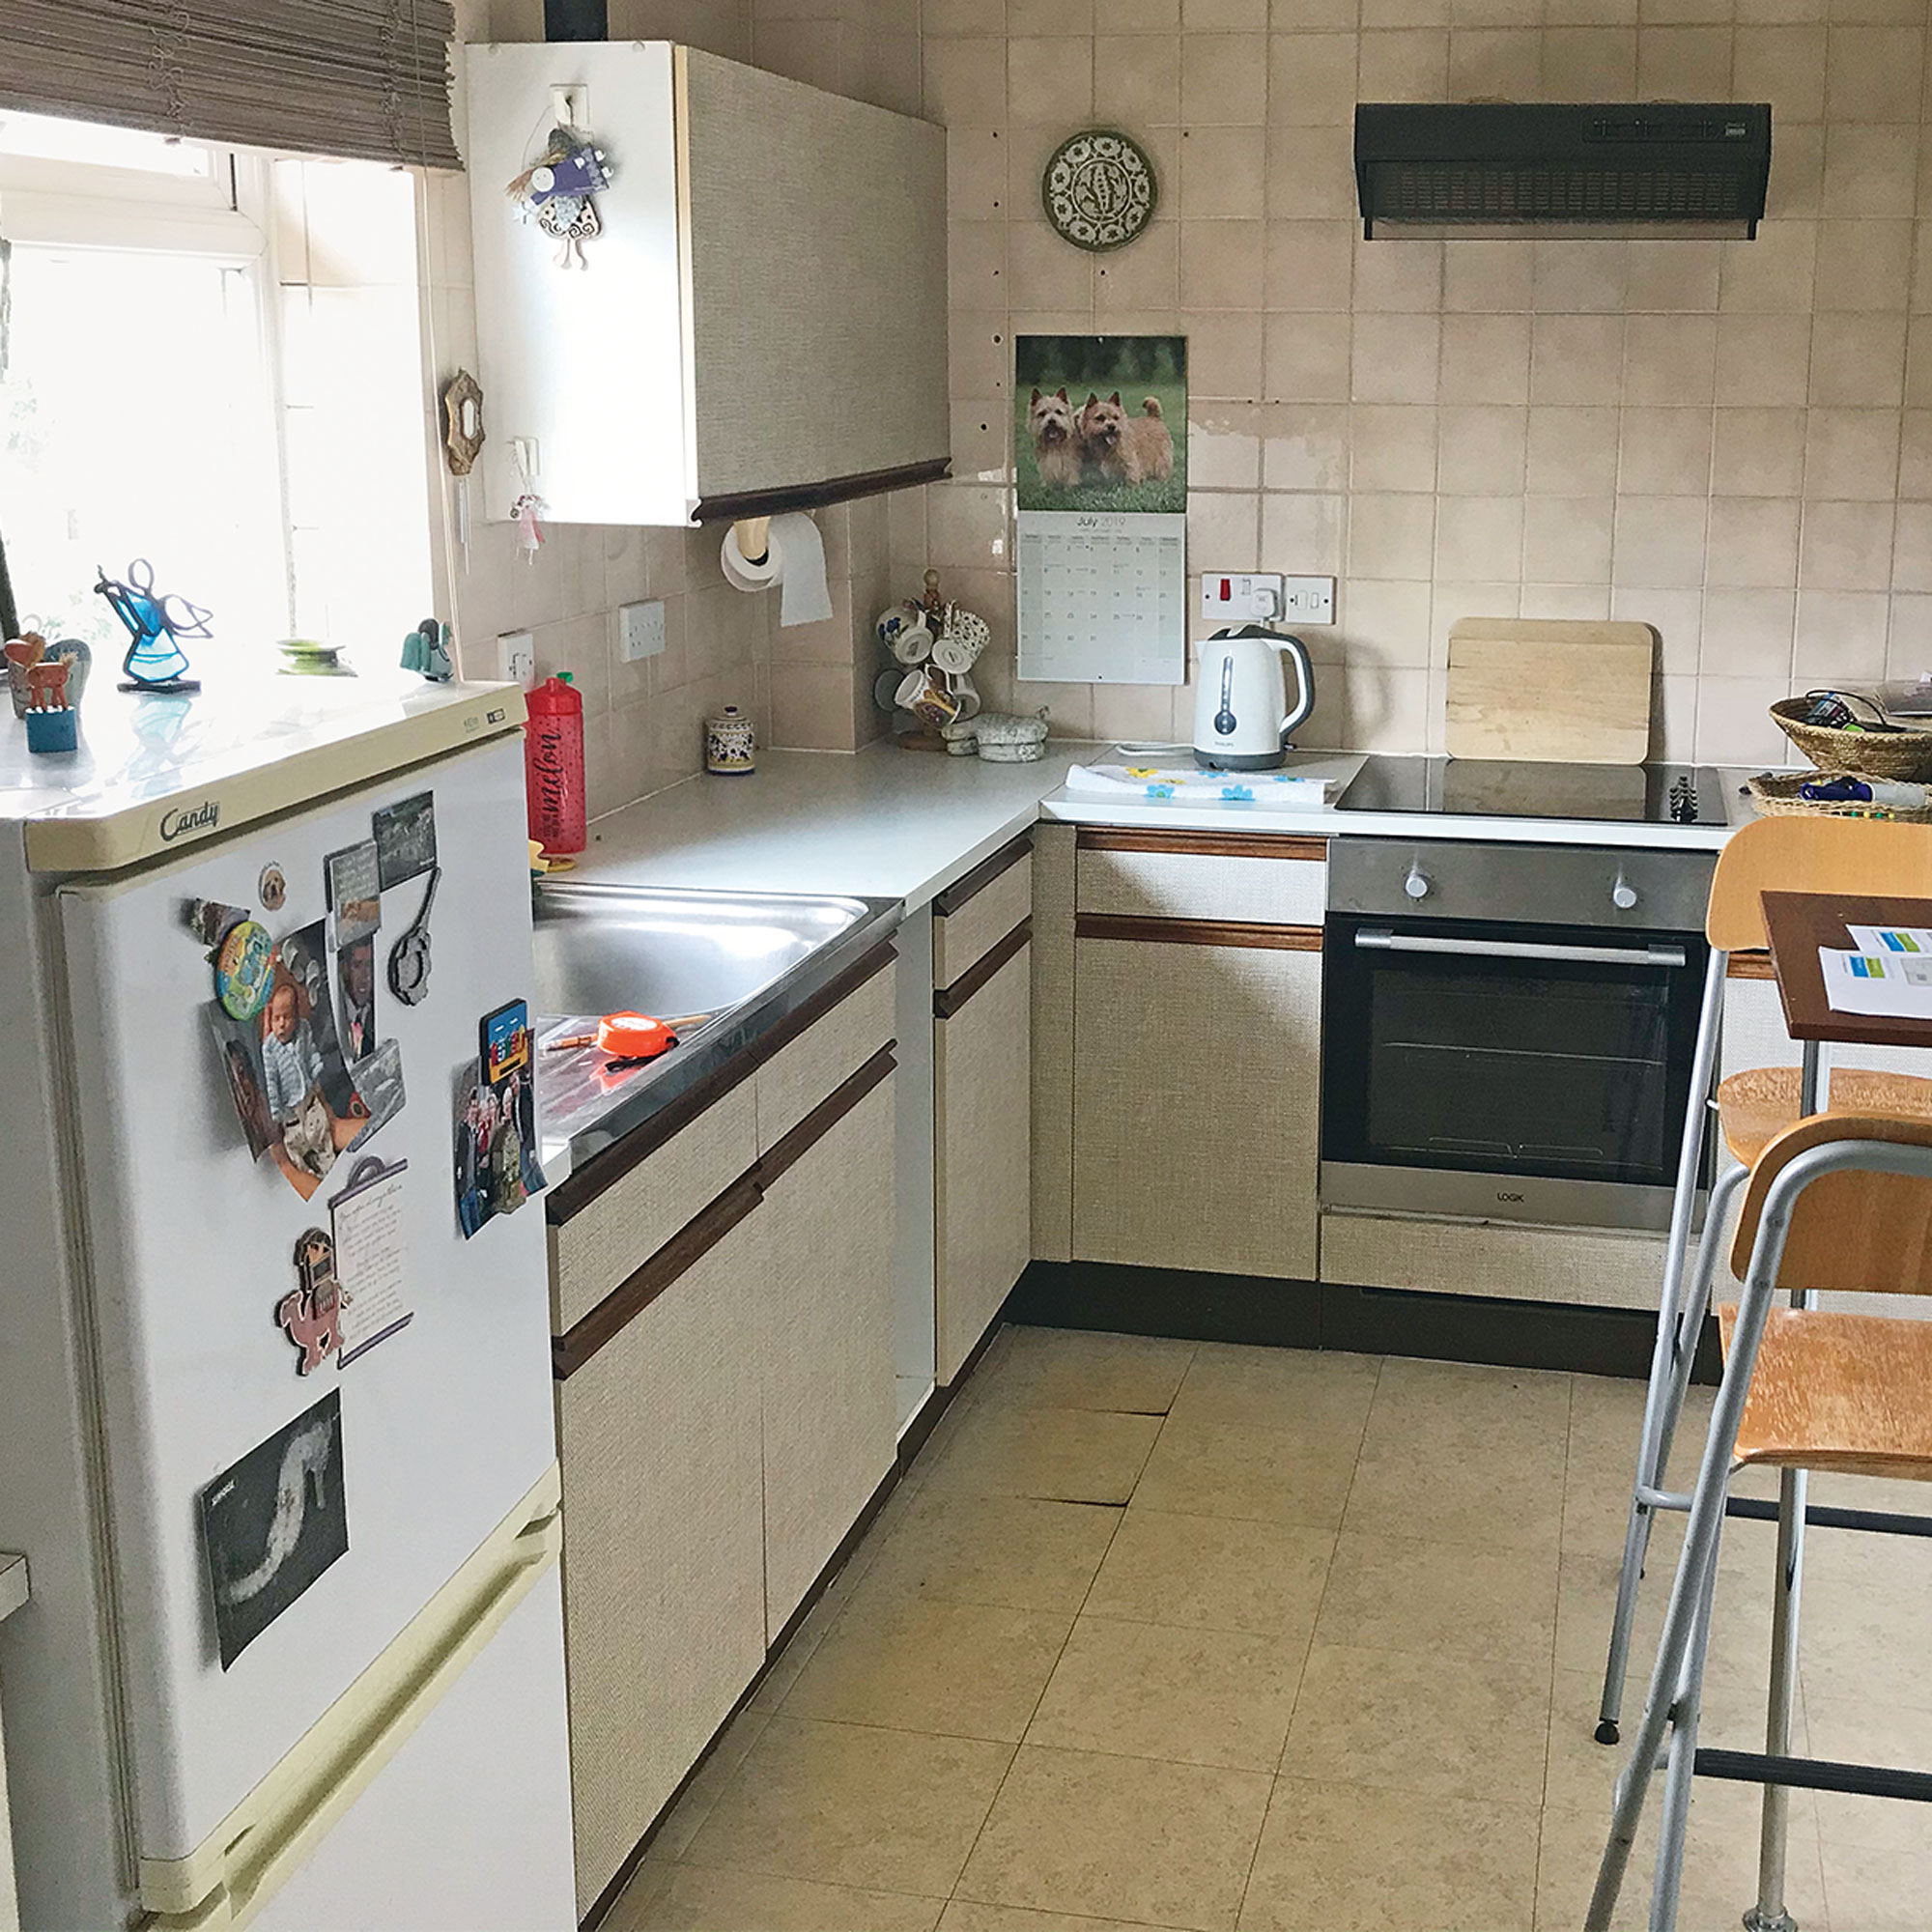
With a dark and dated decor, a bulky fridge freezer positioned next to the the sink and a large overhead cupboard flanking the window, ‘it felt like everything was closing in,’ explains the home owner. ‘I needed to rethink the space completely.’
'I bought the flat in 2021, with help from my parents. It has nice big rooms, but it had been rented out and was incredibly dated and tired. The melamine kitchen in beige and brown was definitely an original from the 1980s when the flats were built and it was in a real state.'
'I was pleased that things were so bad the whole lot had to go rather than trying to adapt what was there. I went along to several high-street kitchen companies, but Howdens stood out for quality, plus they gave me some useful planning advice with suggestions of how to make the cramped kitchen space feel bigger.'
After
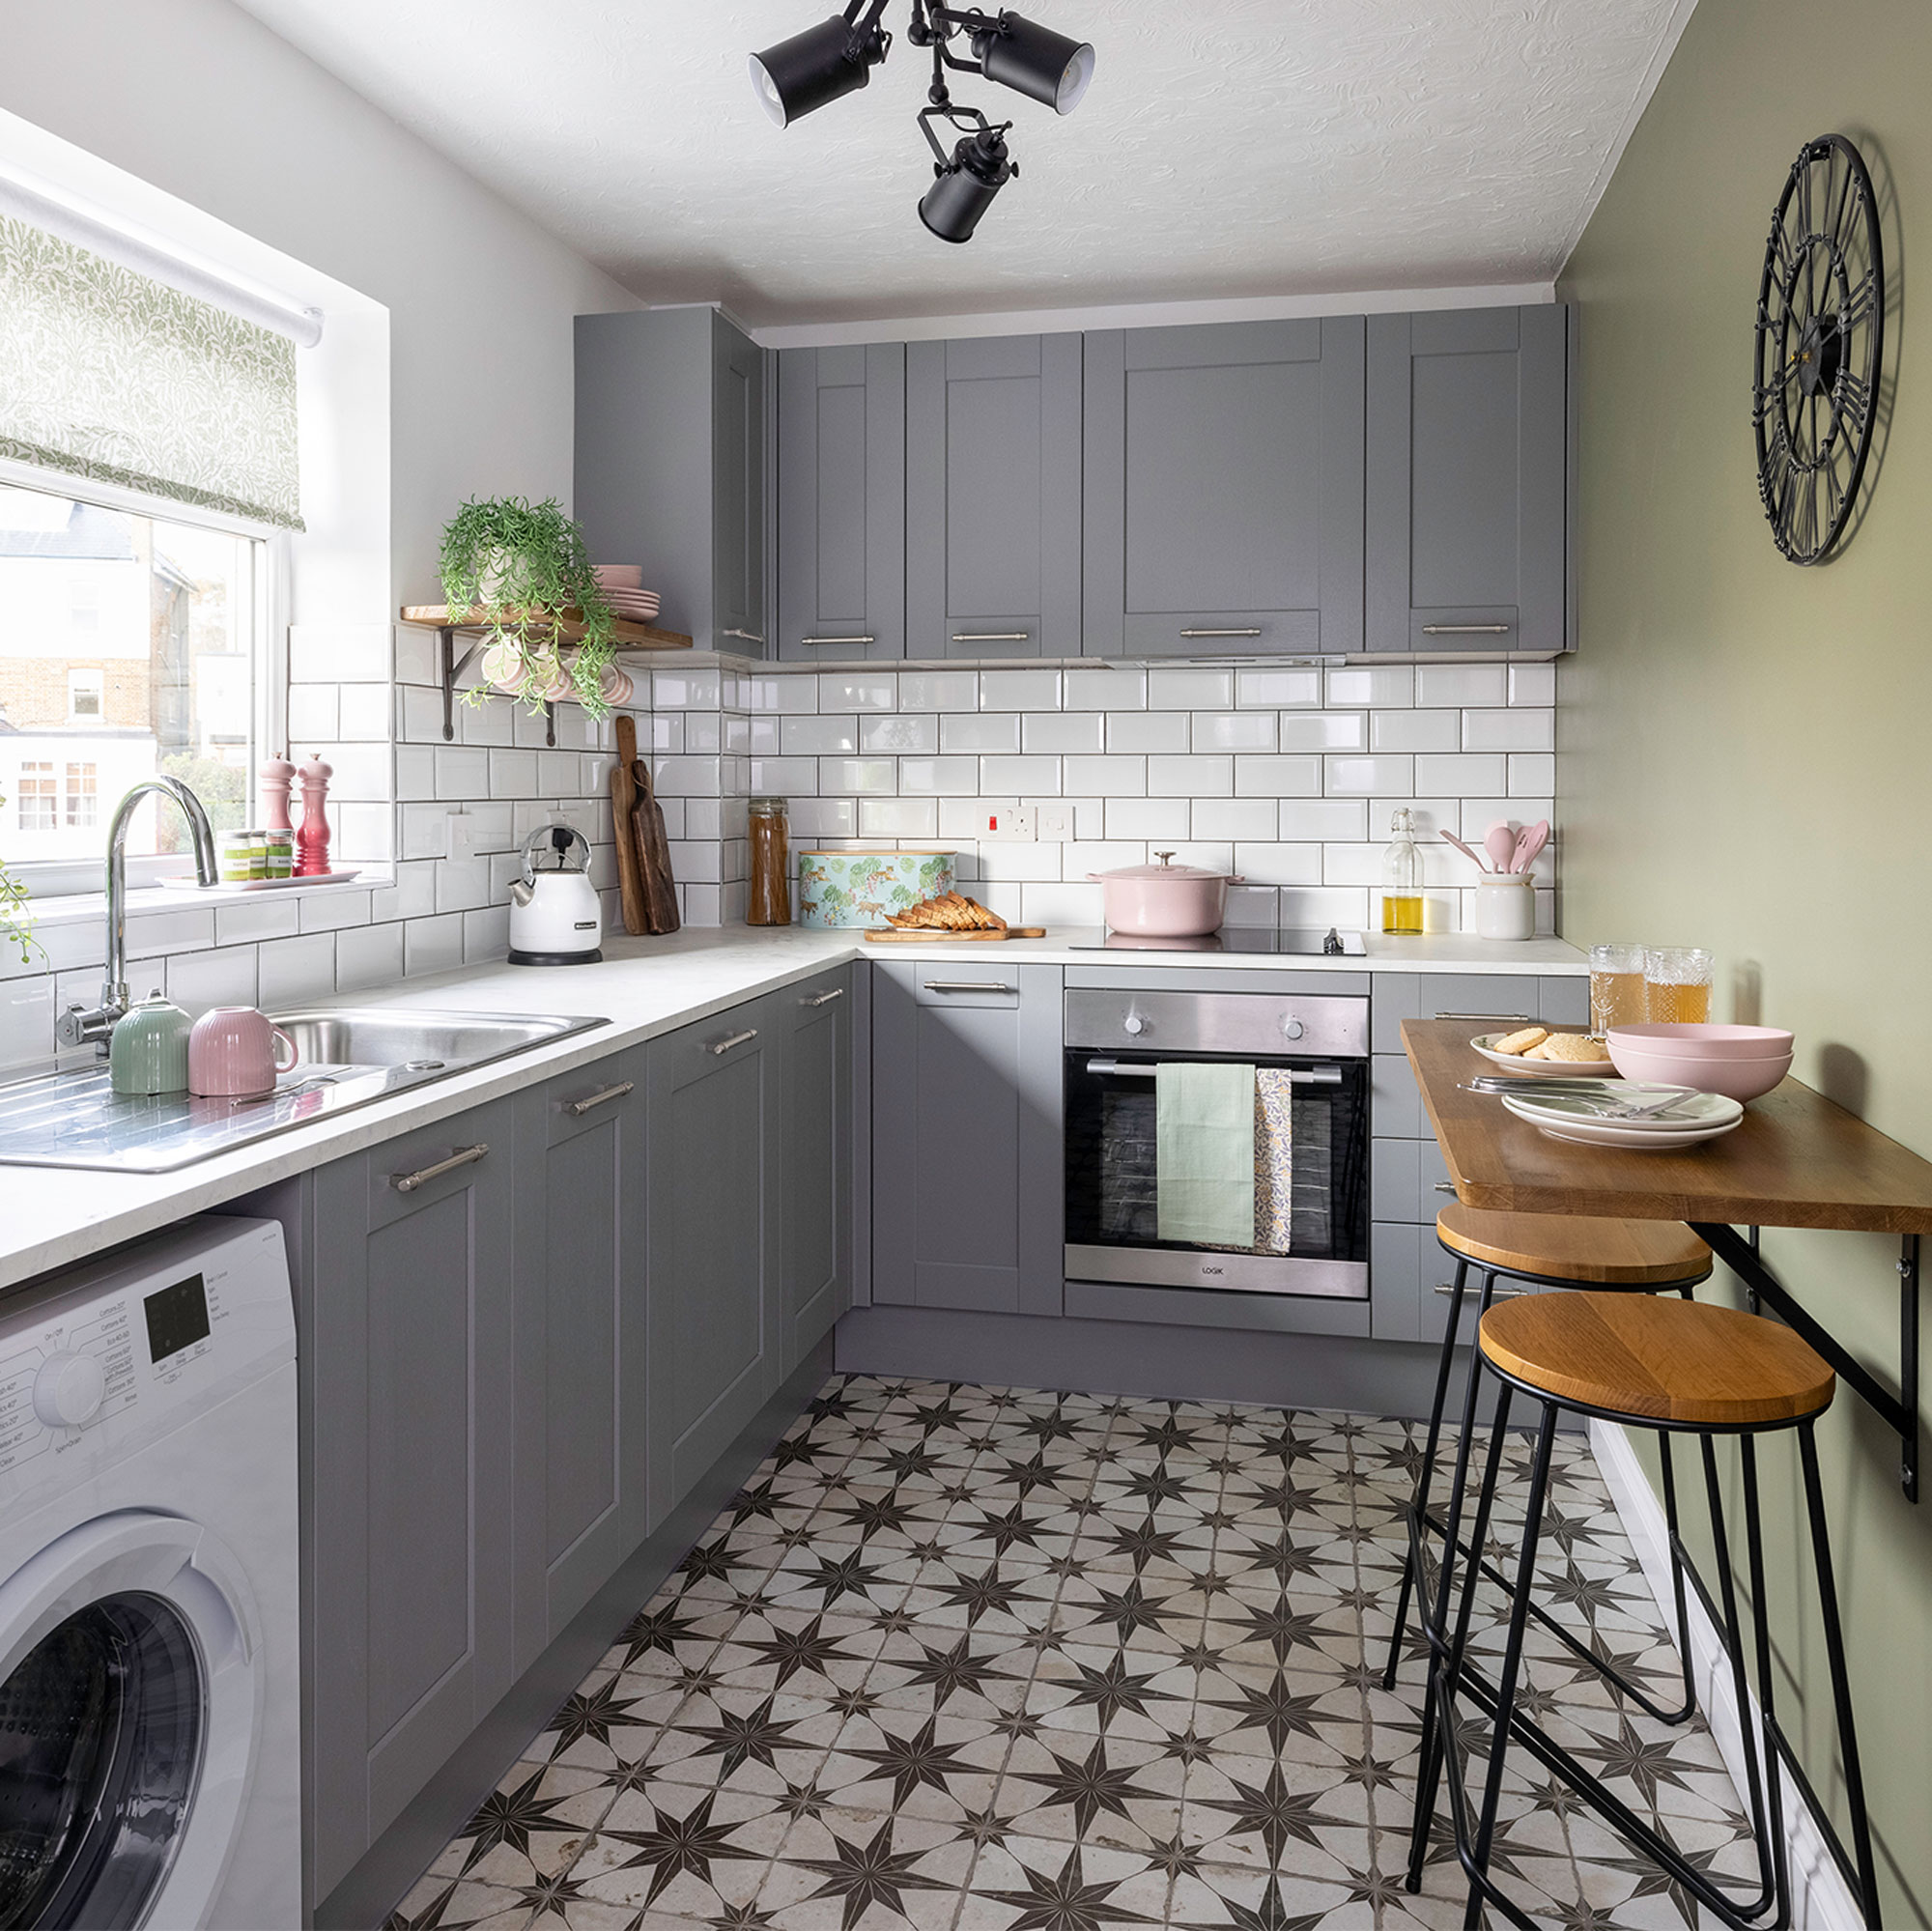
Re-working the once-cramped kitchen layout has made the kitchen feel altogether more open and spacious. Getting rid of the overhead cabinet by the window was first on the list, with the kitchen designers also suggesting adding a run of wall units on the empty back wall too, which has opened up the space while providing handy extra storage at the same time.
'Getting rid of the cupboards next to the window and installing a bank of units on the far wall has made the kitchen look bigger and function better. Plus with its tones of soft grey and green, the kitchen feels so much bigger than it did before even though I have many more units. I love it.'
Get the Ideal Home Newsletter
Sign up to our newsletter for style and decor inspiration, house makeovers, project advice and more.
Get the look: Fairford units in grey with brushed stainless-steel effect Farrier handles, £2,258.29; Storm Grey Marble square-edged worktop, £183.12 for 3m; all Howdens
Chic grey kitchen units
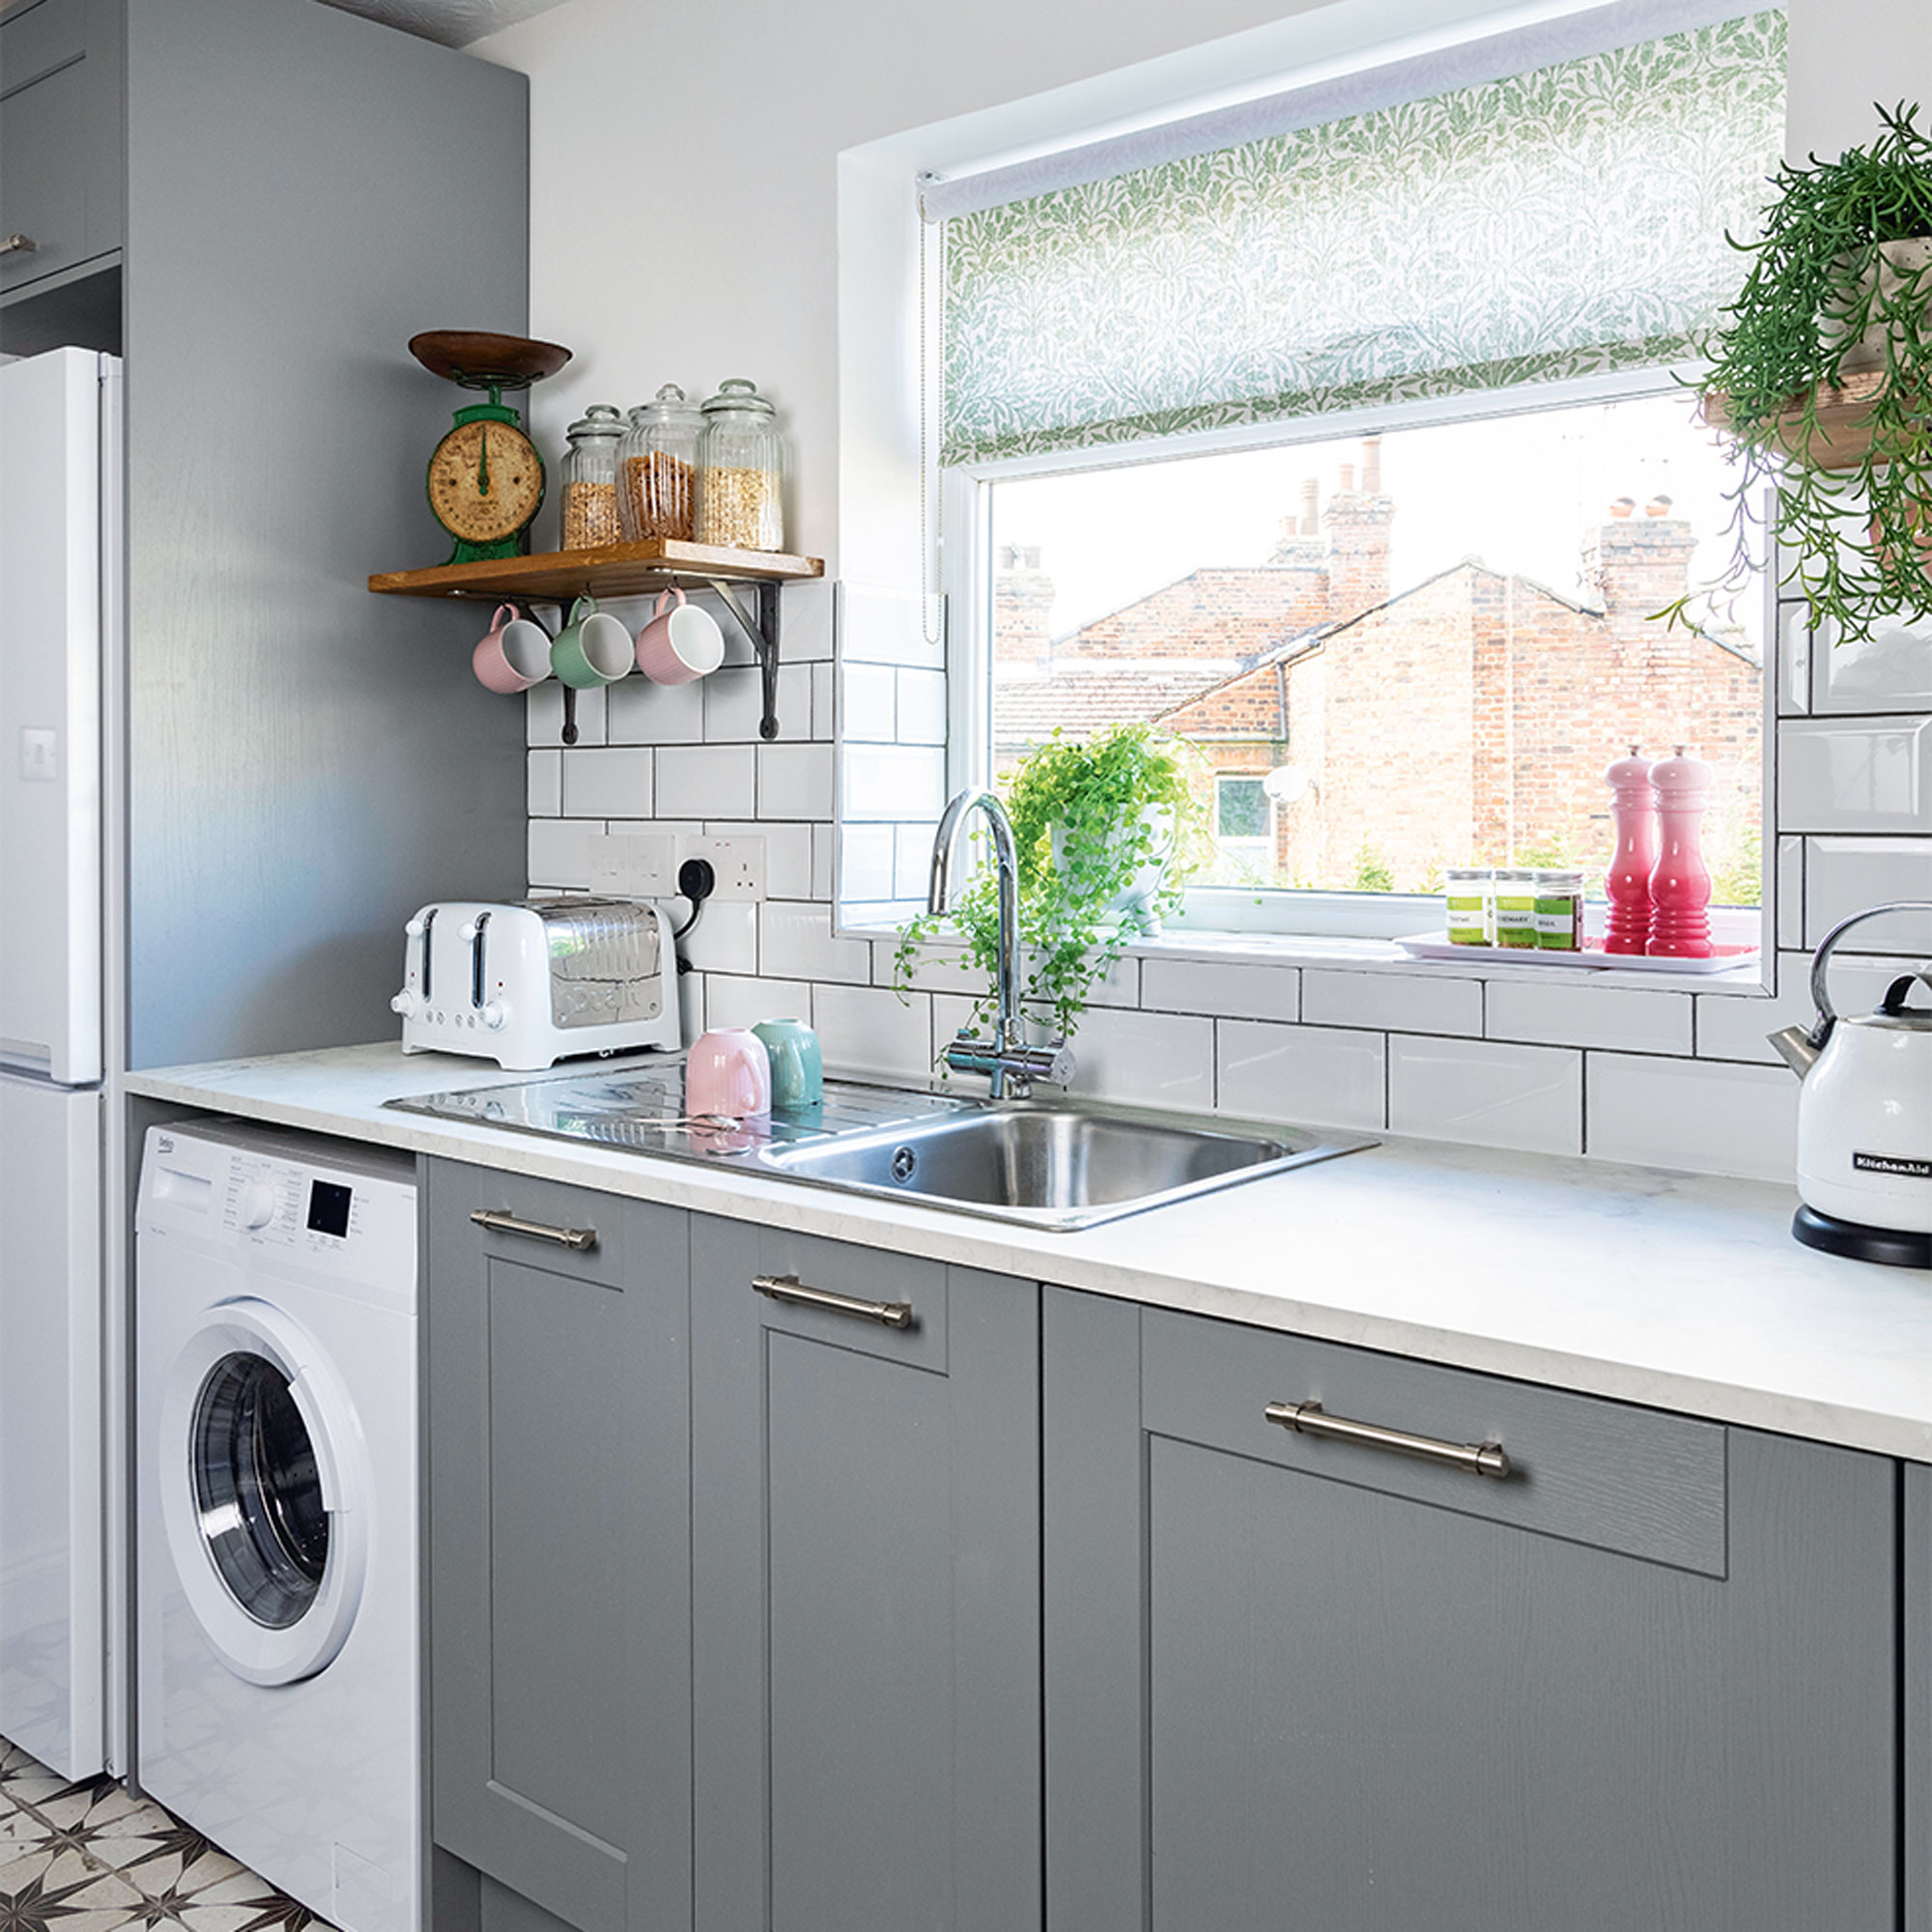
‘I picked grey units in a style that I felt was timeless as I’m not planning to change things any time soon. If I was to sell in the future, they’re not controversial and other things are easily changed,’ says the home owner. ‘I had a maximum budget of £5,000 for everything, including labour, and luckily my parents are great DIYers too – they’ve taught me some skills so I knew we’d save on some of the trades.'
‘The existing cooker and hob had been replaced fairly recently, so I kept those, plus brought my fridge freezer from my last flat. I actually came in under budget as we did all the tiling ourselves as well.’
Get the look: Lamona Ashworth sink, £142.39; Lamona integrated dishwasher, £119.61; Lamona Chrome Rhone swan neck monobloc, £118.09, all Howdens.
Calm green colour scheme
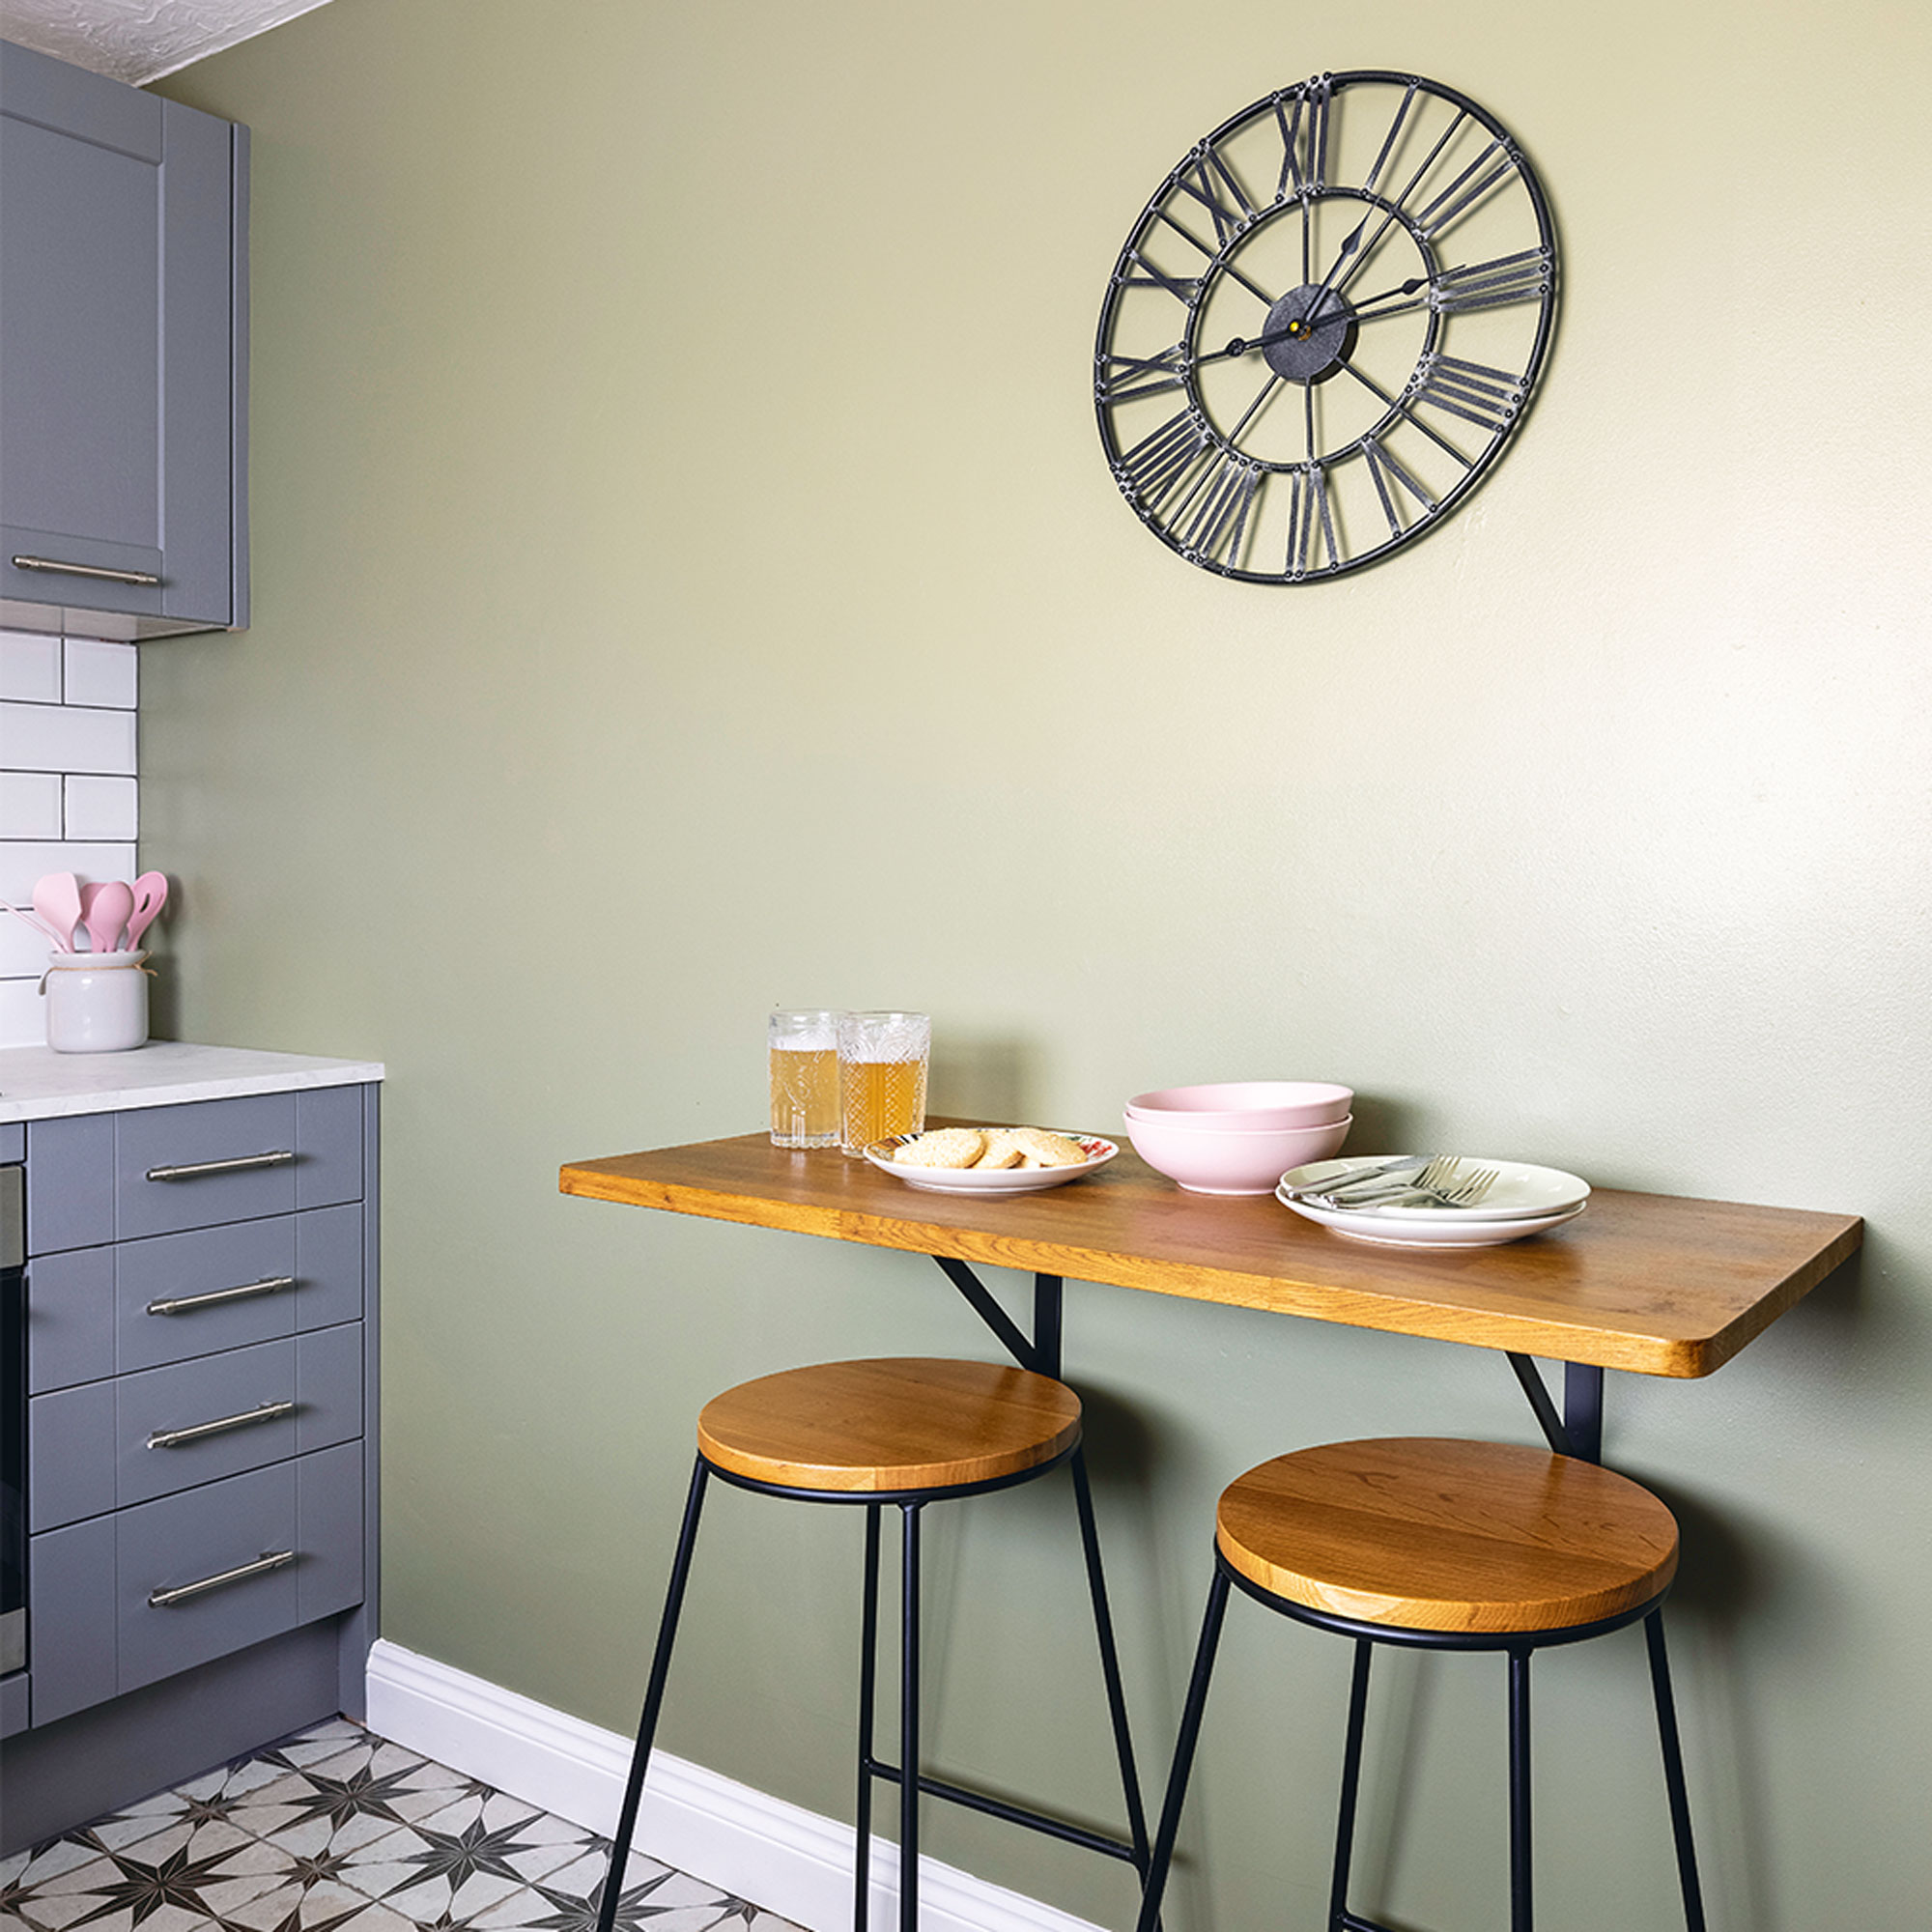
‘Although we have plenty of greenery nearby, the flat doesn’t have a garden, so I wanted to try and bring an outdoor feel to the kitchen,’ explains the home owner. ‘I went for one green wall, choosing a sage green to tie in with the grey units, rather than a lime green or anything too dark that would close the room in.’
‘And it was essential to replace the huge, slatted blind at the window, which was so heavy you could hardly move it. I found a lovely delicate fabric with green foliage in a roller blind that mirrors the green wall.’
Get the look: Walls in Sage Green absolute matt emulsion, £52 for 2.5l, Little Greene
Rustic wood accents
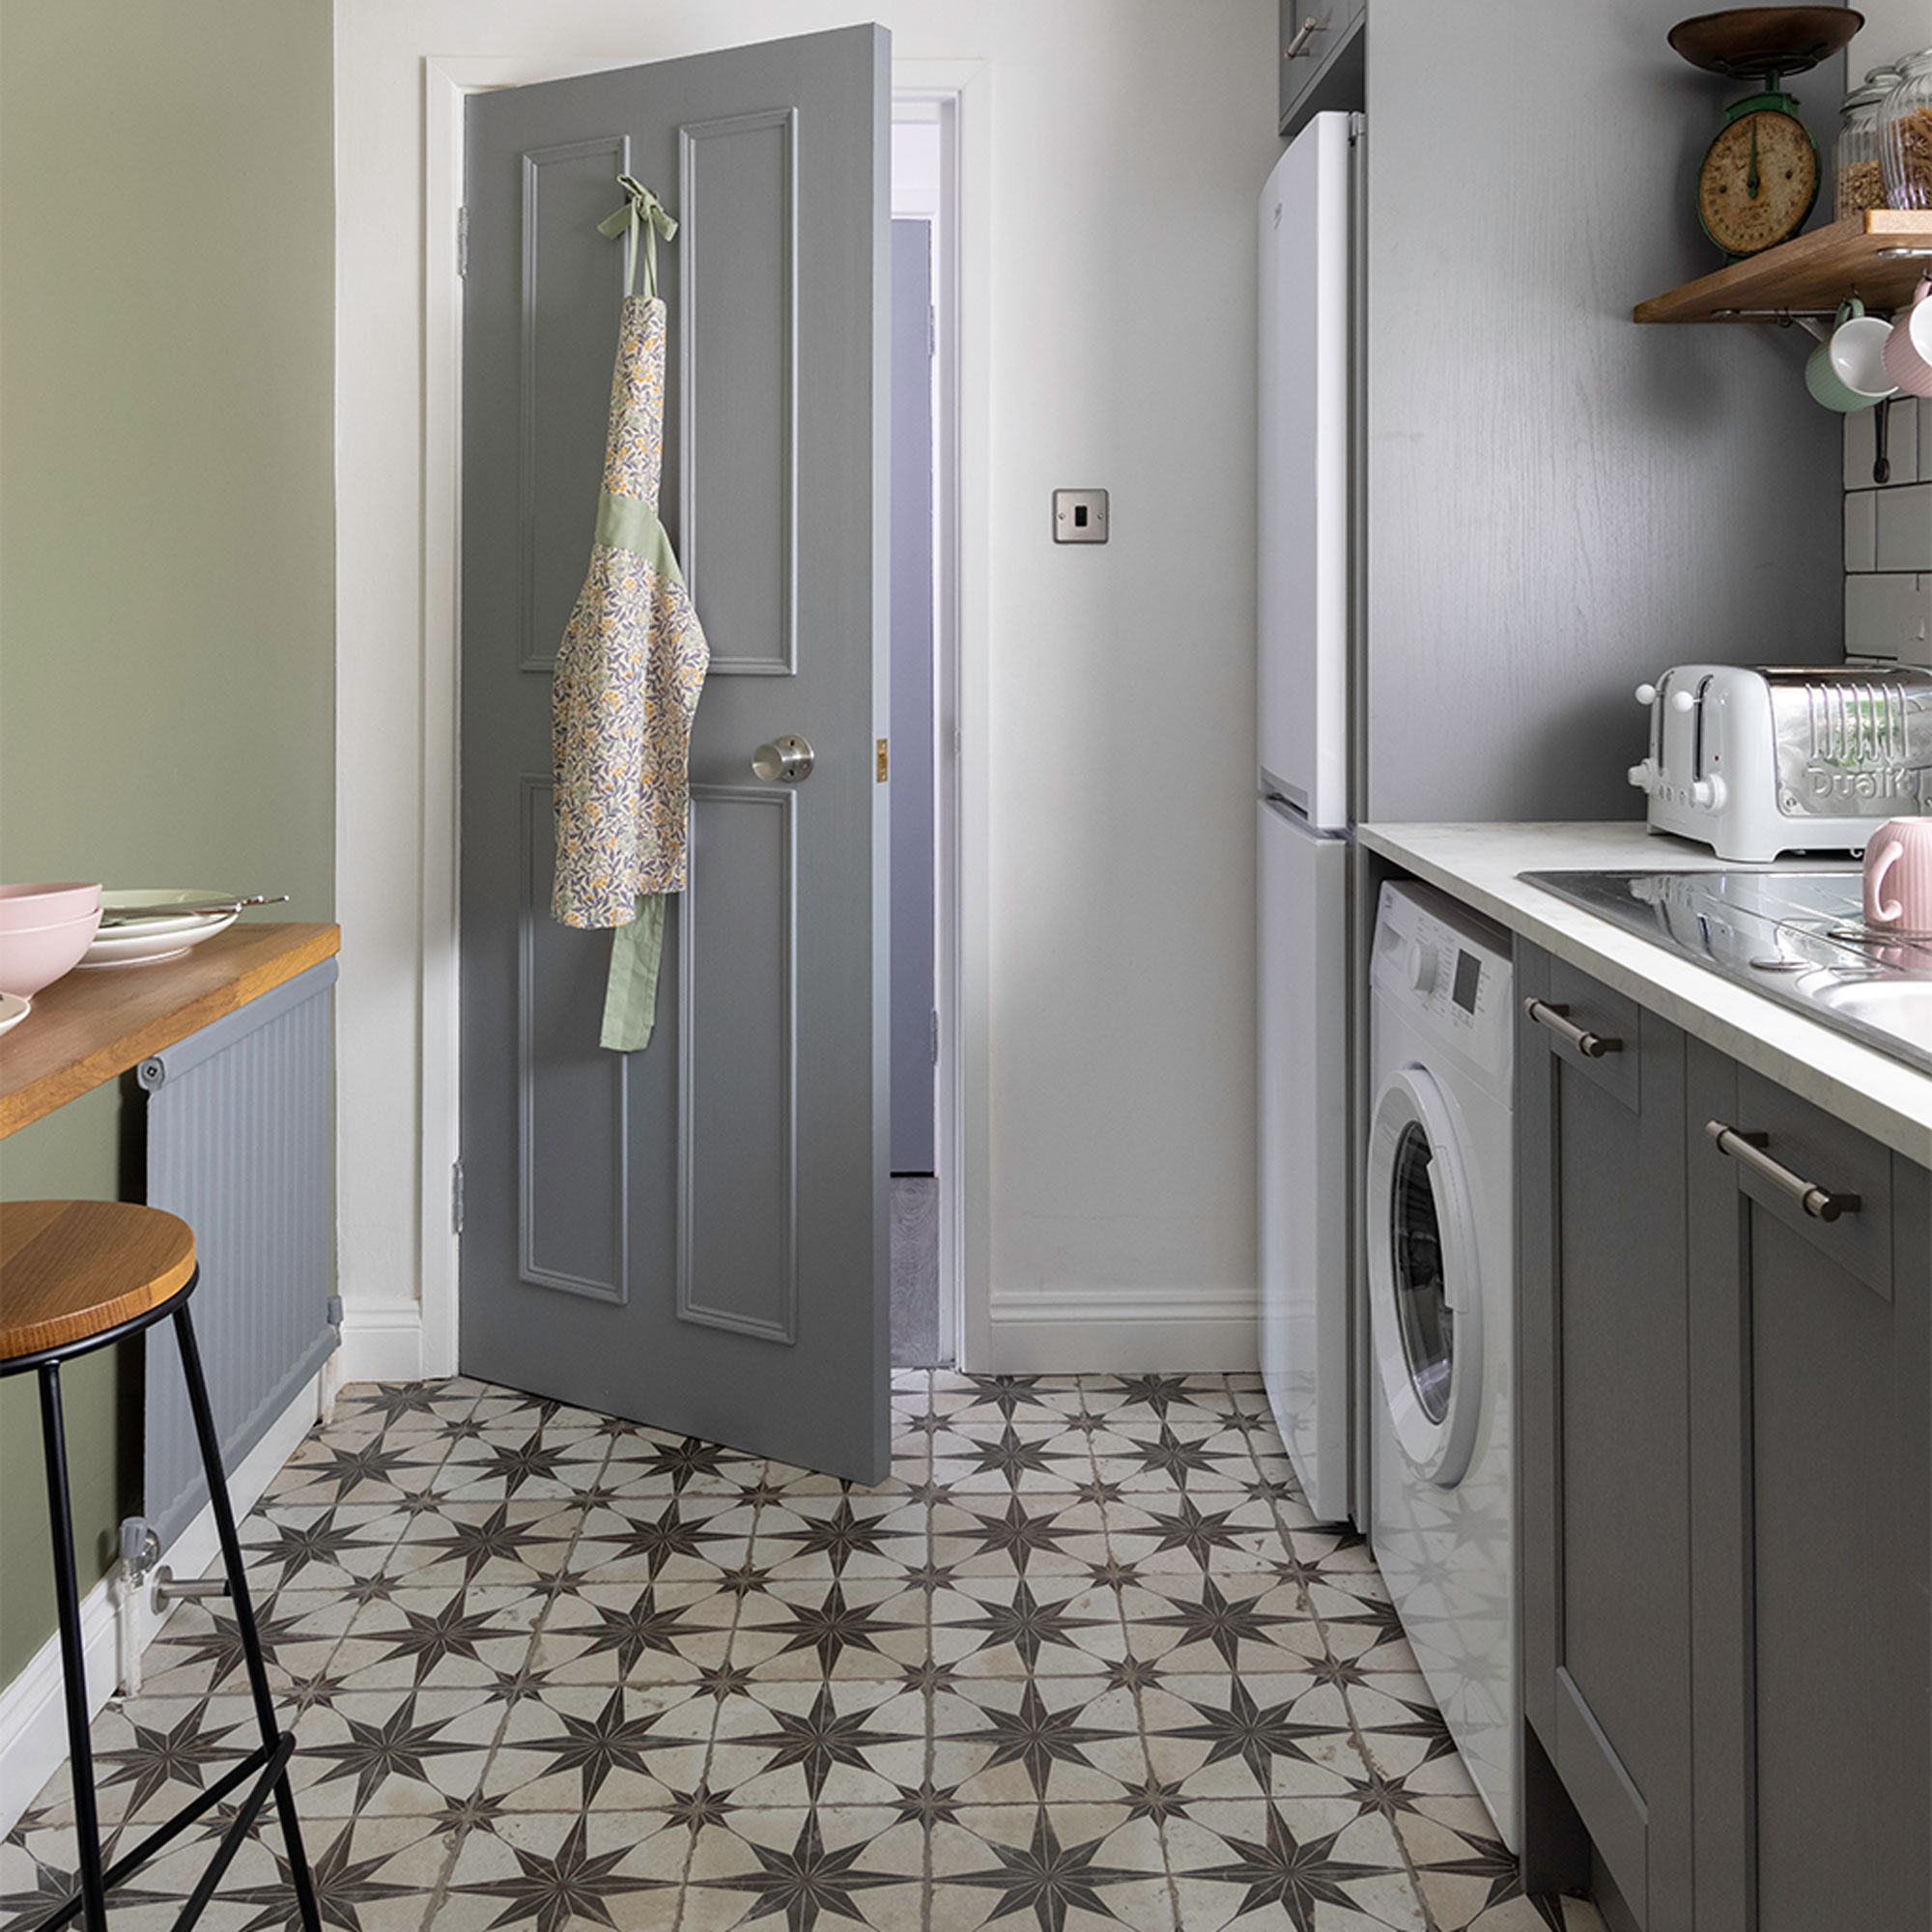
To work with the grey kitchen units, the home owner decided to keep the worktop light and went for a pale grey marble-effect rather than wood. But bringing in some wood was always part of the plan, with rustic shelves and the wooden breakfast bar and stools along one wall.'
‘I decided on a mini wooden dining table, which my dad and I constructed ourselves after ordering an oak worktop – it was surprisingly easy,’ says the home owner. ‘I managed to find stools in a similar oak, which were miles better than the high back chairs there previously and a real bargain.’
Get the look: Oak worktop and shelves, £145 for two metres, Worktop Express; Maloux black oak bar stools, £20 each, B&Q.
Standout flooring
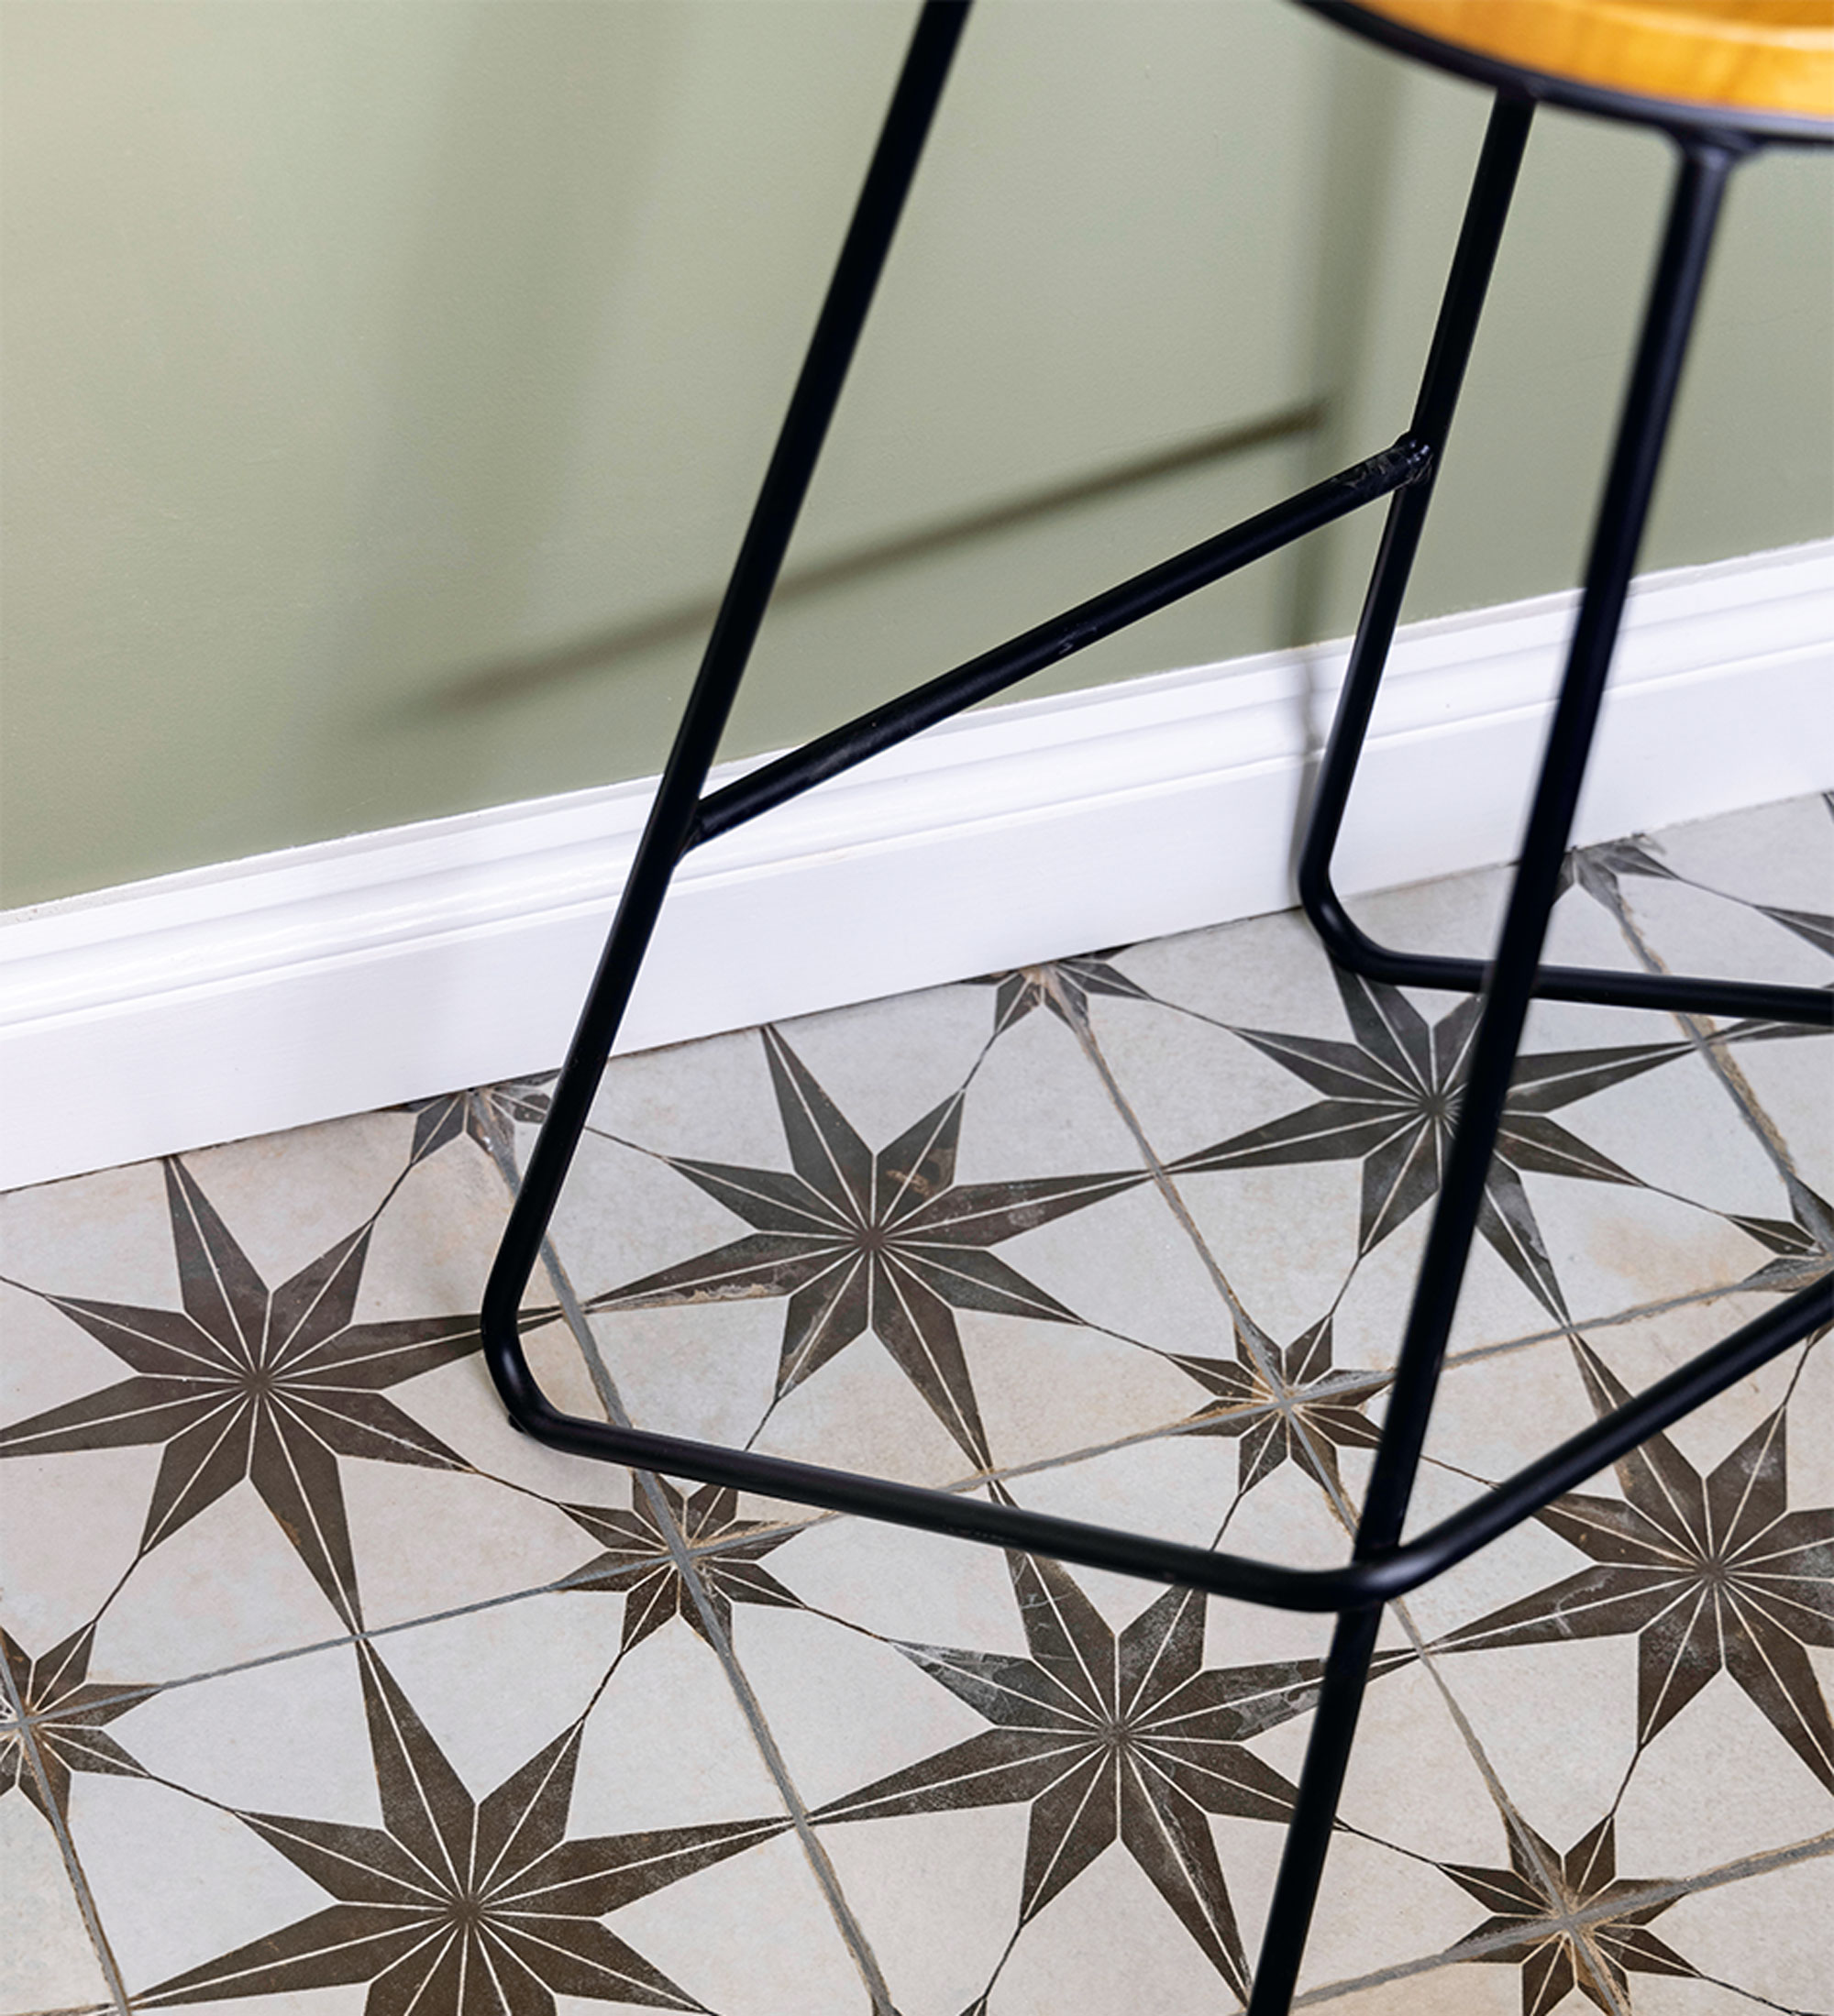
The original grubby lino was ripped up when the home owner moved in, to be replaced with practical ceramic tiles that look super-stylish and are easier to run a mop over.
‘Having been so sensible with the units, I wanted to do something a bit cooler with the floor,’ explains the home owner. ‘I fell for the patterned tiles the first time I saw them and because everything else is so plain, they work really well and add the wow factor.’
Get the look: Scintilla floor tiles, £29.95sq m; Whitechapel gloss metro wall tiles, £13.95sq m, both Walls & Floors.
Classic Metro tiles
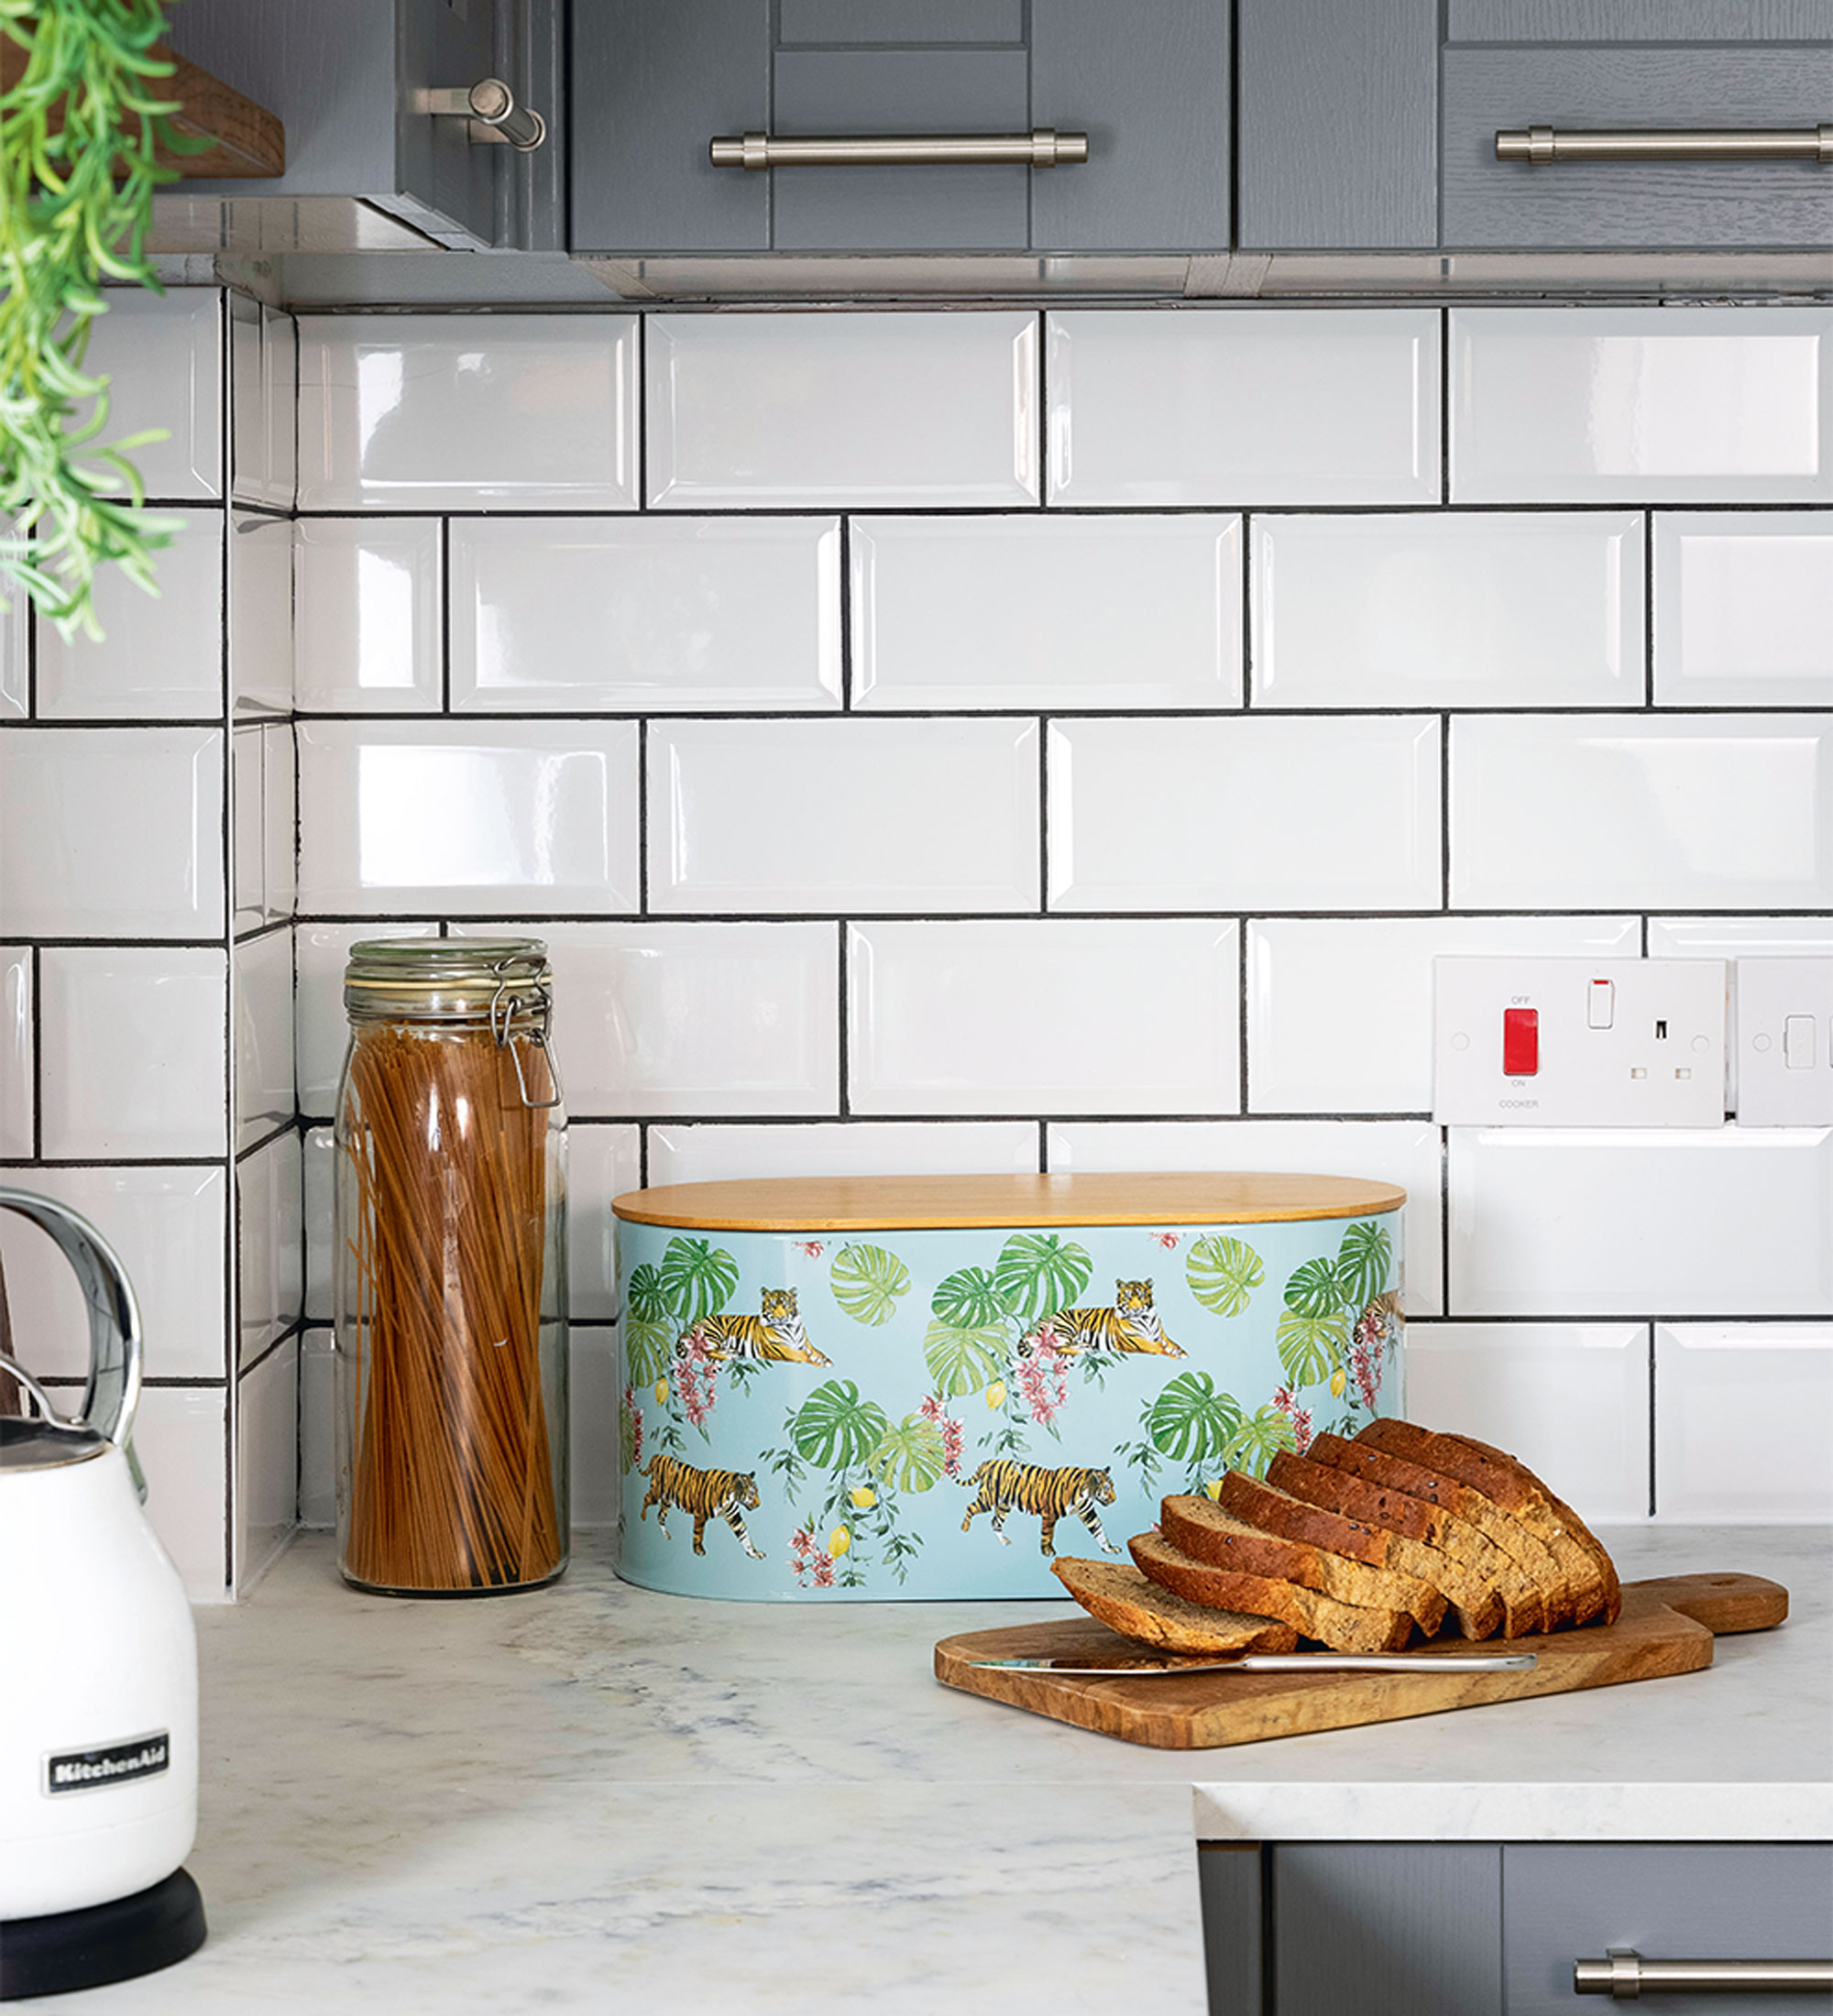
‘With the splashback tiles I kept it fairly safe, going for white metro tiles and pepping them up with grey grout,’ adds the home owner. ‘Opting for gloss tiles rather than matt, helps to throw light around the room when the sun shines in.’
Get the look: Whitechapel wall tiles, £13.95sq m, Walls & Floors
Chic finishing touches
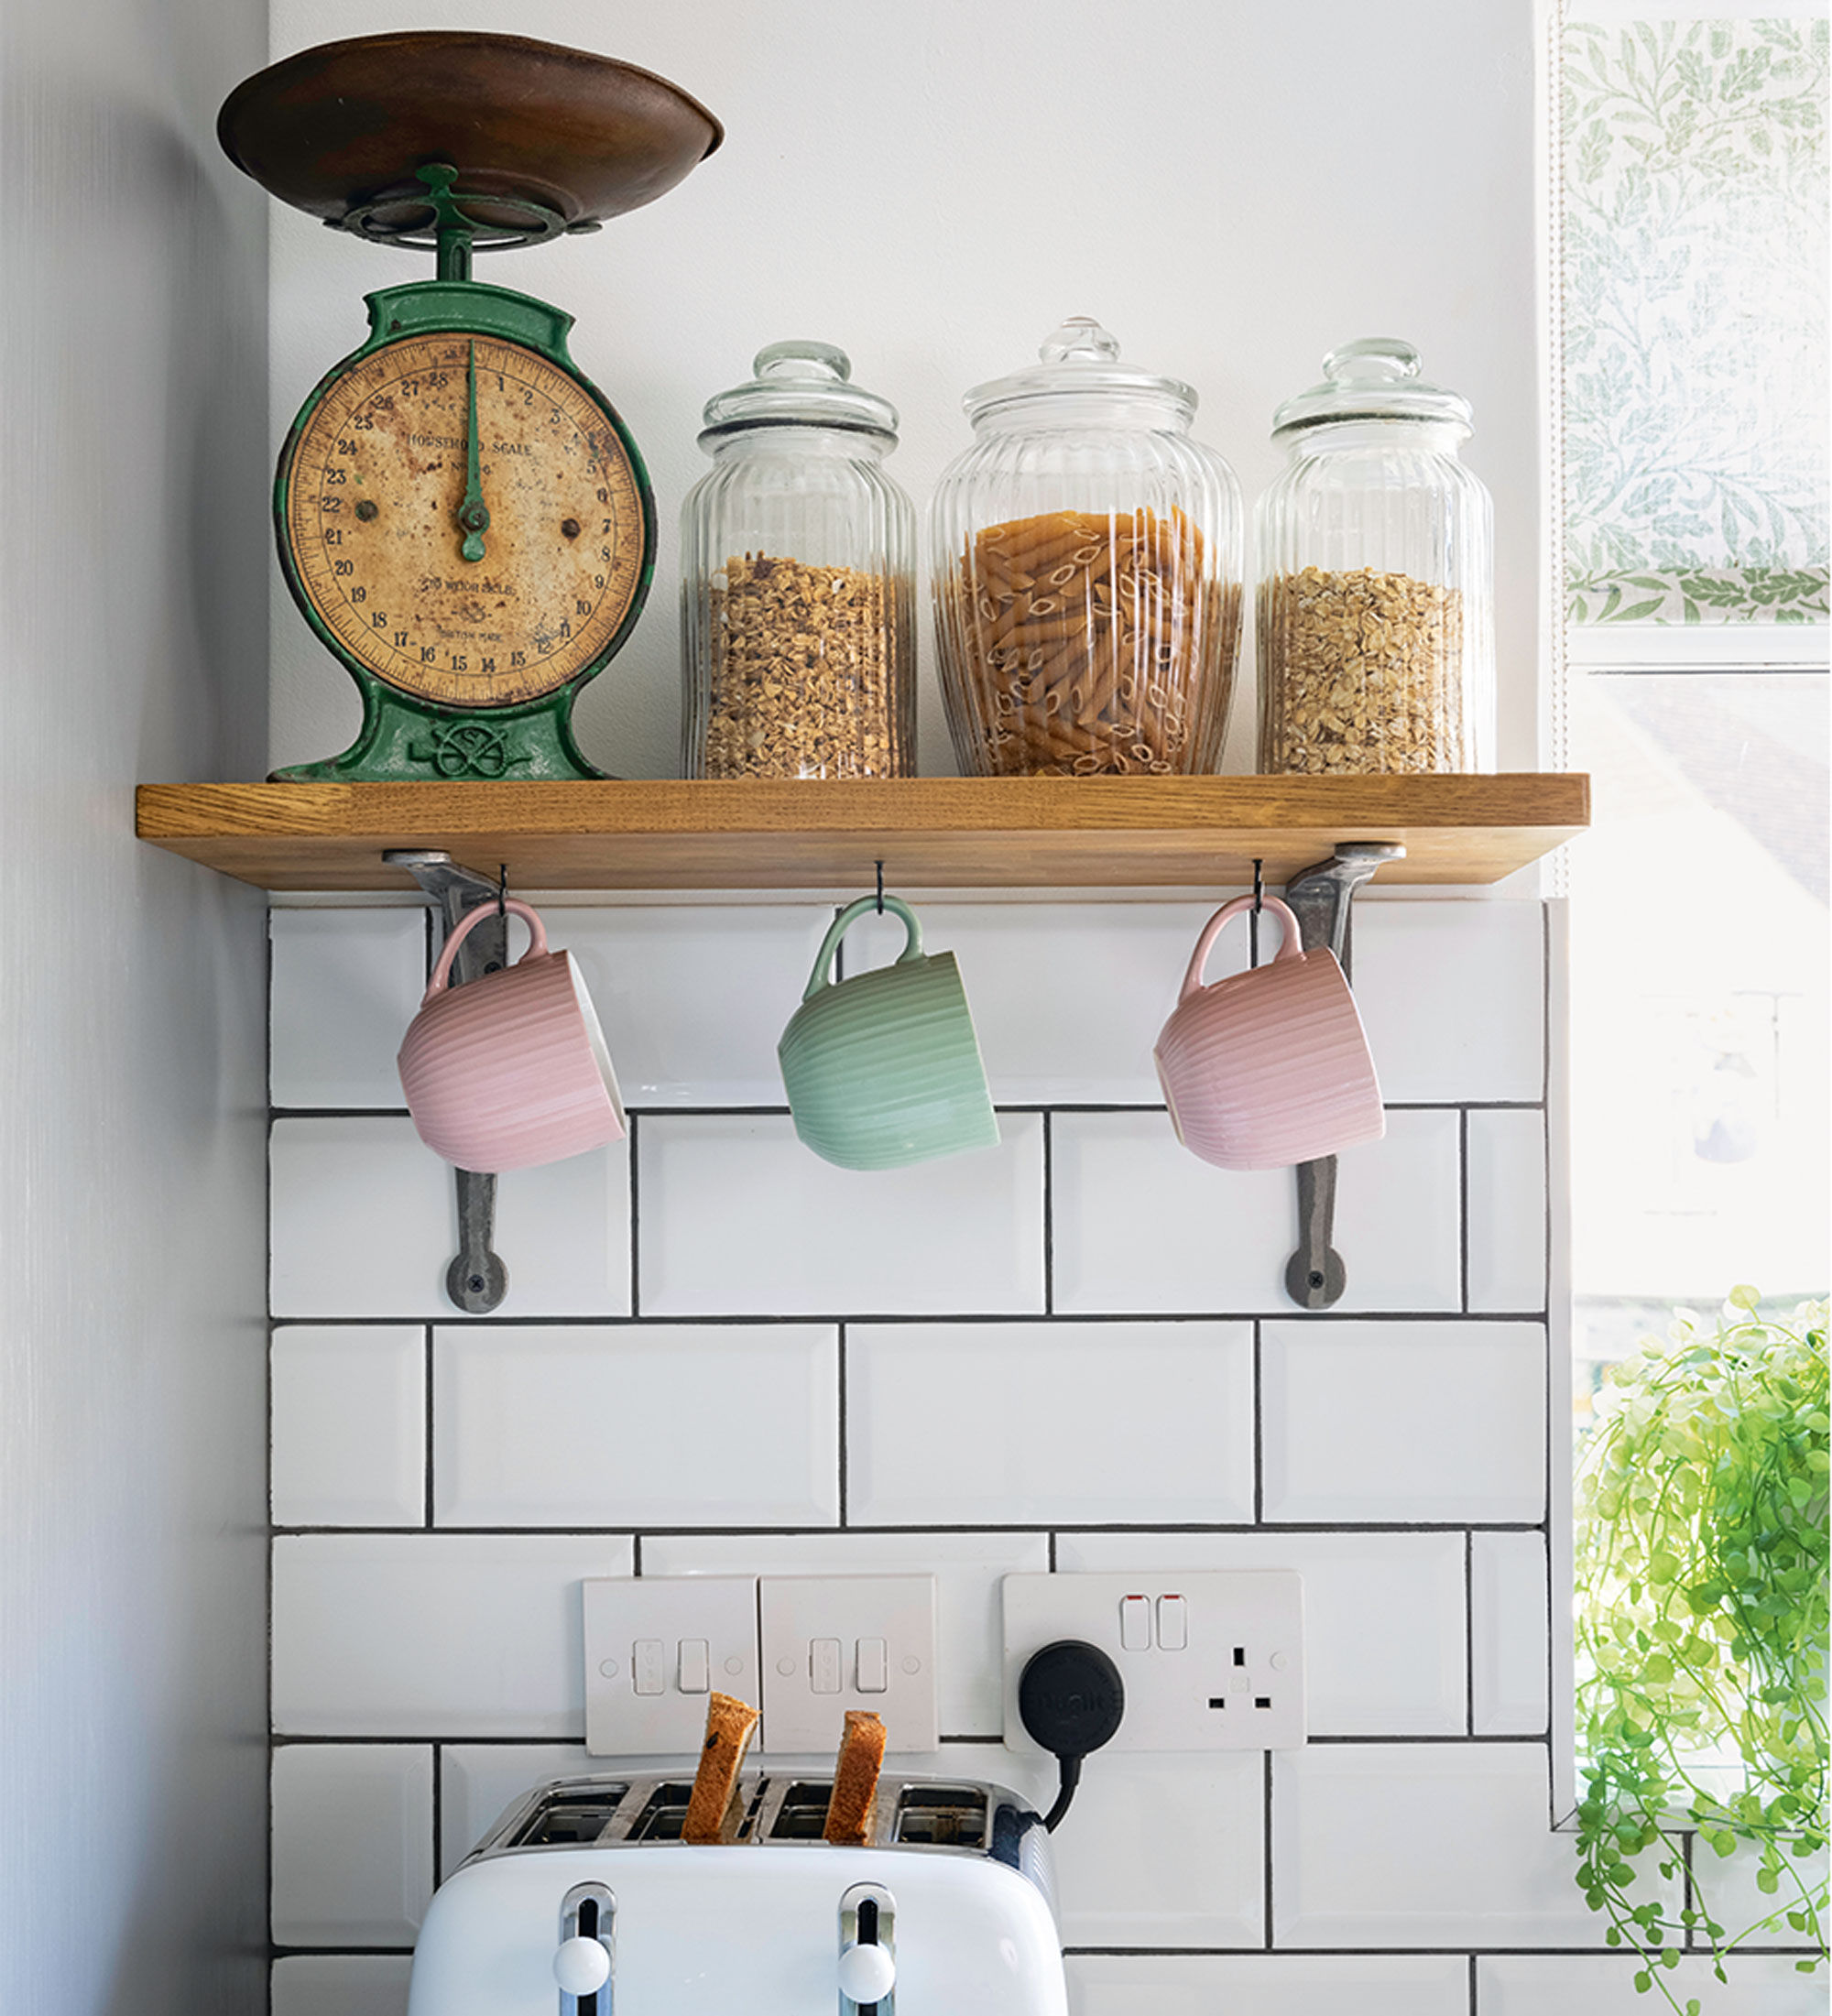
‘Rather than having any more cupboards, I’ve opted for a couple of shelves which match the breakfast bar, with metal brackets to tie in with the stools.’
‘To complement the green wall, I treated myself to a big shop for accessories in green and pink, which are a solid combination. It took in everything from cups to tea towels, and I even picked up an apron as well. I love being in the new space - it’s everything I wanted!’
Get the look: Dualit Lite four slice toaster, £119.99, Argos
How to set up a breakfast bar
Make a space to sit and eat by installing a slimline worktop and bar stools
- Measure out a template first in cardboard, cut it out and hold it against the space. Sit with it to test it’s the size and space you want.
- Make sure that your stools or chairs will fit underneath in a small kitchen and check that the brackets you put in the wall are secured with decent screws.
- Use a spirit level before drilling the holes to make sure that the table sits straight and won’t lean to either side.
- Finish off the table before fitting it by using two or three coats of a hard wax oil rather than trying to do it afterwards.
Additional words Stephanie Smith

Lisa is Deputy Editor of Style at Home magazine and regularly contributes to sister title Ideal Home. She has written about interiors for more than 25 years and about pretty much every area of the home, from shopping and decorating, crafts and DIY to real home transformations and kitchen and bathroom makeovers. Homes and interiors have always been a passion and she never tires of nosying around gorgeous homes, whether on TV, online, in print or in person.
-
 My go-to Ninja coffee machine is on sale for Easter weekend
It makes coffee shop quality achievable at home
By Molly Cleary
-
 When to plant out annual flowering plants for vibrant, colourful garden borders – and give them the best start, according to experts
Not sure when to plant out annual flowering plants? We've got you covered...
By Kayleigh Dray
-
 I'm a kitchen decor editor and didn't like this tableware trend - until I saw H&M Home's designer-look plates
They made it easy to justify a new crockery set
By Holly Cockburn